Creating stunning presentations often involves images, text, and shapes layered together to tell a story. If you’re using Google Slides, you’ve probably wondered, “How do I send an image to the back without messing everything up?” Don’t worry; it’s easier than you think! Here’s a step-by-step guide to help you ace this task.
Why Send an Image to the Back?
Imagine this: you’re working with Google Slides, and you’ve added a photo to your slide. Suddenly, the picture covers your text, ruining the look. Sending the image to the back fixes this by moving it behind other elements like text or shapes. It’s a quick way to layer objects and make your design more professional.
Step-by-Step Guide: Send an Image to the Back
- Select the Image: First, click on the image you want to move. When a blue border appears around it, you’ll know it’s selected.
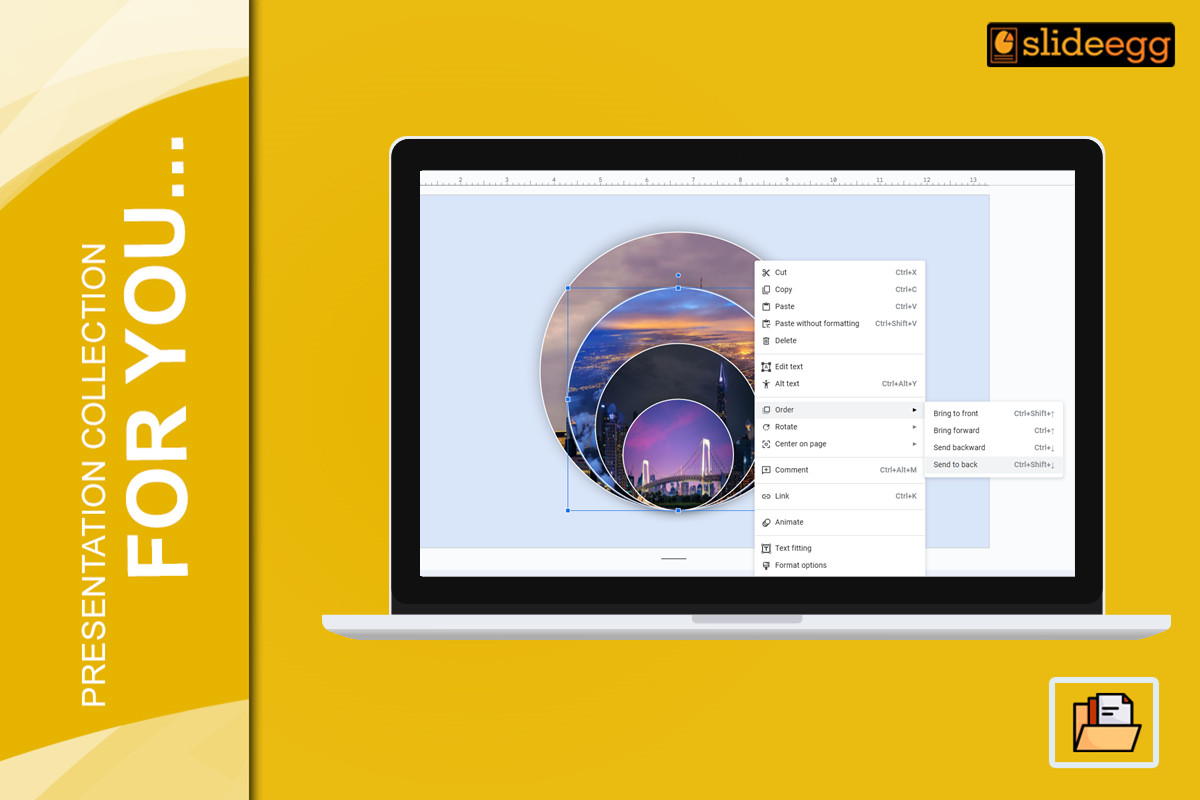
- Right-click on the Image: Once the image is selected, right-click on it to open a small menu.
- Select “Order”: Hover over “Order” in the menu to see options like “Bring to Front” and “Send to Back.”
- Click “Send to Back”: Select “Send to Back,” and the image will move behind all the other elements on your slide. If you want it behind only specific items, choose “Send Backward” instead, and it will move back one layer at a time.
- Adjust as Needed: If your image is still not in the right place, repeat the process until it’s perfectly arranged.
Pro Tips for Perfect Layering
- Lock Elements: Once you’re happy with your layout, lock the images and text boxes also to avoid accidental changes.
- Test Transparency: Adjust the image’s transparency for a subtle background effect.
If you’re unsure about editing images to suit your slide design, check out our detailed blog on how to edit the images in Google Slides presentation. It’s packed with easy tips for cropping, resizing, and using an image resizer to get your visuals just right!
Final Thoughts
Sending an image to the back in Google Slides is super easy and a game-changer for creating layered designs. Whether you’re customizing slides from scratch or tweaking free Google Slides templates, mastering this trick will save you time and elevate your presentations.
Try it out today, and don’t forget to explore other features like cropping or adjusting images for that perfect slide look! With a little practice, you’ll be a Google Slides pro in no time.