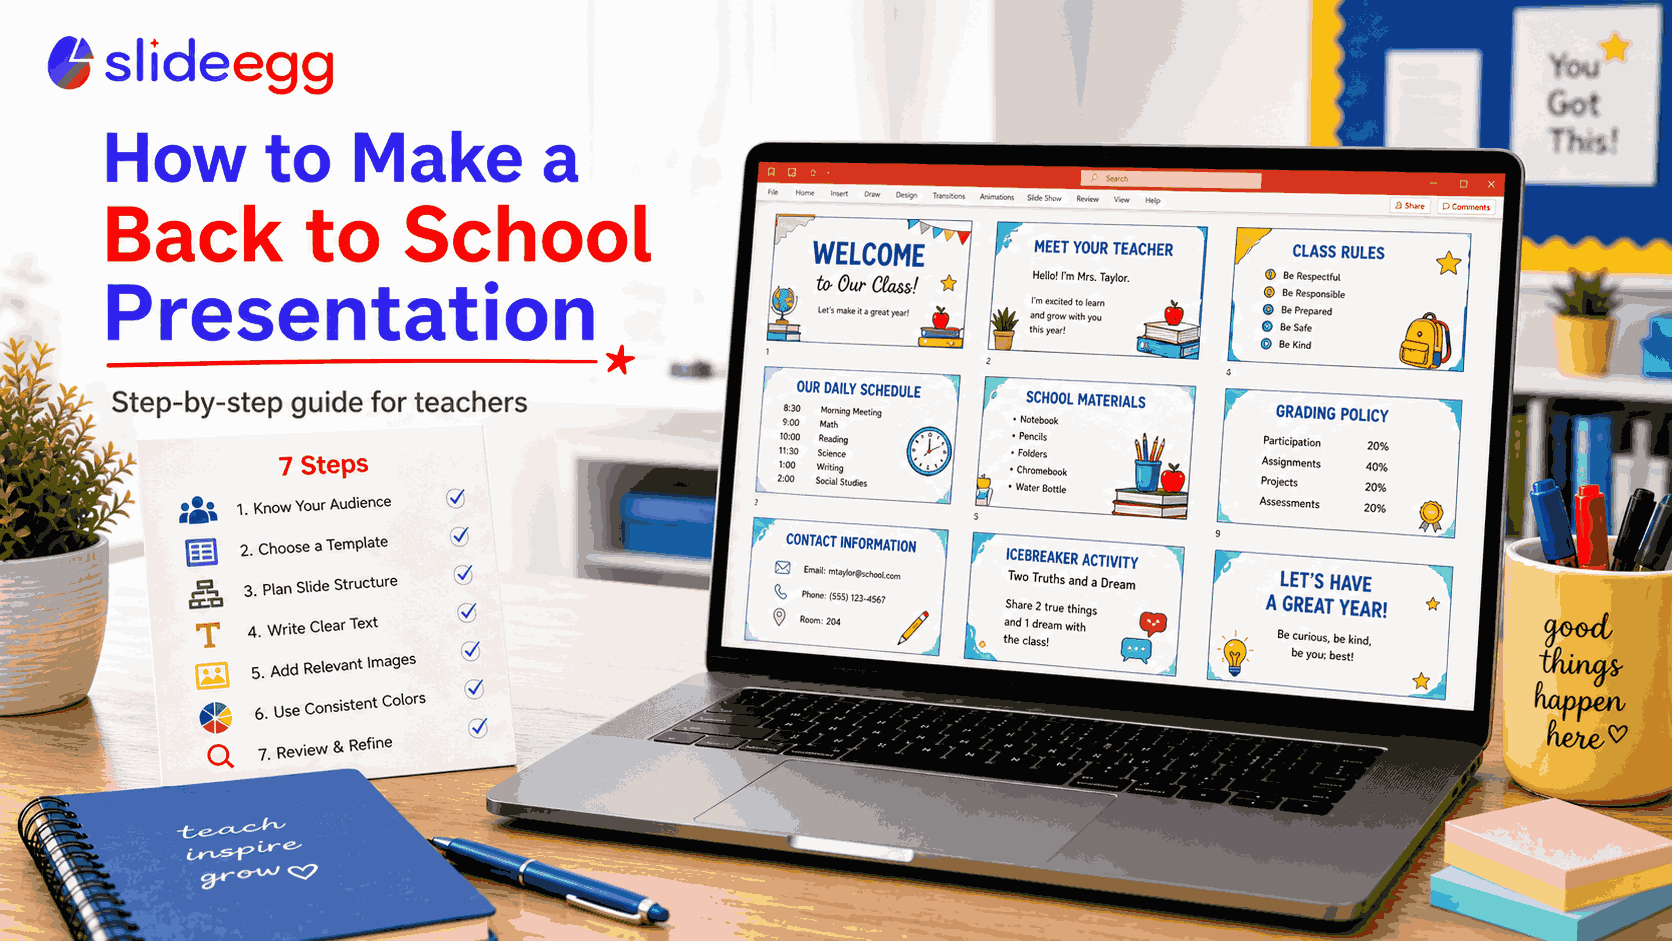
To make a back to school presentation: choose a template that matches your audience, add your key information across 8–15 slides, customize colors and design, and rehearse once before presenting. The whole process takes under an hour when you start from a good template. Here’s exactly how to do it.
Step 1: Define Your Audience and Purpose
Before opening PowerPoint, answer two questions: Who are in the room — students, parents, or both? What do they need to know before leaving — class expectations, your contact information, the course outline?
The biggest mistake teachers make is using the same deck for students and parents. The design, depth, and tone needed are completely different. Decide upfront — this determines template choice, slide count, and language level.
Step 2: Choose the Right Template
Start with a template rather than a blank slide. A blank slide creates design paralysis — you spend time on fonts and colors instead of content. A template handles the visual structure so you can focus on what to say.
What to look for: editable text and shapes, multiple slide layouts, a design appropriate for your grade level, and Google Slides compatibility. Browse 160+ free back to school templates on SlideEgg and download one before moving to Step 3
Step 3: Plan Your Slide Structure
Map out the slide sequence before filling in content. This is faster than writing as you go.
For a student-facing first-day deck (8–12 slides):

- Title slide: your name, class name, school year
- About your teacher: photo, background, why you teach this subject
- Class goals: what students will accomplish this year
- Daily schedule and structure
- Materials needed
- Classroom rules (3–5 non-negotiables)
- How to ask for help
- Grading policy (brief)
- Your contact info
- Icebreaker question or activity
For a parent-facing back to school night deck (12–15 slides):
- Welcome and introduction
- Curriculum overview and learning goals
- How the class is structured (units, timeline)
- Grading breakdown
- Major assessments and projects
- Homework expectations
- How to support your child at home
- Communication: how and when to reach you
- Important dates
- Resources and materials list
- Q&A slide
Step 4: Fill in Content — Text First
Open your template and replace placeholder text with your actual content. Focus on words first — don’t stop to adjust formatting as you go. The fastest workflow: go through every slide typing your content, then go back and clean up formatting in one pass.
Keep slide text minimal. A slide is a visual aid, not a script. Aim for no more than 30–40 words per slide. If you have more to say, say it verbally — don’t put it on screen.
Step 5: Add Images and Personalize
Two images make a back to school presentation significantly more engaging: a photo of you and a photo of your classroom. Both are worth including on Day 1 — they make you real and the space familiar before students arrive.
To add a photo in PowerPoint: click an image placeholder → Delete to remove the default → Insert → Pictures → select your file. Or drag and drop directly, then resize using corner handles (hold Shift to maintain proportions).
Step 6: Customize Colors and Design
You don’t need to redesign the template — just align it with your classroom identity. In PowerPoint: Design tab → Variants → Colors → Customize Colors. Set your school’s primary color as Accent 1. This updates accent colors across every slide automatically.
For fonts: Design → Fonts → Customize Fonts. A clean, readable pairing for any grade level: Lato for headings, Open Sans for body text.
Step 7: Review, Trim, and Rehearse
Before your final save, run through these checks:
- Delete any template placeholder text you didn’t replace
- Spell check (Ctrl/Cmd + F7)
- Read each slide aloud — if a slide takes more than 90 seconds to explain, split it
- Test on a projector if possible — text that looks fine on your laptop may be unreadable from the back of the room (minimum 28pt for projected body text)
One dry run is enough. You know the content — this rehearsal is to check timing and catch anything out of order.
Common Mistakes to Avoid
Too much text per slide. If your audience is reading your slides, they’ve stopped listening to you. Slides support what you’re saying — they don’t replace it.
No clear closing. Every presentation should end with one specific thing you want the audience to do or remember. “Questions?” is not a closing slide. Close with your contact info and one direct takeaway.
Animations in a time-pressured setting. Skip them. Animations add technical risk and no substantive value for a first-day or parent-night presentation. Static slides are faster and more reliable.
Frequently Asked Questions
How long should a back to school presentation be?
For students on the first day: 15–20 minutes. For back to school night (parents): 20–30 minutes. Keep slides under 15 for parent presentations — they need time to ask questions. Timing yourself in a dry run prevents overruns on the actual day.
What should I include in a back to school presentation for students?
At minimum: teacher introduction, class rules and expectations, daily schedule, materials needed, grading policy, and how to contact you. Add an icebreaker activity at the end to transition from presentation mode to interaction.
Do I need PowerPoint to use a back to school template?
No. Most .pptx templates open in Google Slides via File → Import Slides, and in Apple Keynote directly. All core features — text editing, color changes, image replacement — work in all three applications.
How do I make my presentation more engaging for students?
Use one image per slide instead of bullet points where possible. Add a question slide that you actually pause and ask the class. Keep text to a minimum — speak the explanation, don’t write it on screen. End with an activity, not a summary.