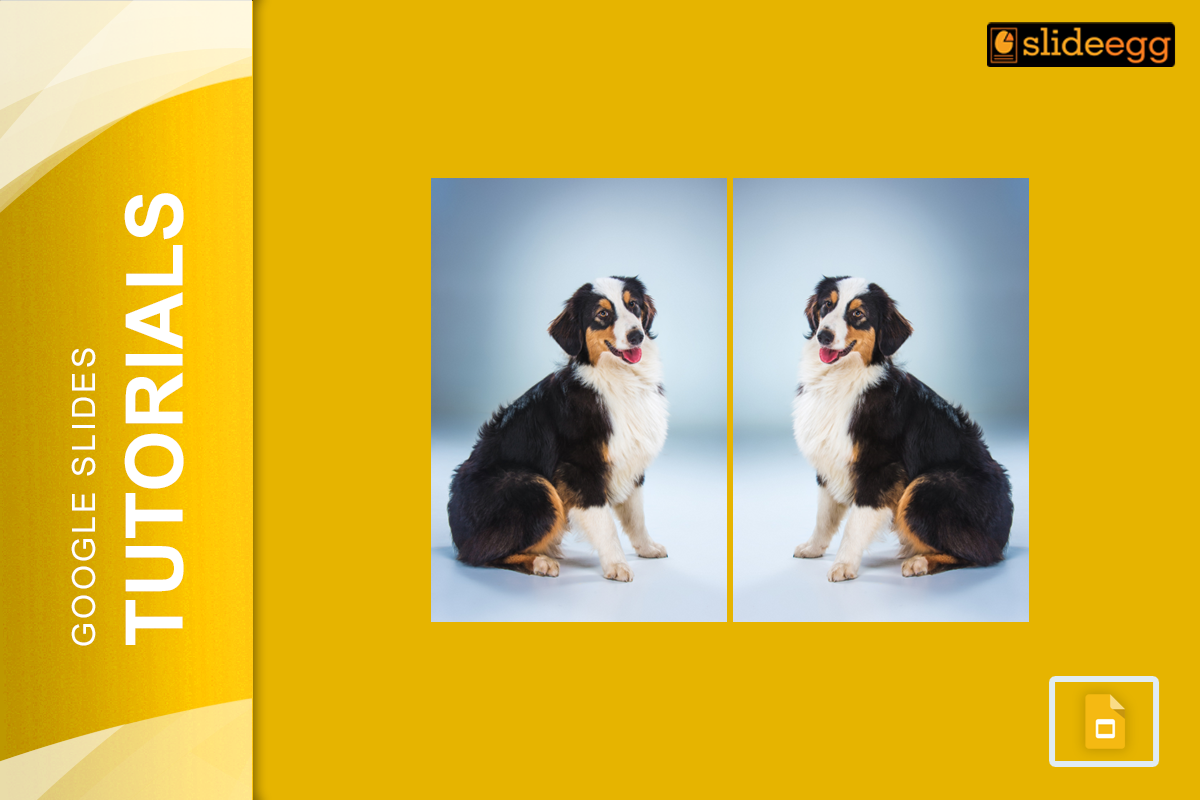
Your image is facing the wrong direction. The arrow points left when it should point right. The person in the photo looks away from your text instead of toward it. You know exactly what you need — but there’s no obvious “mirror” button anywhere in Google Slides.
Here’s the good news: mirroring an image in Google Slides takes just two clicks once you know where to look. This guide walks you through 3 ways to flip and mirror images — horizontal flip, vertical flip, and a simple reflection technique — so you can fix any image orientation in seconds.
Quick Overview: How to Mirror an Image in Google Slides
- Select your image on the slide
- Right-click → hover over Rotate
- Choose Flip horizontally or Flip vertically
- Reposition and resize as needed
That’s the fast version. Keep reading for the full step-by-step breakdown, a reflection effect technique, and practical tips for each method.
Method 1: Flip an Image Horizontally (Mirror Left to Right)
This is the most common mirror technique — it reverses your image so it faces the opposite direction.
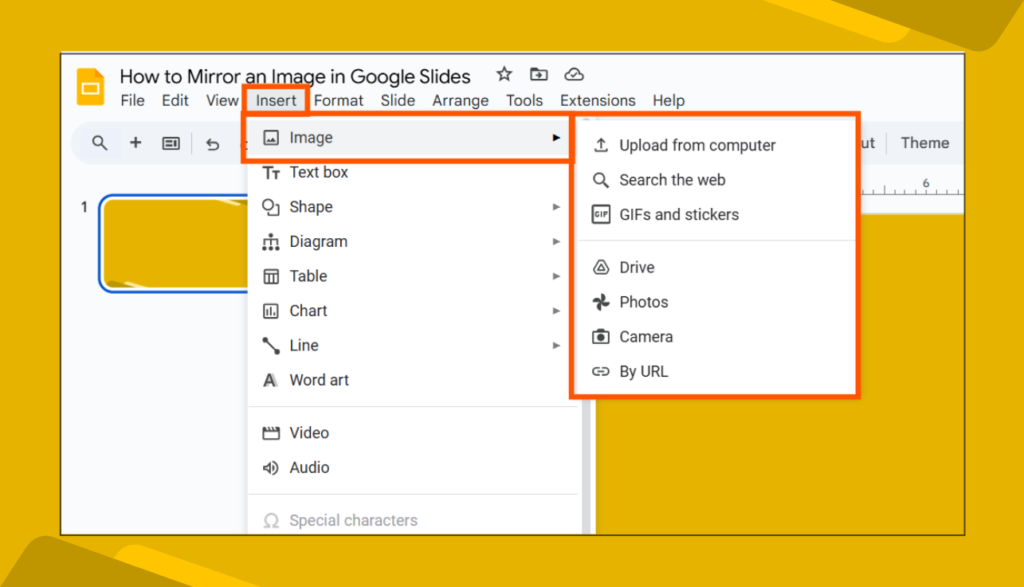
Step 1: Open your presentation in Google Slides. Navigate to the slide where your image is, or add a new image via Insert → Image and choose from your computer, Google Drive, or the web.
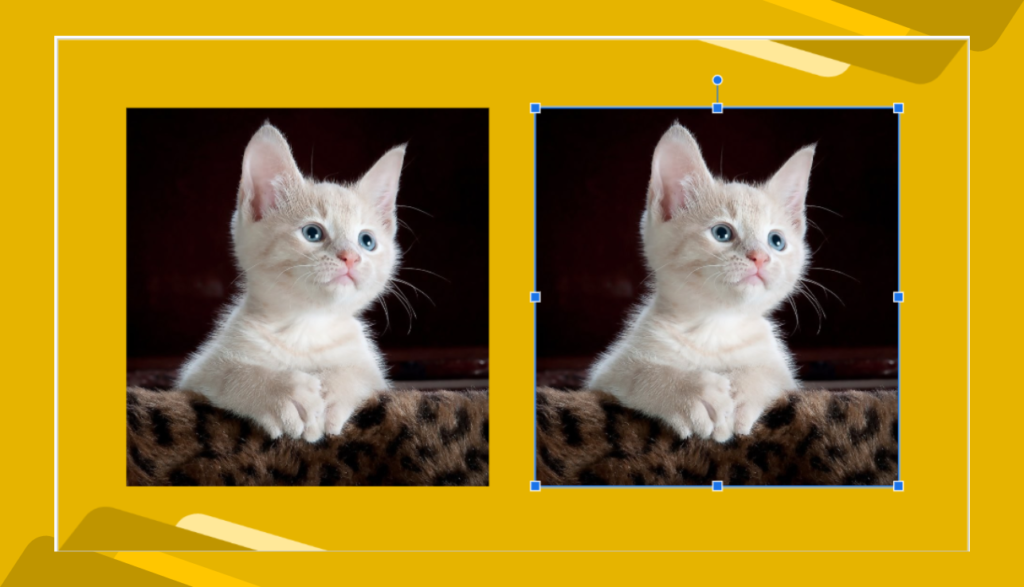
Step 2: Click the image to select it. A blue outline with handles will appear around it.
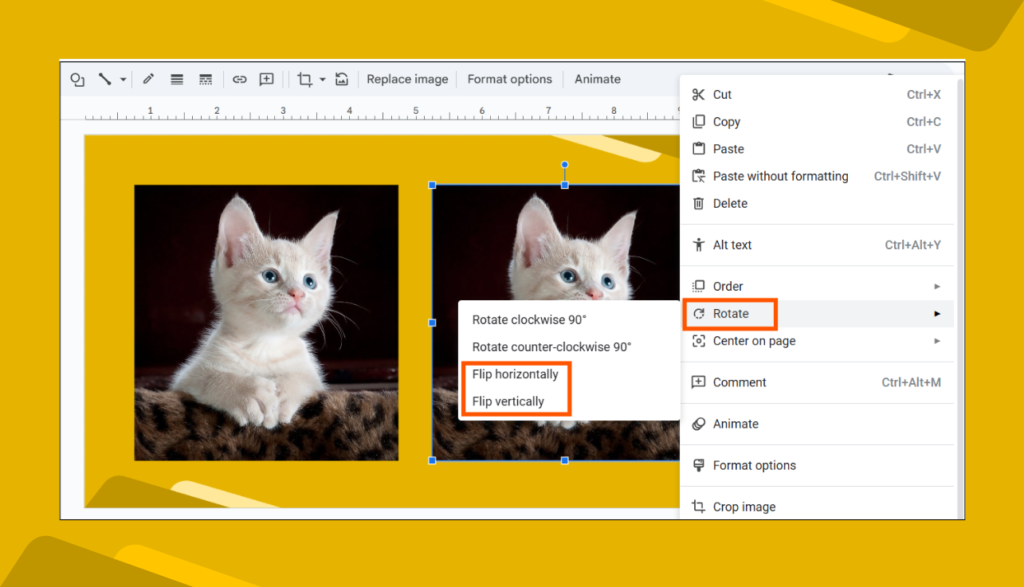
Step 3: Right-click the image to open the context menu.
Step 4: Hover over Rotate in the dropdown. A sub-menu will appear with these options:
- Flip horizontally — mirrors the image left to right (most common)
- Flip vertically — flips the image upside down
- Rotate 90° clockwise / counterclockwise — rotates without mirroring
Step 5: Click Flip horizontally. Your image instantly mirrors.
Step 6: Click and drag the image to reposition it if needed. Use the corner handles to resize.
Pro tip: If the result doesn’t look right, press Ctrl + Z (Windows) or Cmd + Z (Mac) to undo instantly and try the other flip direction.
Method 2: Flip an Image Vertically
Vertical flipping turns your image upside down — useful for creating shadow effects, fixing an inverted image, or designing stylized layouts.
Step 1: Select the image on your slide.
Step 2: Right-click → hover over Rotate.
Step 3: Click Flip vertically.
The image flips on its horizontal axis — the top becomes the bottom and vice versa.
When to use this: Vertical flips work well for creating a ground reflection effect (place the flipped copy below the original and reduce its opacity) or correcting images that were captured or saved upside down.
Method 3: Create a Mirror Reflection Effect
Want to go beyond a simple flip and create a professional reflection effect — like an image mirrored in water or glass? Here’s how to do it in Google Slides without any extra tools.
Step 1: Insert your image and position it on the slide.
Step 2: Click the image, then press Ctrl + D (Windows) or Cmd + D (Mac) to duplicate it.
Step 3: With the duplicate selected, right-click → Rotate → Flip vertically.
Step 4: Drag the flipped copy directly below the original so the bottoms of both images meet.
Step 5: With the flipped copy still selected, right-click → Format options. Under Adjustments, reduce the Transparency to around 50–70%. This makes the reflection look more realistic and subtle.

Step 6: Optionally, group both images together — hold Shift, click both, then right-click → Group — so they move as one unit.

Pro tip: Add a thin horizontal line between the image and its reflection using Insert → Line. Set its color to a light gray or white to suggest a surface like a floor or table.
How to Flip Multiple Images at Once
If you need to flip several images simultaneously — for example, a set of icons or a repeated design element — you don’t have to do them one by one.
Step 1: Hold Shift and click each image you want to flip. All selected images will show blue handles.
Step 2: Right-click any of the selected images → Rotate → choose your flip direction.
All selected images flip at once. Note that each image flips independently — they don’t flip as a grouped unit unless you group them first.
Why Mirror or Flip Images in Google Slides?
Flipping an image isn’t just a workaround — it’s a deliberate design technique used by professionals for several reasons:
Fix orientation errors. Stock photos and icons sometimes face the wrong direction for your layout. A person looking left when your text is on the right creates visual tension. A horizontal flip fixes it in two clicks.
Create visual balance. Symmetry is one of the most powerful design principles. Mirrored images on either side of a slide create a sense of order and professionalism.
Design reflection effects. Reflected images suggest depth, elegance, and polish — common in product presentations, portfolios, and brand decks.
Adapt directional elements. Arrows, characters, and diagrams often point in a specific direction. Flipping them lets you control visual flow and guide your audience’s attention across the slide.
Save Time with Free Google Slides Templates
If you want professionally designed slides where images, layouts, and visual balance are already handled — browse SlideEgg’s free Google Slides templates. Every template is fully editable, so you can apply any of the flip and mirror techniques above to customize images to your exact needs.
Also explore our free PowerPoint templates if you work across both tools.
Frequently Asked Questions
Can I mirror an image in Google Slides on a mobile device?
Yes, but with limitations. The Google Slides mobile app supports basic image editing. Tap the image → tap the three-dot menu → look for Rotate options. The experience is more limited than the desktop version, so for precise reflection effects, use a desktop browser.
Does flipping an image reduce its quality in Google Slides?
No. Google Slides performs flips as a display transformation — the original image file is not re-encoded or compressed. Your image retains its full resolution after flipping.
Is there a keyboard shortcut to flip an image in Google Slides?
There’s no single shortcut key for flipping, but you can speed up the process: select the image and press Alt + Enter (Windows) or Option + Enter (Mac) to open Format options directly. For the right-click rotate menu, there’s no shortcut — two clicks is the fastest route.
Can I mirror text in Google Slides?
Google Slides doesn’t support flipping a text box directly. The workaround: take a screenshot of your text, insert it as an image, and then flip that image using the Rotate menu. Keep in mind the text will be uneditable once it’s an image.
How do I undo a flip in Google Slides?
Press Ctrl + Z (Windows) or Cmd + Z (Mac) immediately after flipping to undo. Alternatively, right-click the image → Rotate → apply the same flip again to reverse it — two horizontal flips return the image to its original orientation.
Can I flip a shape or icon the same way as an image?
Yes. The Rotate → Flip menu works on shapes, icons, and drawn objects — not just inserted images. Select any object, right-click, and the same flip options are available.
What’s the difference between flipping and rotating an image?
Flipping creates a mirror image — the content reverses direction. Rotating turns the image by a fixed angle (90°, 180°, etc.) without reversing it. Use flip when you want a true mirror; use rotate when you want to change the image’s angle while keeping its original orientation.
Wrapping Up
Mirroring an image in Google Slides is one of the fastest fixes in presentation design — and once you know the three approaches (horizontal flip, vertical flip, and reflection effect), you have full control over how every image sits in your layout.
The next time an image faces the wrong way or your slide feels visually unbalanced, you’ll know exactly what to do.
Want slides that already look great? Browse SlideEgg’s free Google Slides templates — professionally designed, fully editable, and ready to customize in minutes.
For more design techniques, explore our free PowerPoint tips and tricks templates.