Flipping or inverting an image in Google Slides is one of those tasks that sounds complex but takes about ten seconds once you know where to look. Whether you need to mirror a photo so a subject faces the right direction, rotate an image to an exact angle, or apply a colour inversion effect for a stylised design, Google Slides handles all of it natively — no third-party software needed.
This guide covers all three methods in 2026: flipping via the Arrange menu, precise rotation via Format options, and colour inversion via the Recolour tool. It also covers the mobile app situation, common use cases, and how to create a mirror effect using two images.
Quick start — fastest path to flip an image
- Click the image once to select it
- Click Arrange in the top menu
- Hover over Rotate
- Choose Flip horizontally or Flip vertically
- Done — the change applies instantly
Understanding image inversion in Google Slides
The term “invert” is used loosely and means different things in different contexts. In Google Slides specifically, there are two distinct operations people commonly refer to as inverting:
| Term | What it does | Where to find it |
|---|---|---|
| Flip horizontally | Creates a left-right mirror image | Arrange → Rotate → Flip horizontally |
| Flip vertically | Creates a top-bottom mirror image | Arrange → Rotate → Flip vertically |
| Rotate 180° | Flips the image upside down | Format options → Size & Rotation → Angle: 180 |
| Colour inversion | Reverses image colours (photographic negative effect) | Format options → Recolour → Negative |
This guide covers all four. Knowing which one you actually need before you start saves time and avoids the confusion of applying the wrong transformation.
When would you invert or flip an image in a presentation?
Flipping and inverting images is more useful than it might seem. Common real-world situations include:
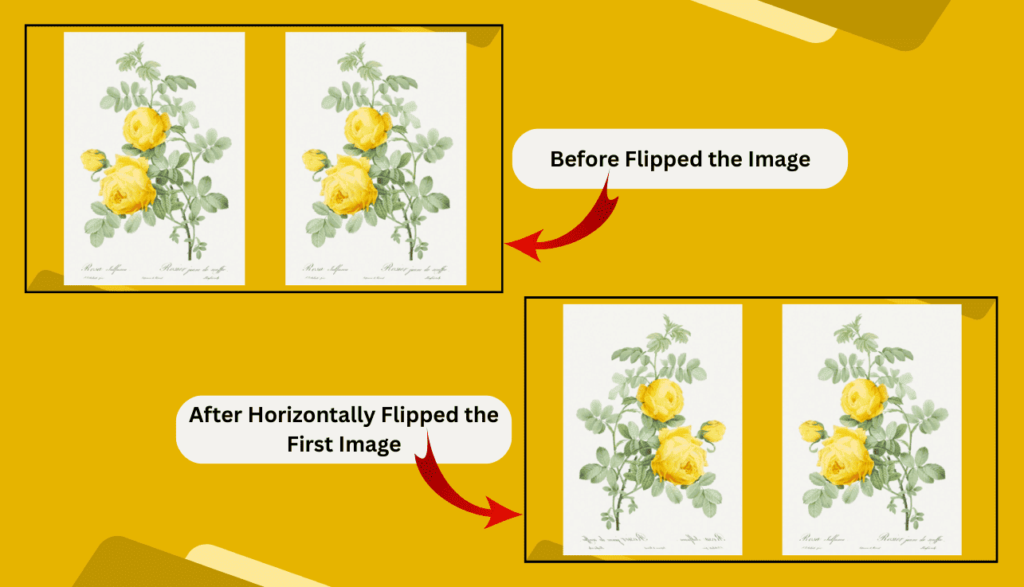
- Fixing image direction. A photo of a person or animal facing left when you need them to face right — one horizontal flip corrects it instantly.
- Creating symmetry. Duplicating an image and flipping the copy creates a perfectly symmetrical layout — useful for title slides, covers, and product showcases.
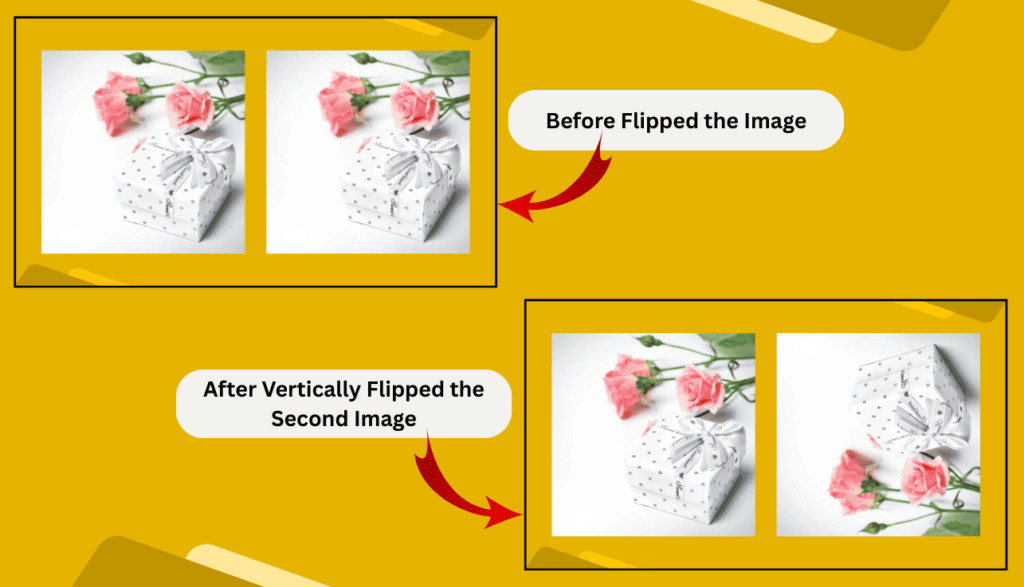
- Mirror and reflection effects. A vertically flipped, semi-transparent duplicate placed below an image simulates a floor reflection — a common design technique for product images.
- Balancing slide composition. If two images on a slide both face the same direction, the slide feels lopsided. Flipping one creates visual balance and guides the viewer’s eye toward the centre.
- Design and branding stylisation. Colour inversion creates a dark-mode or photographic negative effect — useful for creative decks, portfolio presentations, and tech or design-themed slides.
- Correcting scanned documents. Scanned images sometimes come in upside down or rotated. A quick flip or rotation corrects the orientation without leaving Google Slides.
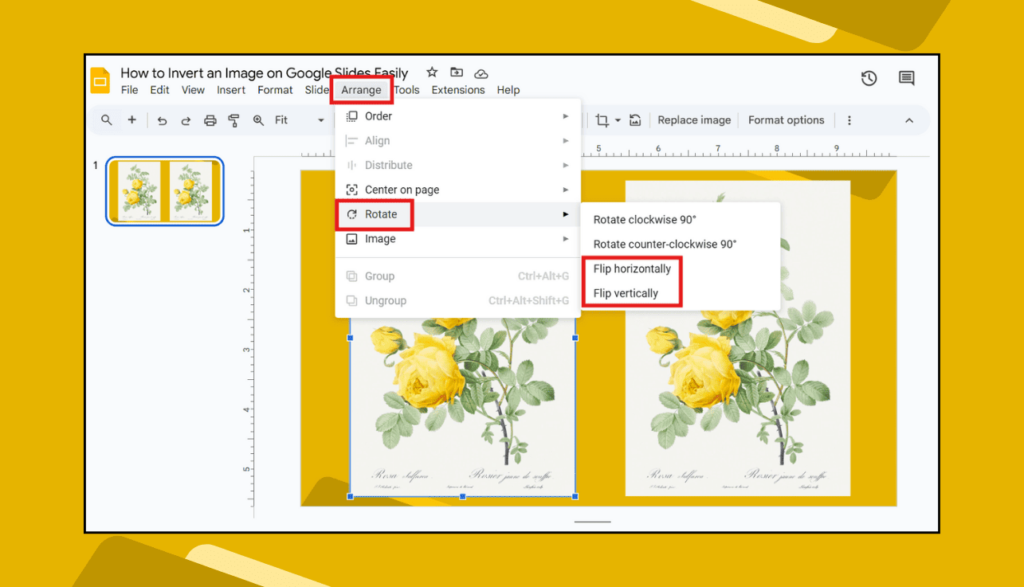
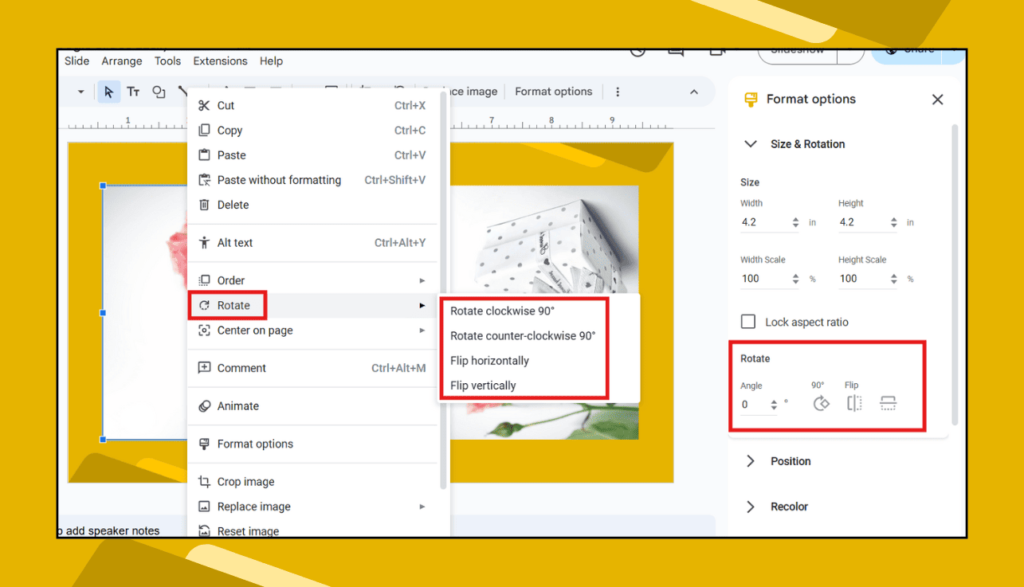
Method 1 Flip an image using the Arrange menu
This is the fastest method for a standard horizontal or vertical flip. It requires no sidebar, no dialog box — just two clicks.
- Open your presentation in Google Slides and go to the slide containing the image.
- Click the image once to select it. A blue selection border with resize handles appears around it.
- Click Arrange in the top menu bar.
- Hover over Rotate. A submenu appears with four options:
- Rotate clockwise 90° — rotates the image 90 degrees to the right
- Rotate counter-clockwise 90° — rotates the image 90 degrees to the left
- Flip horizontally — mirrors the image left-to-right (most commonly used)
- Flip vertically — mirrors the image top-to-bottom
- Click your chosen option. The transformation applies immediately — no confirmation needed.
To undo instantly: Press Ctrl+Z (Windows) or Cmd+Z (Mac) to reverse the flip immediately. To flip back manually, simply apply the same flip direction again — flipping horizontally twice returns the image to its original orientation.
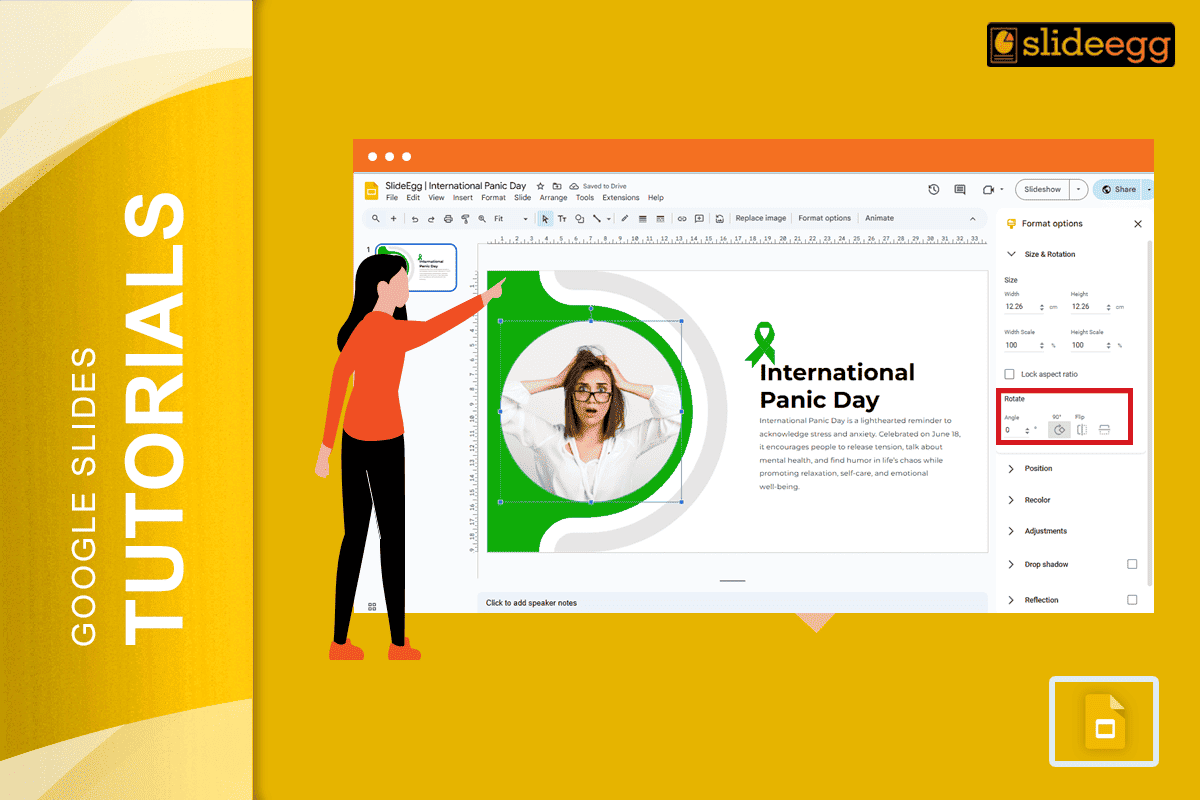
Method 2 Rotate to a specific angle using Format options
When you need a precise rotation angle — 45 degrees, 180 degrees, or any other specific value — the Format options sidebar gives you exact numerical control.
- Click the image to select it.
- Right-click on the image and choose Format options from the context menu. The Format options sidebar opens on the right side of the screen. Alternatively, go to Format → Format options in the top menu.
- Click Size & Rotation in the sidebar to expand that section.
- Find the Angle field. Enter your desired rotation:
- 90° — rotates clockwise 90 degrees
- 180° — rotates the image upside down (equivalent to flipping both horizontally and vertically)
- 270° — rotates counter-clockwise 90 degrees
- Any other value — for tilted or angled effects
- Press Enter or click outside the field to apply. The image rotates to the exact angle you specified.
Freehand rotation shortcut: Click the image to select it. A circular rotation handle appears above the image (a small circular arrow icon). Click and drag it to rotate the image freely. Hold Shift while dragging to snap the rotation to 15-degree increments — useful for clean 45° or 90° angles without needing the sidebar.
Example for Before and After Inverting an Image
Resize without distortion: In the same Size & Rotation panel, you can lock the aspect ratio before resizing. Check the Lock aspect ratio checkbox before changing Width or Height values to ensure the image scales proportionally and does not stretch.
Method 3 Invert image colours using the Recolour tool
If “invert” means you want to reverse the colours of an image — turning a light photo dark, or creating a photographic negative effect — Google Slides has a built-in Recolour tool that handles this.
- Click the image to select it.
- Open Format options (right-click → Format options, or Format → Format options).
- In the sidebar, click Recolour to expand that section.
- Click the No Recolour dropdown to open the colour preset gallery.
- Select Negative from the preset list. This applies a true colour inversion — light areas become dark, dark areas become light, and all colours shift to their opposites on the colour wheel.
- Use the Transparency, Brightness, and Contrast sliders below the Recolour section to fine-tune the result.
- To remove the colour effect at any time, return to Format options → Recolour and select No Recolour.
Note on colour inversion quality: The Negative preset works best on photographic images with a full range of tones. On flat-colour illustrations or logos, the result may look unexpected. Always preview the result before finalising — the effect can be removed instantly with No Recolour if needed.
How to create a mirror effect with two images
A mirrored pair of images — one original, one flipped — is a clean design technique for title slides, product showcases, and symmetrical layouts. Here is how to build it in Google Slides:
- Insert your image via Insert → Image.
- Click the image to select it, then press Ctrl+D (Windows) or Cmd+D (Mac) to duplicate it. A copy appears slightly offset from the original.
- With the duplicate still selected, go to Arrange → Rotate → Flip horizontally.
- Drag the flipped image to sit directly beside the original — right edge to left edge for a left-right mirror, or bottom edge to top edge for a reflection effect.
- Select both images by holding Shift and clicking each one. Go to Arrange → Align & distribute → Align top (for a horizontal pair) to align them perfectly.
- For a floor reflection effect, place the flipped copy below the original, reduce its Transparency to around 50% in Format options, and optionally apply a slight vertical fade using a gradient white rectangle overlay.
Flipping images on mobile — what works and what doesn’t
As of 2026, the Google Slides mobile app for iOS and Android does not include the Arrange → Rotate → Flip option. The full flip functionality is only available in the desktop browser version of Google Slides.
If you need to flip an image and can only use a mobile device, the practical workaround is:
- Flip the image using a free photo editing app — Snapseed (iOS and Android) or Google Photos both include a flip/mirror option.
- Save the flipped image to your device or Google Drive.
- Open Google Slides on your phone, delete the original image, and insert the pre-flipped version.
The mobile app does support freehand rotation via the rotate handle — tap and hold the image and a rotation handle appears. This allows approximate rotation but not the precision of the desktop Angle field.
Image editing tips for Google Slides in 2026
- Crop before flipping. If your image needs both cropping and flipping, crop first using the crop tool in the toolbar, then flip. This avoids having to re-crop after the flip changes the image orientation.
- Group flipped images before moving them. If you have created a mirrored pair or a layout with multiple images, select all of them, right-click, and choose Group before moving or resizing. This keeps the relative positions locked so the design does not fall apart when you reposition it on the slide.
- Use Format options for precise sizing after rotating. After rotating an image, its bounding box dimensions may not match what you expect. Open Format options → Size & Rotation and set exact Width and Height values to restore the image to its intended display size.
- Avoid over-relying on the Recolour presets. The built-in colour presets (Grayscale, Sepia, Negative etc.) are useful for quick effects but limited in control. For complex colour adjustments, edit the image in Google Photos or an external editor before inserting it into your slide.
- Alt text is not affected by flips. If you have added alt text to an image for accessibility, flipping or rotating the image does not remove or change the alt text — it persists through all visual transformations. You can verify this in Format options → Alt text.
Start with presentation-ready images
Getting image orientation right is much easier when you start from a well-designed slide layout. SlideEgg’s library of free Google Slides templates includes professionally designed decks with image placeholders already positioned and proportioned correctly — reducing the need for manual flipping and repositioning. For the full Google Slides image editing reference, see Google’s official image formatting documentation.
Frequently asked questions
What is the difference between flipping and inverting an image in Google Slides?
Flipping (also called mirroring) changes the orientation of the image — horizontally creates a left-right mirror, vertically creates a top-bottom mirror. Colour inversion changes the actual colours of the image so light areas become dark and colours appear as their opposites, similar to a photographic negative. Google Slides supports both: flipping via the Arrange menu, and colour inversion via the Recolour tool in Format options.
Can I flip an image on Google Slides on iPhone or Android?
The Arrange → Rotate → Flip option is not available in the Google Slides mobile app as of 2026. The practical workaround is to flip the image using a free app like Snapseed or Google Photos before inserting it into your presentation. The desktop browser version of Google Slides has full flip and rotation support.
How do I rotate an image to an exact angle in Google Slides?
Right-click the image → Format options → Size & Rotation → Angle field. Enter your exact degree value (e.g. 180 to flip upside down, 45 for a diagonal tilt). Press Enter to apply. For freehand rotation, drag the circular handle above the selected image — hold Shift to snap to 15-degree increments.
Does flipping an image in Google Slides change the original file?
No. Flipping and rotating an image in Google Slides only changes how it is displayed on the slide. The original image file — whether stored on your computer, Google Drive, or elsewhere — is completely unaffected. If you download the image from Google Slides after flipping it, the downloaded file will still be in its original orientation.
Can I flip text in Google Slides like an image?
Google Slides does not support flipping regular text boxes — the Flip options only work on images and shapes. The workaround is to take a screenshot of your text, insert it as an image, and then flip the image. Note that flipped text will not be readable by screen readers or searchable by Google, so use this technique for decorative purposes only.
How do I create a mirror effect with two images in Google Slides?
Insert your image, duplicate it with Ctrl+D (Cmd+D on Mac), select the duplicate, and go to Arrange → Rotate → Flip horizontally. Drag the flipped copy beside the original and use Arrange → Align & distribute → Align top to align them perfectly. This creates a clean symmetrical mirror effect without any external tools.
Can I undo a flip or colour inversion in Google Slides?
Yes — press Ctrl+Z (Cmd+Z on Mac) immediately after applying the flip to undo it. To reverse manually: for a flip, apply the same flip direction again (flipping horizontally twice returns to original). For colour inversion, go to Format options → Recolour → No Recolour. Both operations are fully reversible at any time.