“The gap between a slide that looks amateur and one that looks polished is often not the content — it is the spacing. Too little line spacing and text feels suffocating. Inconsistent indentation and bullet points look misaligned. Wrong paragraph spacing and slides feel unbalanced even when the words are perfect.
In 2026, Google Slides gives you precise control over all three: indentation, paragraph spacing, and line spacing. This guide covers every method — the Format menu, keyboard shortcuts, the ruler tool, and the mobile app — so you can format text exactly how you want it, every time.
Quick start — the fastest paths
- Indentation: Select text →
Format → Align & indent → Indentation options - Line spacing: Select text →
Format → Line & paragraph spacing - Indent bullet deeper: Click bullet → press
Tab - Decrease indent: Click bullet → press
Shift+Tab - Visual indent:
View → Show ruler→ drag the indent markers
Why indentation and spacing matter in Google Slides
Text formatting in slides works differently from documents. In a document, readers sit close and read at length. In a slide, your audience reads from a distance in seconds. This means formatting decisions that are minor in a Word document are highly visible on a projected slide.
- Line spacing affects how easily the eye moves from one line to the next. Too tight and text looks cramped; too loose and lines feel disconnected from each other.
- Paragraph spacing creates visual breathing room between distinct ideas, making it clear where one point ends and the next begins — without needing blank lines or extra bullet points.
- Indentation shows hierarchy. Indented sub-bullets are visually subordinate to their parent bullets, making the structure of complex information immediately clear without any explanation.
Getting these three settings right is the difference between a slide your audience can scan in three seconds and one they have to work to read.
Part 1 How to change indentation in Google Slides
Method A Using the Format menu
The Format menu gives you the most precise control over indentation, including first-line and hanging indent options.
- Open your presentation in Google Slides and navigate to the slide you want to edit.
- Click inside the text box containing the text you want to indent. The text box border will highlight to show it is selected.
- Select your text. Highlight specific paragraphs by clicking and dragging, or press
Ctrl+A(Windows) /Cmd+A(Mac) to select all text in the box. - Go to Format → Align & indent → Indentation options. The Indentation Options dialog opens.
- Set your indent values:
- Left: Distance from the left edge of the text box — increases overall indentation
- Right: Distance from the right edge — useful for pull quotes or narrow columns
- Special → First line: Indents only the first line of each paragraph (classic paragraph indent style)
- Special → Hanging: All lines except the first are indented — used in reference lists and bibliographies
- Click Apply to see the changes immediately on your slide.
Indent values are in inches by default. 0.25 inches is a standard single indent level. 0.5 inches is a double indent. For sub-bullets that need to align with body text, 0.5 inches left indent with a 0.25 inch hanging indent is the classic combination.
Method B Using keyboard shortcuts
For bullet lists, keyboard shortcuts are the fastest way to control indent levels — no menu needed.
- Tab Increase indent — moves bullet one level deeper (becomes sub-bullet)
- Shift + Tab Decrease indent — moves bullet one level up
Place your cursor at the very beginning of the bullet line before pressing Tab — if the cursor is in the middle of the text, Tab will insert a tab character instead of changing the indent level. Google Slides supports up to 5 indent levels for nested bullet lists.
Method C Using the ruler
The ruler lets you set indentation visually by dragging markers — ideal when you want to eyeball the result rather than enter exact values.
- Go to View → Show ruler. A horizontal ruler appears above the slide editing area.
- Click inside the text box you want to format. Two triangular markers appear on the ruler:
- Top triangle (pointing down): controls first-line indent
- Bottom triangle (pointing up): controls left indent for all remaining lines
- Drag the markers to your desired position. The text updates in real time as you drag.
- To hide the ruler after formatting, go to View → Hide ruler.
Ruler tip: Hold Shift while dragging to move both triangle markers together — this shifts the entire paragraph indent without changing the relationship between the first line and subsequent lines.
Part 2 How to change line spacing in Google Slides
Line spacing controls the vertical distance between individual lines within the same paragraph. It is measured as a multiplier of the font size — 1.5 spacing means the gap between lines is 1.5 times the font size.
Method A Using the Format menu
- Select the text you want to adjust — click and drag to highlight it, or press
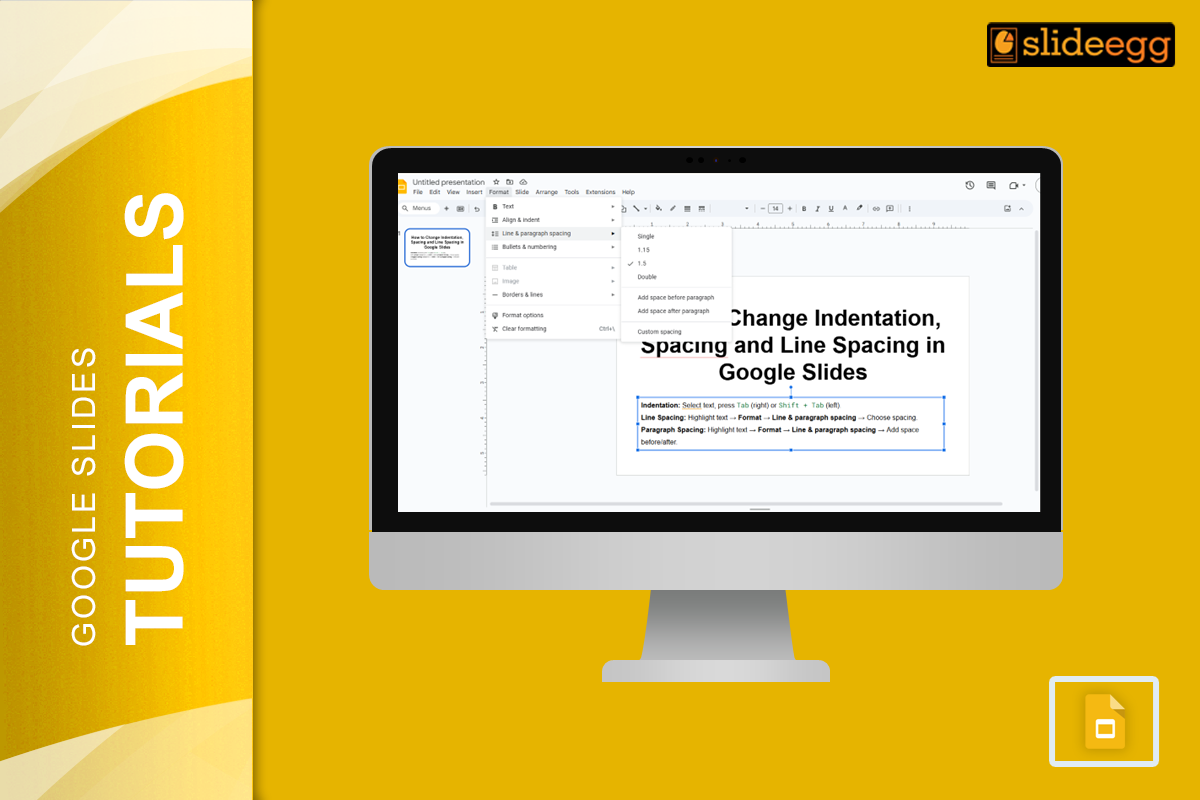
Ctrl+A/Cmd+Ato select all text in the box. - Go to Format → Line & paragraph spacing.
- Choose from the preset options:
- Single — compact, best for titles and short callout text
- 1.15 — slightly airy, the Google default for body text
- 1.5 — comfortable for longer text blocks, easier to read at distance
- Double — very open, rarely used in slides
- For a precise value, choose Custom spacing and enter an exact number (e.g. 1.3). Click Apply.
| Line spacing | Best for | Avoid when |
|---|---|---|
| Single (1.0) | Titles, short callouts, footnotes | Long bullet lists — feels cramped |
| 1.15 | Standard body text, bullet points | Very small font sizes (<16pt) |
| 1.5 | Content-heavy slides, accessible design | Slides with many bullets — runs out of space |
| Double (2.0) | Headlines you want to stand out | Most slide contexts — too much vertical space |
| Custom | Precise brand spacing requirements | When consistency across slides matters more than precision |
Method B Using the toolbar
If the line spacing toolbar button is visible in your Google Slides ribbon, you can click it directly for instant access to the same preset options without going through the Format menu. Look for the icon showing three horizontal lines with up-down arrows to the left — it appears in the text formatting toolbar when a text box is selected.
Part 3 How to change paragraph spacing in Google Slides
Paragraph spacing adds vertical space above or below an entire paragraph — separate from the line spacing within it. This creates clear visual separation between distinct bullet points or sections without inserting blank lines, which can shift other content unpredictably.
- Select the paragraph you want to adjust — click anywhere inside it, or select multiple paragraphs by highlighting them.
- Go to Format → Line & paragraph spacing.
- Choose Add space before paragraph to add a 10pt gap above the selected paragraph, or Add space after paragraph to add a 10pt gap below.
- For a custom amount, choose Custom spacing at the bottom of the menu. Enter specific values in the Before and After fields (measured in points — 1pt = 1/72 inch). Click Apply.
Paragraph spacing vs blank lines: Never add blank lines between bullet points to create spacing — this shifts all following content down and creates layout problems when you add or remove bullets. Use paragraph spacing instead. It is precise, consistent, and adjustable without affecting layout.
Part 4 Adjusting spacing on mobile (Google Slides app)
The Google Slides app for iOS and Android supports line spacing and basic indentation, though with fewer options than the desktop browser version.
- Open the Google Slides app and open your presentation.
- Tap the text box you want to format. Tap again to enter edit mode.
- Select the text you want to adjust.
- Tap the Format icon (the letter A with horizontal lines) in the top toolbar.
- Tap Paragraph. You will see controls for:
- Line spacing — tap the plus/minus to increase or decrease
- Indentation — use the increase/decrease indent buttons
- Space before/after paragraph — adjust with plus/minus buttons
- Tap the back arrow to apply changes and return to the slide.
Note: Custom spacing with exact point or multiplier values is only available in the desktop browser version of Google Slides. On mobile, you are limited to incremental adjustments. For precise formatting, use the desktop version and then edit content on mobile.
How to apply consistent spacing across your entire presentation
Adjusting spacing slide by slide is time-consuming and leads to inconsistencies. The most efficient approach is to set spacing in the Slide Master, which propagates your settings across every slide that uses the same layout.
- Go to View → Theme builder (in some versions: Slide → Edit master).
- In the master editor, click on the text placeholder whose spacing you want to set — usually the Body text or Content placeholder.
- Select the text inside, then apply your line spacing and paragraph spacing settings via Format → Line & paragraph spacing.
- Click the X to close the master editor. Your spacing settings now apply to all slides using that layout.
For full details on Google Slides text formatting options, refer to Google’s official formatting documentation.
Best practices for spacing in Google Slides in 2026
- Use 1.15 or 1.5 line spacing for all body text. Single spacing looks cramped on slides; 1.15 is the sweet spot for readability without wasting vertical space.
- Add paragraph spacing instead of blank lines. Blank lines between bullets create unpredictable layout behaviour when content changes. Use Format → Line & paragraph spacing → Add space after paragraph instead.
- Keep indentation consistent across the whole deck. If sub-bullets are indented 0.5 inches on slide 3, they should be indented 0.5 inches on slide 12. Set this in the Slide Master to ensure consistency automatically.
- Never indent slide titles. Titles should always start at the left edge of the text box. Indented titles look unbalanced and misaligned with the rest of the slide.
- Use hanging indents for reference slides. If your presentation has a bibliography, sources, or reference list, hanging indent format — where the first line is flush left and subsequent lines are indented — is the standard and most readable format.
- Test spacing at actual presentation size. Press
Ctrl+Shift+F5(Windows) orCmd+Shift+F5(Mac) to enter presentation mode and check how your spacing looks on a full screen before finalising.
Start with a well-spaced template
The fastest way to get spacing right is to start from a template where spacing, indentation, and line height are already set correctly. SlideEgg’s library of free Google Slides templates includes hundreds of professionally designed decks with consistent, presentation-ready text formatting built in — so you spend your time on content, not formatting adjustments.
Frequently asked questions
Why can’t I change the indentation in Google Slides?
If indentation options are greyed out, check three things: (1) make sure you have clicked inside a text box and selected text — formatting only applies to text, not slide backgrounds or images; (2) confirm you have Editor access to the file — Commenter and Viewer access do not allow formatting changes; (3) if the text box is part of a master layout, go to View → Theme builder and edit the master directly.
What is the difference between line spacing and paragraph spacing in Google Slides?
Line spacing controls the gap between individual lines within the same paragraph — for example, between two lines of a bullet point. Paragraph spacing controls the vertical gap added above or below an entire paragraph — the space between one bullet and the next. Use line spacing for readability within dense text; use paragraph spacing to create visual separation between distinct ideas.
What is a hanging indent and how do I create one in Google Slides?
A hanging indent is where the first line starts at the left margin and all subsequent lines are indented further right — the opposite of a standard first-line indent. It is used in reference lists and bibliographies. To create one, select your text, go to Format → Align & indent → Indentation options, set Special indent to Hanging, enter your desired depth, and click Apply.
Can I change line spacing in Google Slides on iPhone or Android?
Yes. Open the Google Slides app, tap the text box, tap the Format icon (the letter A with lines), then tap Paragraph. Use the plus and minus buttons to adjust line spacing and indentation. Note that custom spacing with exact values is only available in the desktop browser version — the mobile app only allows incremental adjustments.
How do I set consistent spacing across all slides in Google Slides?
Edit the Slide Master. Go to View → Theme builder, select the text placeholder in the master layout, apply your spacing settings, then close the editor. These settings propagate to all slides that use that layout automatically — far faster and more consistent than adjusting each slide individually.
What line spacing is best for Google Slides presentations?
For most presentations, 1.15 to 1.5 line spacing is ideal — easy to scan at a glance without taking excessive vertical space. Single spacing feels cramped for multi-line bullet points. Double spacing is too open for slide content and wastes valuable slide area. For titles and short callout text with only one or two lines, single spacing is fine.
How do I increase indent for bullet points in Google Slides?
Place your cursor at the beginning of the bullet point and press Tab to move it one indent level deeper (it becomes a sub-bullet). Press Shift+Tab to move it back up. You can nest bullets up to 5 levels deep. For precise indent values, use Format → Align & indent → Indentation options and adjust the Left indent value.