| Quick Tips: How to Invert an Image on Google Slides 🌸Open your Google Slides presentation. 🌸Click on the image you want to flip. 🌸Go to the “Arrange” menu. 🌸Select “Rotate”. 🌸Choose “Flip horizontally” or “Flip vertically”. 🌸Done! Your image is now inverted! |
Turn Images Upside Down or Sideways in Seconds!
Sometimes, we want to make things a bit fun or stylish in our presentations. One easy way? Flip the image! It can give a cool mirror effect or just help fit the design better.
Did you know flipping an image is called “inverting” or “mirroring”? It helps in design, art, and even storytelling!
Let’s say you added a photo on your slide, but it looks odd, facing the wrong way. No worries. You don’t need Photoshop or any fancy tool. Google Slides lets you flip images in seconds—and it’s super easy!
📝 Step-by-Step: How to Invert an Image on Google Slides
Here’s how you can do it with zero design skills
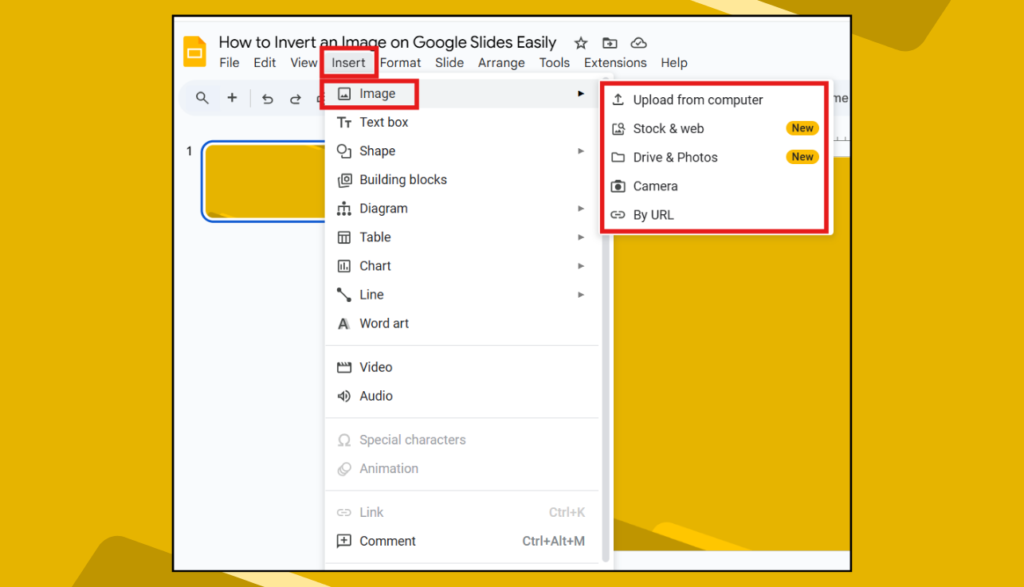
🖼 Step 1: Insert Your Image
- Open your Google Slides file.
- Click on the slide where you want the image.
- Go to Insert > Image > Upload from the computer (or choose from Drive, Search, etc.).
Click “Insert” to add your image.
🔄 Step 2: Select the Image
- Click once on the image.
- A blue box will appear around it.
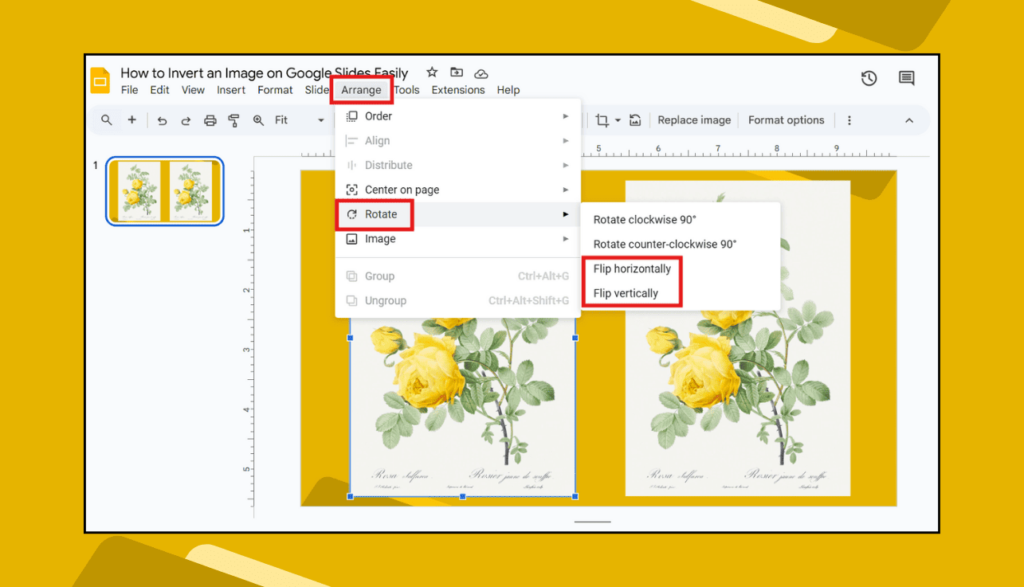
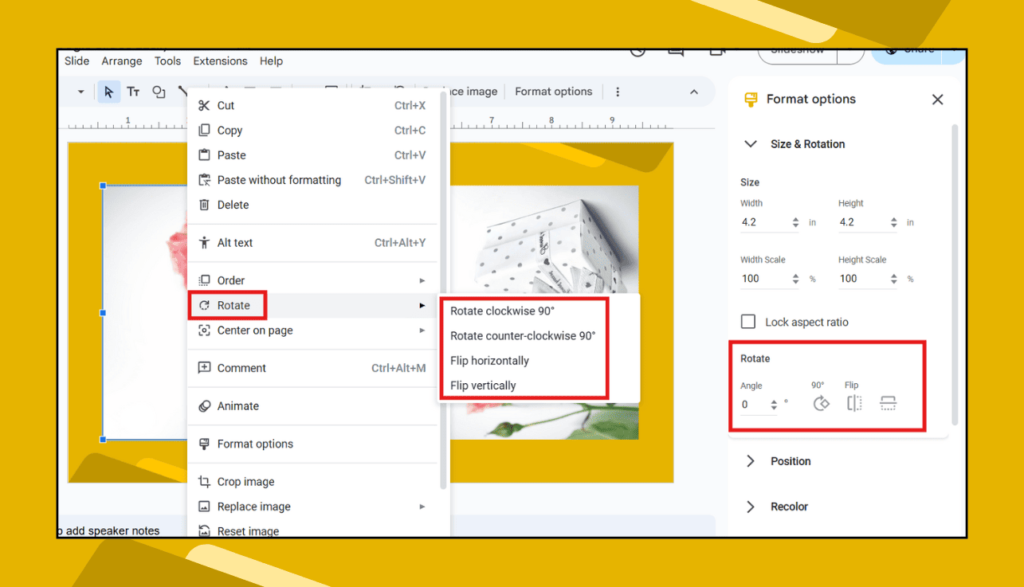
🔁 Step 3: Method 1 – Use the Arrange Menu
- Click Arrange from the top menu.
- Hover over Rotate.
- You’ll see:
- Flip horizontally – flips left to right.
- Flip vertically – flips top to bottom.
- Choose the one you want.
- Done!
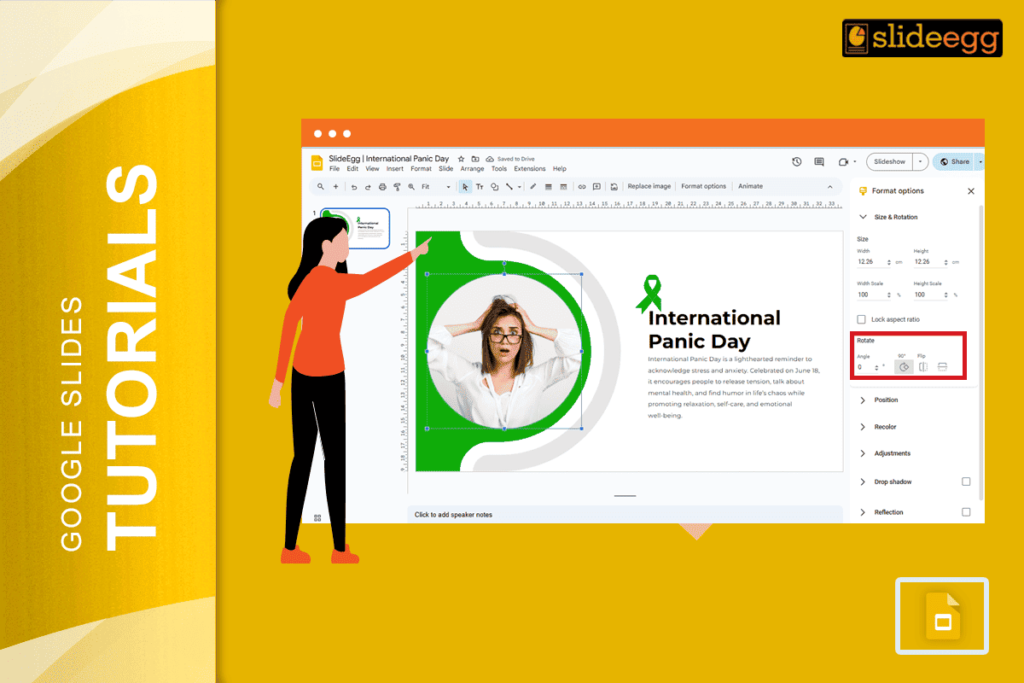
🖱️ Step 3: Method 2 – Right-click and Use Format Options
This is another way that gives you more control over rotation angles:
- Right-click on the image.
- Choose Format options.
- A sidebar will open on the right.
- Click on Size & Rotation.
- You can enter the exact angle to rotate (like 180° to flip upside down).
- You can also flip manually using rotation handles or sliders.
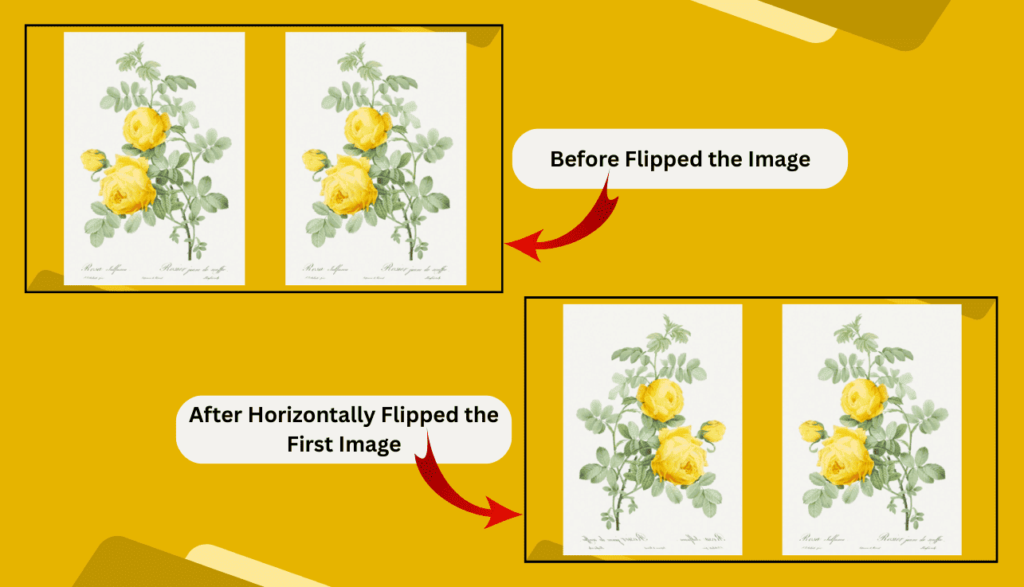
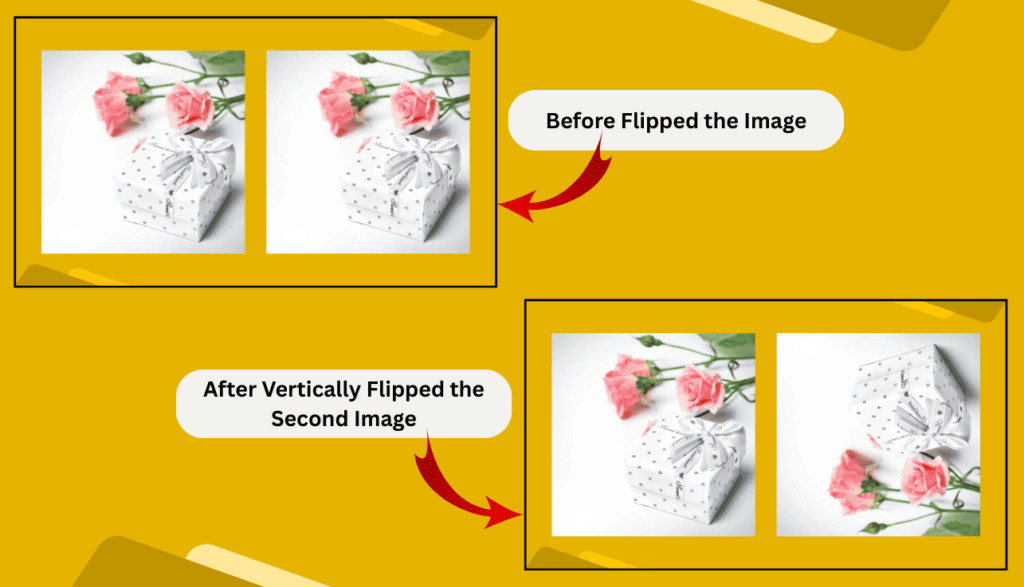
Example for Before and After Inverting an Image
🤔 Why Invert Images on Google Slides?
Here are some cool reasons:
- Make it look creative.
- Fix the direction of a person or object.
- Create mirror effects.
- Add balance to your design.
- Add fun to your storytelling.
💡 Extra Tips for Image Editing in Google Slides
- Want to crop the image? Click the crop icon in the toolbar.
- Need to adjust colors? Use the “Format options” > “Adjustments”.
- Add shadows or reflections to make it pop!
✅ Works on Any Device!
The good part? This works on:
- Windows and Mac computers
- Chromebooks
- Even tablets (with some limits)
If you’re using the Google Slides mobile app, flipping options might not be available. Use the desktop version for full control.
❓ Frequently Asked Questions
1. Can I rotate the image instead of flipping it?
Yes! Click the image > Use the blue rotate handle on top to turn it any way you want.
2. What if the image looks blurry after flipping?
Try re-uploading the image in higher quality or using the “Format options” to adjust clarity.
3. Can I flip text like images?
No, Google Slides doesn’t allow flipping regular text boxes. But you can turn the text into an image using screenshot tools and flip that!
4. Does flipping an image change the file?
Nope. It only changes how it looks on your slide. The original file stays the same.
If you’re working on a school project, business report, or just having fun with a photo, flipping images can add that extra bit of wow! And now, you know how to do it in Google Slides in less than a minute. Try now!