Adding maps to a presentation is a good way to show data, routes, locations, and geographic regions. In this step-by-step guide, let’s see how you can add and edit maps to your Google Slides presentations.
Why Use Maps in Google Slides?
It might be helpful in pointing out important places, travel routes, business locations, etc. With Google Slides, you can add maps to make your presentations more dynamic.
How to Insert a Map in Google Slides
- Open your presentation in Google Slides, where you need to show a map.
- Click on Insert > Image > Search the Web.
- A panel titled “Search in Google Images” will appear on the right side of the slide.
- In the search box, type the name of the map you are looking for, such as “World Map”.
- A collection of maps matching your search query will appear.
- Select the map you want and click the Insert button.
- The map will now be successfully inserted into your slide.

How to Edit the Map in Google Slides
Once you have added your map, you probably want to edit or customize it according to your presentation. Here’s how you can simply modify your map in Google Slides.
Step 1: Resize and Move the Map
- Resize: Just click the image and drag the corner handles to make it larger or smaller.
- Move: Click and drag the map to place it around your slide as necessary.
Step 2: Annotate and Customize
You can make your map far more helpful by adding some annotations and other customizations.
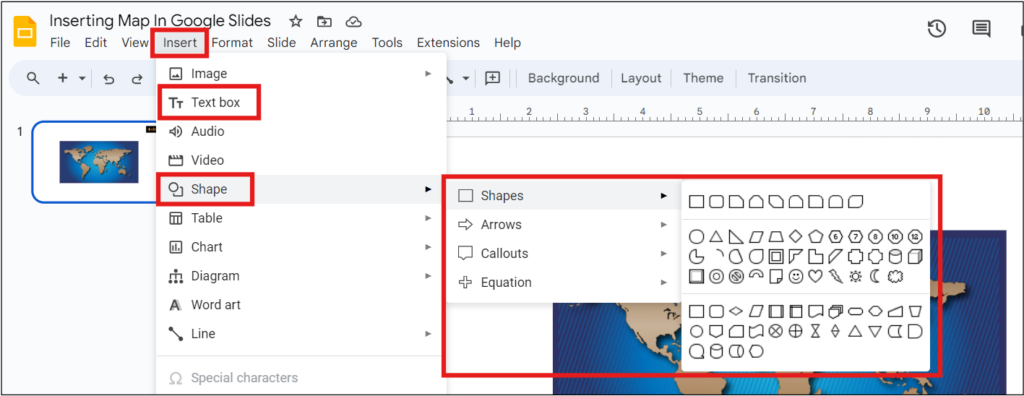
- Add Shapes: Click the Shapes tool on the toolbar and then click on the map to draw circles, rectangles, or lines to highlight certain areas.
- Insert > Shape and then select the shape you want to use.
- Drag the shape over the map and then click on it to edit color and size.
- Text Boxes: Use text boxes to label certain places or add notes.
- Click on Insert > Text Box, then drag on your slide to create a text box.
- Type what you want and modify size, font, and color.
- Arrows and Lines: You can use arrows or lines to point out a particular place.
- Click the Line tool in your toolbar and choose Arrow.
- Drag the arrow to connect the location with your annotation.
How to Effectively Use Maps in Google Slides
- Clarity: Do not overzoom or overload the map. Focus on the key area you want to bring out.
- Annotation: Clearly label your map so that your audience knows what they are looking at.
- Consistency: Make sure the style of your map is in line with your overall presentation, ensuring cohesion.
- Image Quality: Take a high-quality screenshot of your map so as not to make it look pixelated.
Common Issues and Solution
Issue 1: Low-Resolution Maps
- Solution: Be adequately zoomed in while taking the screenshot or using high-quality screen-capturing software.
Issue 2: Map Misaligned on the Slide
- Solution: Employ alignment features within Google Slides templates to center your map or align it correctly.
Issue 3: Map Too Large or Small
- Solution: Resize your map carefully by dragging on corner handles. To avoid distorting disproportionately, use the corner handles and not the side handles.
Final Thoughts
Adding and editing maps in Google Slides helps make your presentations more powerful. Although Google Slides does not have map functionalities, using Google Maps will give an effective workaround. Customize your map, add your annotations, and position it with just a few clicks, and you get a slide that is both visually appealing and informative. Follow these steps, and have your maps slide effortlessly into your next presentation, which will definitely help you get the point across much better. You can also try pre-made map presentation templates available online to make your work simpler and smarter. Happy presenting!