Have you ever had the perfect image for your presentation, but the background just didn’t match? Maybe it’s too busy, distracting, or doesn’t match your slides’ theme. Don’t worry, you don’t need any photo editing software to set this up! Microsoft PowerPoint, the tool that many of us use daily, has a feature that allows you to remove background images with just a few clicks. This simple PowerPoint tricks and tips guide will show you how to remove the background from a picture in the presentation!
Why Remove Backgrounds?
There are many reasons to make an image transparent in a PowerPoint presentation. Here are a few:
- Focus on the Subject: Clear, distraction-free images draw the audience’s attention to the main subject.
- Professionalism: A clean, polished look adds a touch of professionalism to your presentations.
- Visual Appeal: Removing the background from an image can enhance the elegance of your presentations by focusing interest on the key topic.
- Customization: Removing backgrounds allows you to place your images on any color or background, achieving the desired aesthetic.
- Creative Possibilities: Experiment with transparency, layering, and other effects to create unique and engaging visuals.
Let’s Get Removing!
Here’s how to remove backgrounds in PowerPoint:
Step 1: Insert the Picture
- Open your PowerPoint presentation.
- Go to the slide where you need to insert the picture.
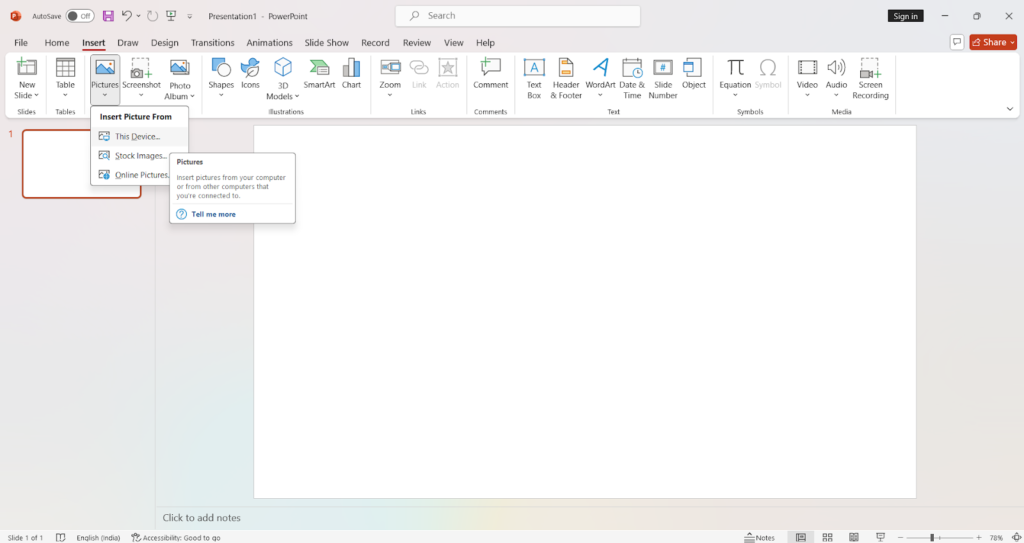
- Click on the “Insert” tab in the toolbar.
- Select “Pictures” and choose the image from your computer.
Step 2: Select the Image
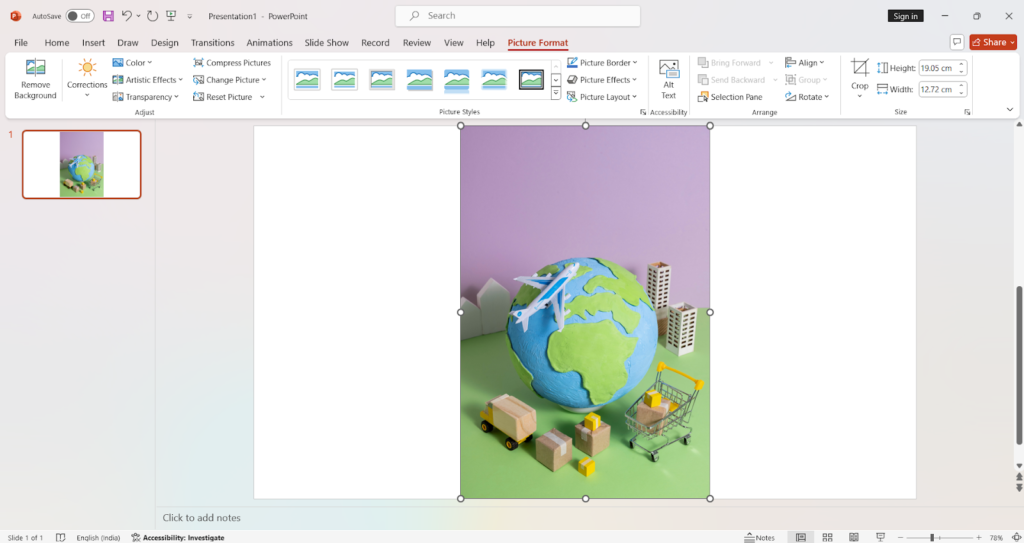
- Click on the image to select it.
- The “Picture Format” tab will appear in the toolbar.
Step 3: Remove Background
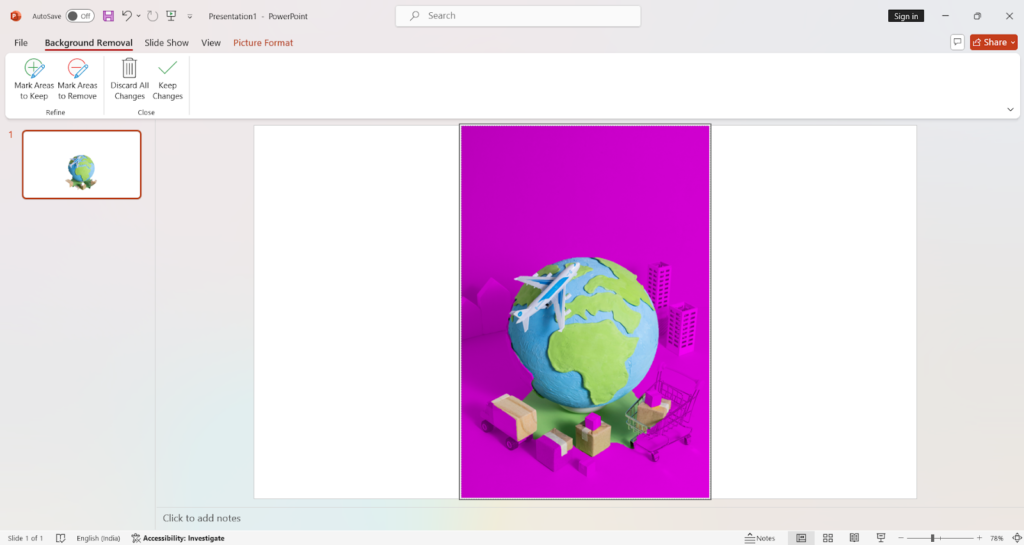
- In the “Picture Format” tab, click on “Remove Background.”
- PowerPoint will automatically try to determine the background and highlight it in purple.
Step 4: Refine the Selection
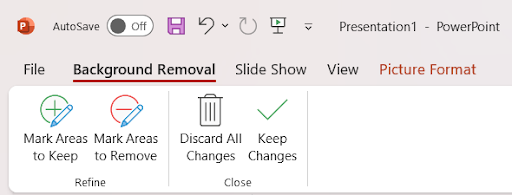
- Mark Areas to Keep: If parts of the subject are highlighted in purple, click “Mark Areas to Keep.” Click on the areas you want to keep in the image.
- Mark Areas to Remove: If parts of the background are not highlighted, click “Mark Areas to Remove.” Click on the areas you want to remove from the image.
Step 5: Confirm Changes
- Once you’re satisfied with the selection, click “Keep Changes” in the “Background Removal” tab.
- If you need to start over, click “Discard All Changes.”
Step 6: Final Adjustments
- You can now resize, move, or further edit the image as needed.
- Use the tools in the “Picture Format” tab to add effects, borders, or other adjustments to enhance your image.
That’s it! You’ve successfully removed the background from your image using PowerPoint. Feel free to experiment with different images and refine your skills.
Tips for Better Results
- High-Contrast Images: Background removal works best with images where the subject contrasts sharply with the background.
- Simple Backgrounds: Try to use images with simple, solid-color backgrounds for easier removal.
- Manual Adjustments: Don’t hesitate to use the manual “Mark Areas to Keep” and “Mark Areas to Remove” options to refine the selection.
Wrapping Up
Removing backgrounds in PowerPoint is quick, and easy, and empowers you to create stunning presentations. By following the above steps, you can easily take the background out of a picture on PowerPoint, making your presentations more professional and visually appealing. I hope this tutorial will help you learn the steps clearly! You can also check out our how to edit background images and color in Google Slides tutorial to get more insights. Happy editing!


