PowerPoint is a popular tool used in offices, institutions, and other environments to create slideshows for various purposes. As you are familiar with the fact, will you change the page orientation from landscape to portrait and vice versa?
In case you say “No.” This blog post is for you!
Dive into the core topic with proven steps: Change the orientation page to landscape to portrait.
Follow the step without bouncing anywhere,
Step 1: Open a PowerPoint presentation
The first step is to open the PowerPoint presentation for which you want to change the orientation. You can double-click the PowerPoint file to open it.
Step 2: Select the Slide to Edit
Once you’ve opened the presentation, select the slide whose orientation you want to change. Select the slide, and click on it in the thumbnail view on the left side of the screen. To select multiple slides, hold down the Ctrl key while clicking each slide that you want to edit.
Step 3: Click the Design tab
With the slide selected, click the Design tab at the top of the screen. It opens the Design tab menu, which contains many options for customizing the design and layout of your presentation.
Step 4: Click the Slide Size button
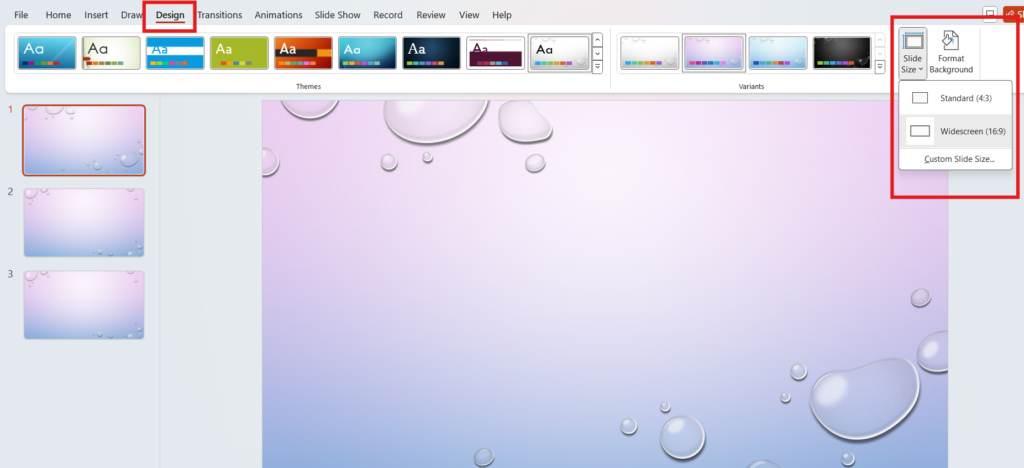
On the Design tab menu, click the Slide Size button located in the Customize group. It will open a drop-down menu with several options to customize your slide size and orientation.
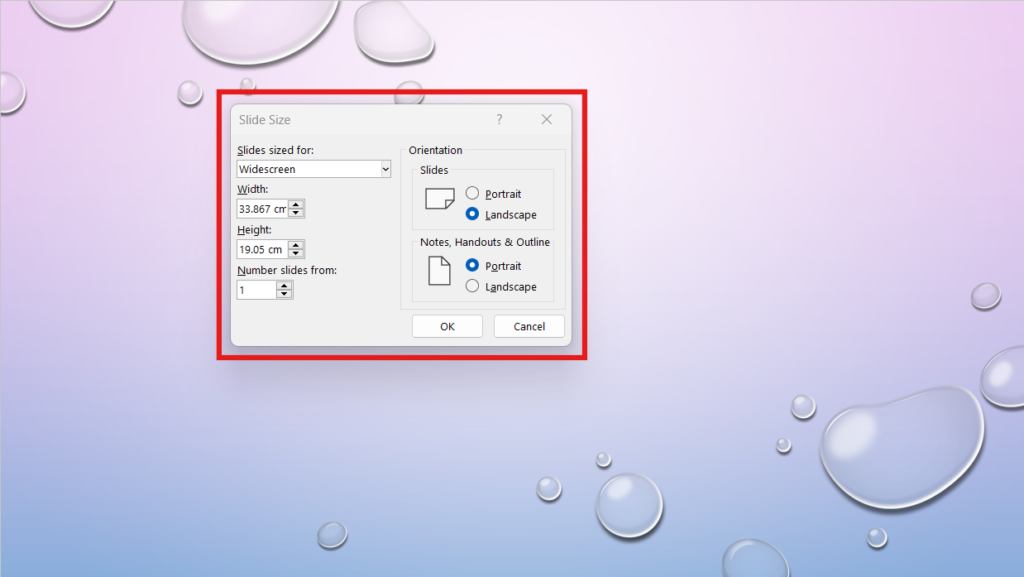
Step 5: Choose the Direction
In the Slide Size drop-down menu, you’ll see two orientation options:
Landscapes and portraits. To change the orientation of the selected slides from landscape to portrait, click the Portrait option.
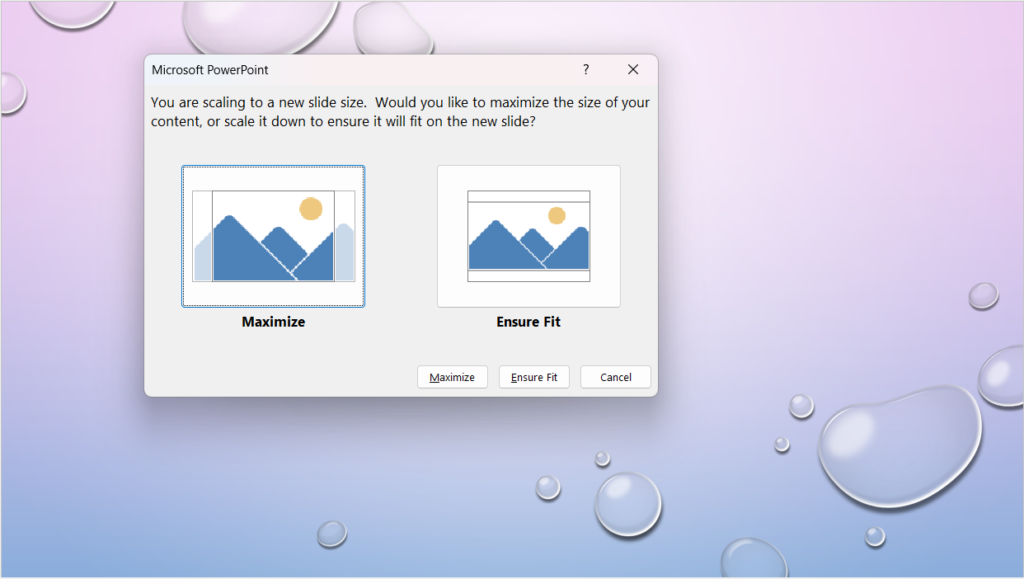
Step 6: Check Out the Preview
After selecting the Portrait option, you’ll see a preview of how the slide(s) will look with the new orientation. If you are satisfied with the changes, click the OK button to apply the new to the selected slides.
Step 7: Save the Presentation
Once you’ve changed the orientation of the selected slides, be sure to save the presentation to retain the changes. Press the Save button in the upper left corner of the screen or go to File > Save.
Here are some additional tips and tricks to keep in mind when changing page orientation in PowerPoint:
Review the Content of Your Slides:
Your slide orientation should be selected based on what you want to display. For example, if you have a lot of text, it’s better to choose landscape orientation to give you more horizontal space. On the other hand, if you have a lot of graphics or images, portrait orientation may be better for vertical space.
Use Paragraph Breaks:
If you want a mix of landscape and portrait orientation in your presentation, you can use section breaks to separate different sections. It allows you to have different orientations for different parts of your presentation.
Print Preview:
Before finalizing your presentation, be sure to check the print preview to make sure everything looks the way you want it to. It will help you catch any formatting or layout issues before presenting your slides.
Conclusion
To wind up, changing page orientation in PowerPoint is a simple process that can be done with just a few clicks. Whether you need to switch from landscape to portrait mode or vice versa, the steps in this blog will help you make the necessary changes.
With a little practice and experimentation, you can create presentations tailored to your specific needs and preferences.