Presentations can sometimes be boring. Animations can help make them more engaging and easier to follow.
You can add as many animations as you want to your Google Slides presentation. Google Slides makes it easy to keep track of all your animations. But be careful not to use too many animations, or your presentation will become too busy and distracting.
Adding animations in Google Slides is simple. First, choose the object you want to animate (text, image, etc.). Then, choose the animation type. Finally, set the order of the animations.
The three forms of animation in Google Slides are Entrance, Emphasis, and Exit, the same as in PowerPoint. A slide’s object can have one or more animations added to it.
Creating an engaging presentation with animation features is not a tough one. However, it’s better if you only include one of each type of item.
Simply scroll down through the words in this passage to know how easy it is.
Before entering into the step guide, know about how animation useful for presentation.
- Animations are used to highlight your important points.
- It guides the viewers through this Animation feature.
- Make interest and add variety to your presentation which makes your presentation stand out.
Let’s begin to play on Google Slides!
Step 1: Open Google Slides and create a new presentation.
Step 2: Select the object that you want to animate.
Step 3: Go to the Insert menu.
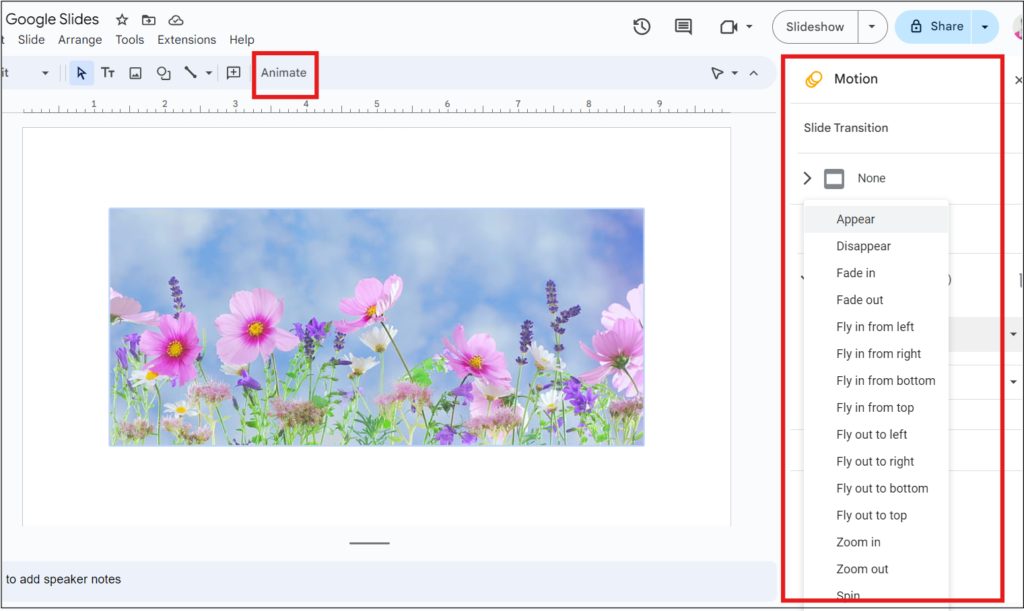
Step 4: Select Animation. The Motion pane will appear on the right.
Step 5: In the Motion pane, under Object Animations, click
Add Animation.
Animation provides various features like fade in, Fly in, Zoom in, Wipe in, Grow, Shrink, Spin, Bounce, Fade out, Fly out, Zoom out, and Wipeout. These features enhance your presentation and make the attention of your audience.
For example, in this guide, we use Fade in option.
Step 6: Click on Fade in and change the animation type to your liking.
Step 7: Click on Play to preview the animation.
Repeat these steps for any additional objects or text you want to animate on the slide.
Additional tips for adding animations in Google Slides
You can use the Animation order list to control the order in which the Animations play.
You can use the Trigger list to specify when the animation should start. For example, you can set the animation to start when you click on the object, when you enter the slide, or when the previous animation finishes.
You can use the Grouping feature to group multiple objects together so that they animate together.
You can use the Custom Animation option to create your custom animations.
Conclusion
Adding animations to your Google Slides templates can make them look more exciting and capture people’s attention. We hope this simple guide will help you to learn how to put animations on objects or text in Google Slides.
But remember, it’s essential to find the right balance between making your presentation visually appealing and getting your main message across. By using these dynamic elements effectively, you can create powerful presentations that leave a strong impression on your audience.