| Quick Tips to Use Screencastify with Google Slides ✅ Open your Google Slides presentation. ✅ Add the Screencastify extension to your Chrome browser. ✅ Click the Screencastify icon to start recording. ✅ Choose your microphone and camera (if needed). ✅ Select the entire screen or window with your slides. ✅ Click record, speak clearly, and present your slides. ✅ Stop the recording and save or share the video. |
Introduction
Screencastify is a simple tool that helps you record your screen and voice while showing your Google Slides. It’s like making a mini movie of your presentation.
In this blog, let’s learn how to use Screencastify the easy way, with plain steps and some helpful tips.
🎥 What is Screencastify?
Screencastify is a screen recording tool that works right in your Google Chrome browser. It lets you record:
- Your screen
- Your voice
- And even your face if you want!
This makes it perfect for explaining stuff, making tutorials, or recording lessons. And yes, it works great with Google Slides too.
📋 Why Use Screencastify with Google Slides?
Here are some good reasons:
- You can explain your slides like you’re in front of the class.
- Perfect for online classes or video tutorials.
- Helps students understand better with your voice and expressions.
- Saves time. Just record once and share it anytime.
🧑🏫 Step-by-Step: How to Use Screencastify on Google Slides
1. Add Screencastify to Chrome
- Open Google Chrome on your computer.
- Go to the Chrome Web Store: chrome.google.com/webstore.
- In the search box, type Screencastify and hit Enter.
- Click on the Screencastify – Screen Video Recorder extension from the list.
- Hit the “Add to Chrome” button.
- A small pop-up will appear—click “Add Extension.”
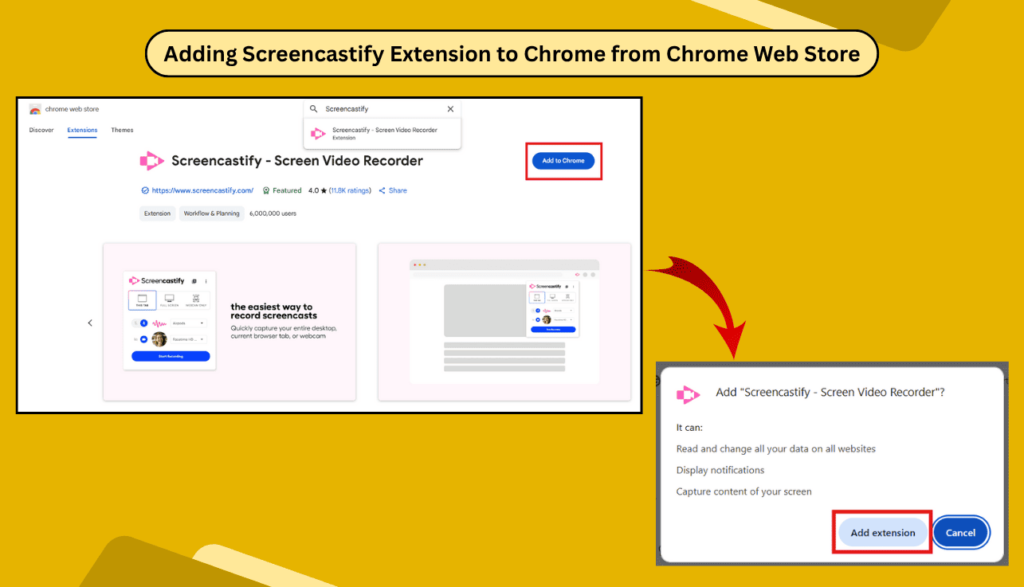
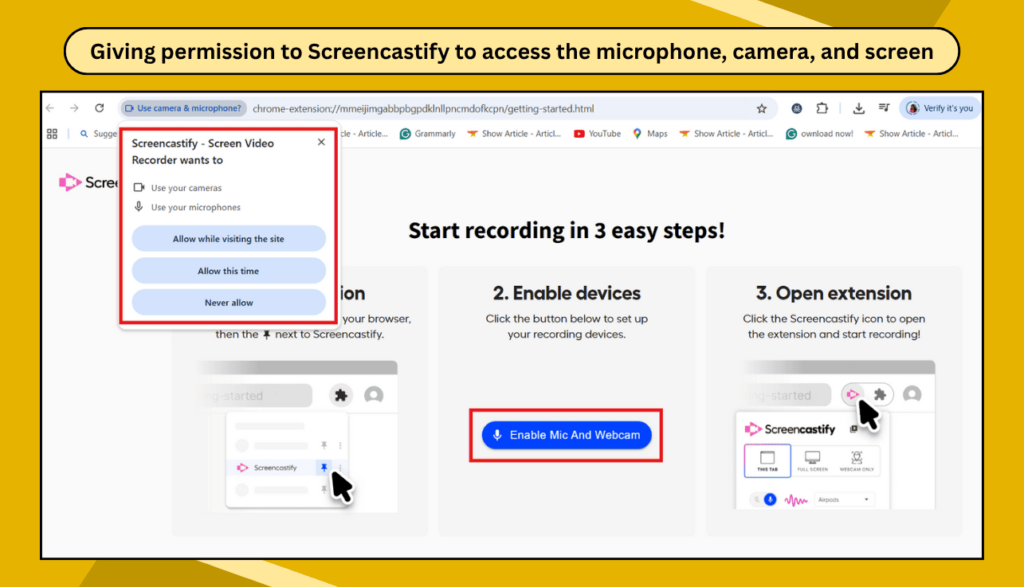
- Give permission to access your microphone, camera, and screen.
- You’re all set!
🔒 Tip: Screencastify is safe and free for basic use.
2. Open Your Google Slides
- Go to Google Slides and open the presentation you want to record.
- Make sure your slides are ready and in the right order.
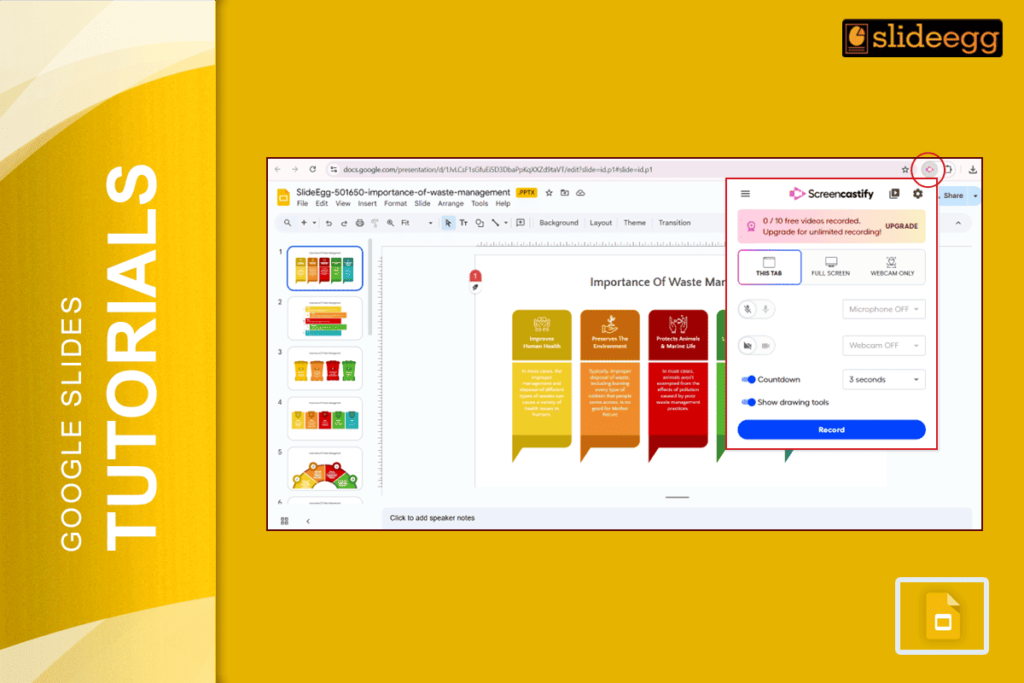
3. Click the Screencastify Icon
- You’ll see the Screencastify icon (a little pink arrow) on the top right of your Chrome browser.
- Click it to open the recording menu.
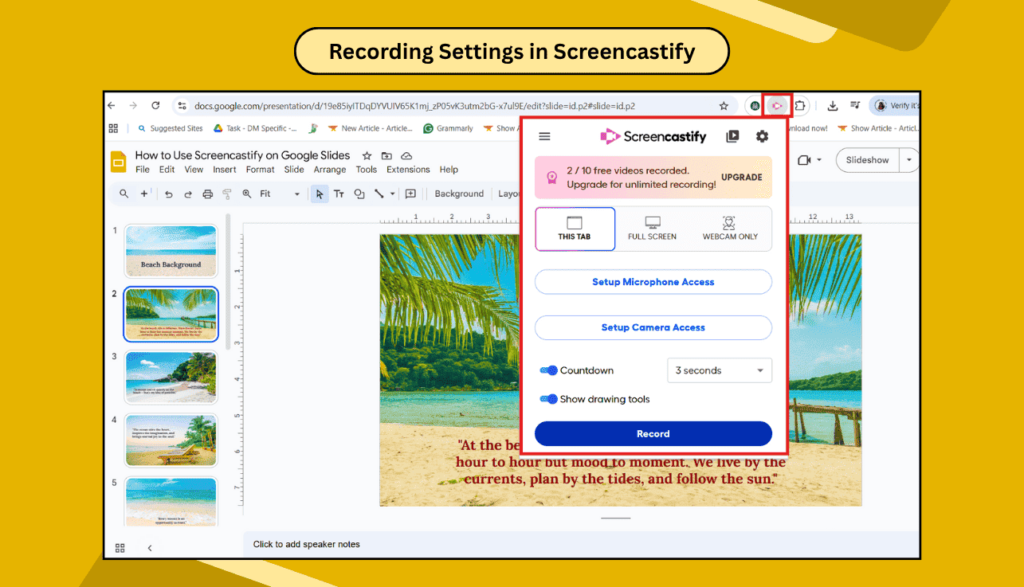
4. Choose Recording Settings
- Select:
- Browser Tab (for just Slides)
- Entire Screen (if you’ll switch apps)
- Turn on the Microphone to record your voice.
- Turn on the Camera if you want to show your face too.
5. Start Recording
- Hit the Record button.
- Start your Google Slides presentation (click “Present” in Slides).
- Speak slowly and clearly as you explain each slide.
🎙️ Pro Tip: Use the laser pointer in Google Slides to show things as you talk.
6. Stop and Save the Recording
- When you’re done, click the Screencastify icon again and hit Stop.
- Your video will automatically save in Google Drive or Screencastify Library.
- From there, you can share, download, or upload it to YouTube.
📌 Extra Tips for Better Recordings
- Practice once before the final recording.
- Keep slides simple and clear.
- Speak like you’re talking to a friend.
- Keep videos short (under 10 minutes works best).
- Use headphones with a mic for clear sound.
💡 Use Cases: Who Can Use This?
- Teachers: Record lessons, explain homework, send video instructions.
- Students: Submit projects, explain ideas, and give digital presentations.
- Trainers & Coaches: Share training videos.
- Anyone: Explain anything using slides and voice!
🧠 FAQs About Screencastify and Google Slides
Q: Is Screencastify free to use?
A: Yes! The basic plan is free and gives 10-minute recordings. You can upgrade for more time and features.
Q: Can I use Screencastify without a camera?
A: Absolutely. You can just record your slides and voice.
Q: Can I edit my video?
A: Yes. Screencastify has simple tools to cut, trim, or even add text to your video.
Q: Can I use this on a Chromebook?
A: Yes, Screencastify works great on Chromebooks, laptops, and desktops.
Q: Is it safe for kids?
A: Yes, it’s trusted by schools and used by thousands of teachers and students.
🎁 Final Thoughts
Using Screencastify on Google Slides is super simple. It helps you bring your slides to life with your voice and face. Whether you’re teaching a lesson, giving a report, or just sharing an idea — this tool makes it easy and fun.
No need to be tech-savvy. Just follow the steps, click record, and speak from the heart.