| Quick Steps to Save Google Slides as JPEG 📥Open your Google Slides presentation. 📥Click “File” in the top menu. 📥Select “Download” from the dropdown. 📥Choose the “JPEG image” option. 📥Pick the current slide or all slides. 📥Wait for the download to complete. 📥Find your JPEG files in the Downloads folder. |
Introduction
Google Slides keeps getting more popular every day. More than 2 billion people use Google Workspace tools worldwide. But here’s something many folks don’t know – you can turn your slides into picture files!
Sometimes you need your slides as images instead of a presentation. Maybe you want to share them on social media. Or put them in a document. Or send them via email without losing the format. Whatever your reason, saving Google Slides as JPEG is super easy once you know how.
Why Save Slides as JPEG Files?
JPEG files are everywhere. Every phone, computer, and website can open them. When you save your Google Slides as JPEG images, you get many benefits:
- Your slides become pictures that work on any device.
- You can use them in other apps easily.
- They load faster than big presentation files.
- Plus, people can view them without needing Google Slides.
Step-by-Step Guide to Convert Google Slides to JPEG
Let’s walk through the process together. It’s really simple:
Step 1: Open Your Google Slides
Go to your Google Slides presentation. Make sure it looks exactly how you want it. Check all text, images, and colors.
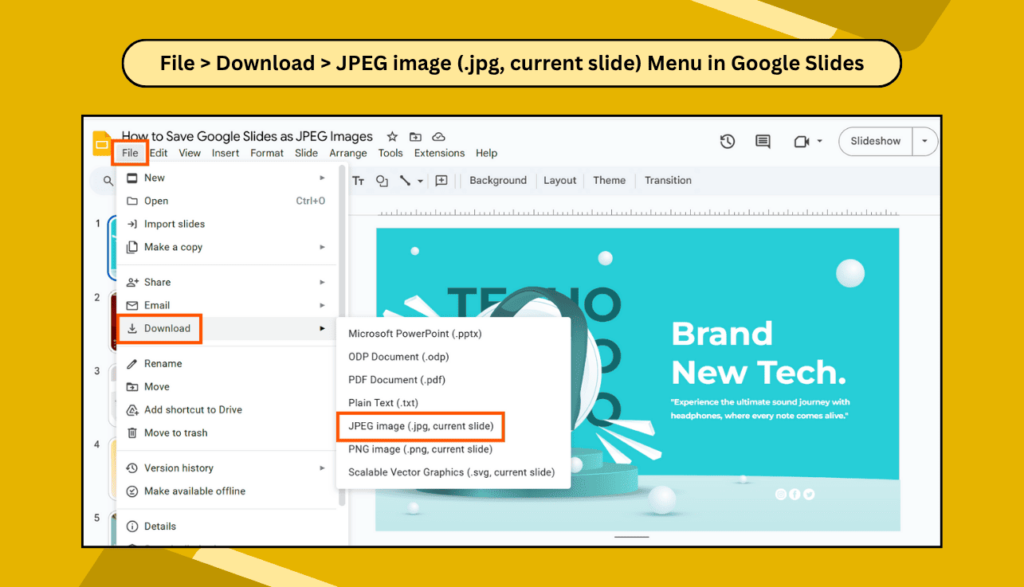
Step 2: Click on the File Menu
Look at the top left corner. Click on “File” in the menu bar.
Step 3: Choose Download Option
In the dropdown menu, find “Download” and click on it. You’ll see several format options.
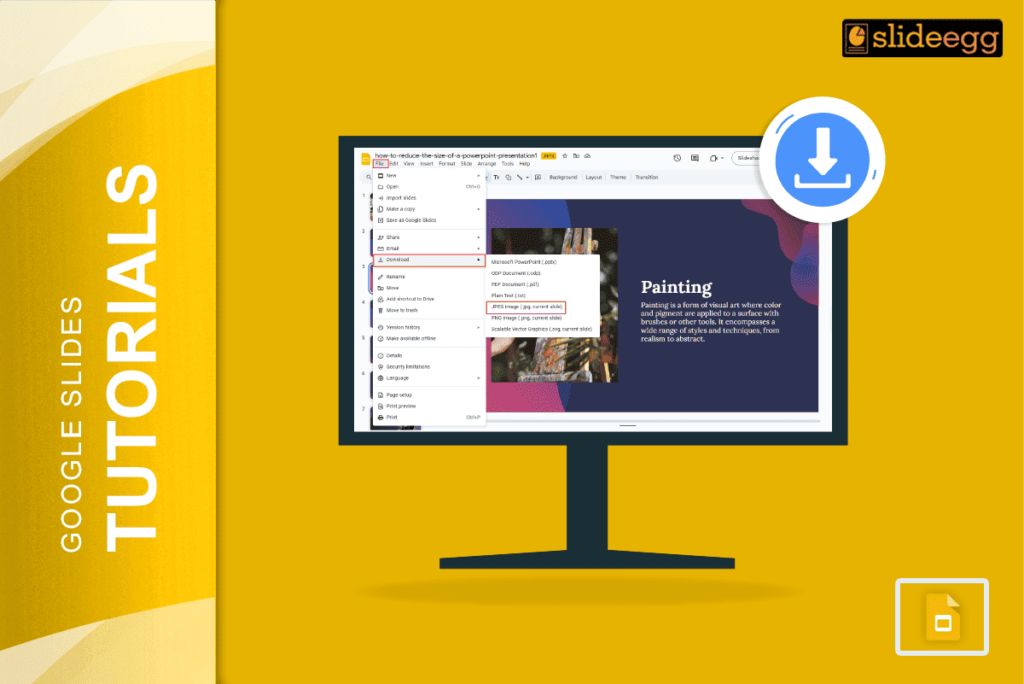
Step 4: Select JPEG Format
Click on the “JPEG image (.jpg, current slide)” option. This will download the slide you’re currently viewing.
Step 5: Wait for Download
Your browser will download the JPEG file. It usually goes to your Downloads folder.
Downloading All Slides as JPEG
Want to save all slides as JPEG files? You’ll need to do this one by one:
Go through each slide in your presentation. Click on the slide you want to save. Then follow the same steps: File > Download > JPEG image. This will save that specific slide.
Repeat this process for every slide you want as a JPEG file. Yes, it takes a bit more time, but you get perfect control over each image.
Tips for Better Quality Images
The quality of your JPEG files matters. Here are some tricks to make them look great:
- Keep your slides simple and clean. Too many small details might look blurry in JPEG format. Use bold fonts that are easy to read. Bright colors work better than pale ones.
- Make sure your images and graphics are high quality before adding them to slides. Low-quality pictures will stay low-quality in the JPEG version.
Using Mobile Devices
Saving slides as JPEG on mobile is different. The Google Slides mobile app doesn’t have a direct download as a JPEG image.
Here’s what you can do on your phone or tablet:
Take a screenshot of each slide while viewing it in the app. This creates an image file on your device. Make sure to view the slide in full-screen mode for the best quality.
Common Problems and Solutions
Sometimes things don’t work perfectly. Here are quick fixes for common issues:
- If the download doesn’t start, try refreshing the page. Clear your browser cache if files won’t download. Check if you have enough storage space on your device.
- Some slides might look different from JPEG files. This happens with special fonts or complex animations. Stick to standard fonts for better results.
Alternative Methods
There are other ways to get JPEG images from Google Slides. You can take screenshots of each slide. But the download method we covered is the fastest and gives the best quality results.
Best Uses for JPEG Slide Images
JPEG versions of your slides work great for many things:
- Share them on Facebook, Instagram, or Twitter.
- Add them to blog posts or websites.
- Include them in emails or documents.
- Use them for printed materials.
The possibilities are endless once your slides become regular image files.
Frequently Asked Questions
Q: Can I save Google Slides as PNG instead of JPEG?
A: Yes! When you click Download, you can choose PNG format too. PNG files are bigger but have better quality for graphics.
Q: Will my animations work in JPEG files?
A: No, JPEG files are still images. Animations and transitions won’t work. Each slide becomes one static picture.
Q: How big are the JPEG files?
A: It depends on your slide content. Simple slides create smaller files. Slides with lots of images make bigger JPEG files.
Q: Can I edit JPEG files later?
A: JPEG files are pictures, not presentations. You can edit them in photo apps, but it’s limited. Better to edit in Google Slides first.
Q: Do I need special software to open JPEG files?
A: No! Every computer, phone, and tablet can open JPEG files. They work everywhere without special apps.
Converting your Google Slides to JPEG images opens up new ways to use your presentations. Whether you’re sharing on social media, creating handouts, or building a website, JPEG versions of your slides give you more flexibility. Try it today and see how easy it is!