| Quick Tips: How to Remove Slide Transitions in Google Slides 📝 Open your Google Slides presentation. 📝 Click on the slide you want to edit. 📝 Click Slide > Transition from the top menu. 📝 Set the transition to “None”. 📝 Click “Apply to all slides” (if you want it for the whole deck). 📝 Done! Your slides now have no transition effects. |
Not every slide needs fancy effects. Sometimes, less is more. Too many transitions can make your presentation look messy or distracting. Keeping your slides clean and simple helps your message shine.
Did you know? Over 60% of people say they prefer simple and clear presentations over ones filled with animations. That’s where removing transitions comes in handy.
🧠 What Are Transitions in Google Slides?
A transition is the effect that happens when you move from one slide to another. It can fade, flip, or slide in. Sounds fun, right? However, if overused, it can make your presentation feel slow or unprofessional.
Let’s say you’re making a school project, a business pitch, or a tutorial. If you don’t need all those effects between your slides, it’s better to remove them.
🔧 Step-by-Step: Remove Transitions in Google Slides
Here’s how you can do it in just a few clicks:
✅ Step 1: Open Your Google Slides
Go to Google Slides, and open the presentation you want to edit.
✅ Step 2: Click on Any Slide
Pick any slide where you want to check or change the transition.
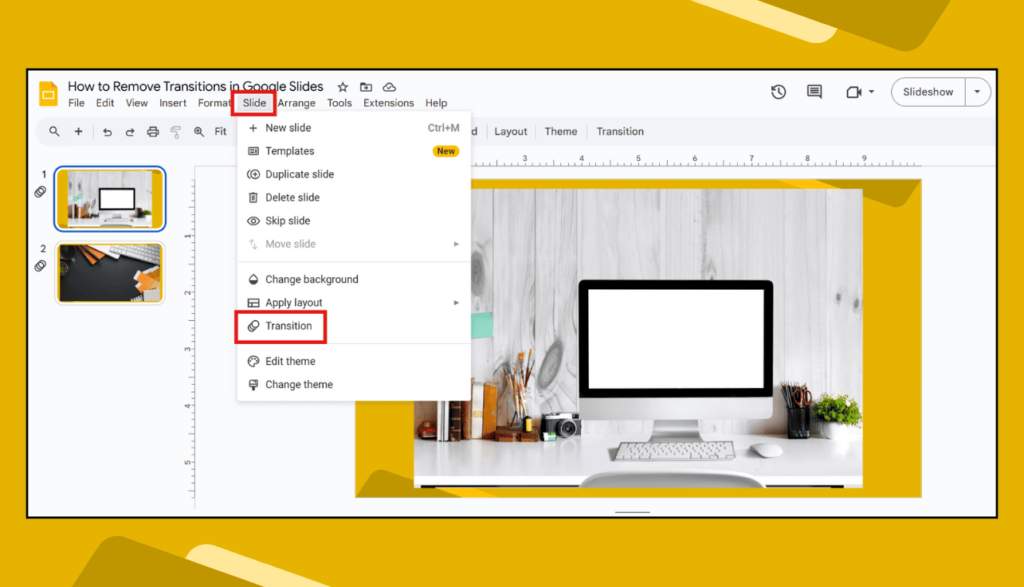
✅ Step 3: Go to “Slide” > “Transition”
On the top menu, click on Slide, then select Transition. A panel will appear on the right side of your screen.
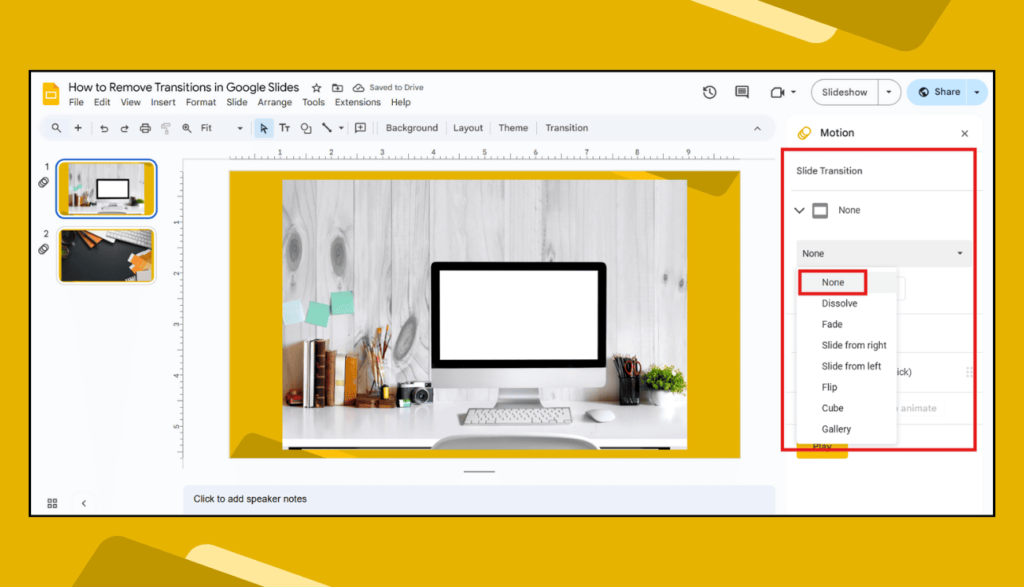
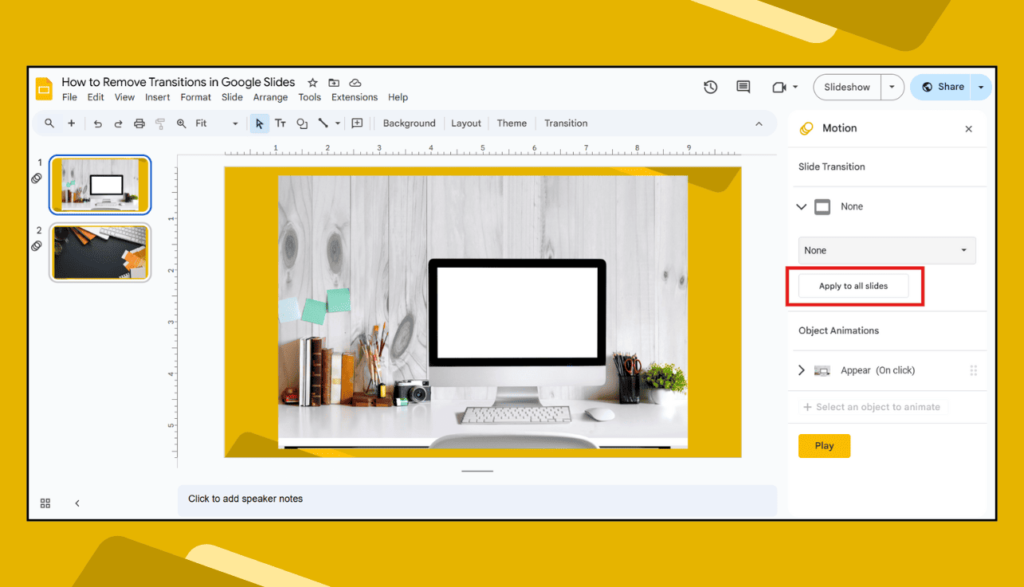
✅ Step 4: Set the Transition to “None”
Under the Slide transition section, click the dropdown menu and select “None.” This will remove the animation between slides.
✅ Step 5: Apply to All Slides (Optional)
Click the “Apply to all slides” button if you want to remove transitions from every slide in your deck. This saves time if you have many slides.
That’s it! You just made your Google Slides smoother and simpler.
🎯 Why Remove Transitions?
Removing transitions can help when:
- You want your slides to load faster.
- You’re making a serious or formal presentation.
- Your audience is young kids or seniors who may get confused by moving effects.
- You want a clean, minimal style.
- You’re printing slides or saving them as a PDF.
Less animation = less distraction.
📌 Tips to Keep in Mind
- Always preview your slides after removing transitions.
- If you want to remove animations on elements (like text or images), click on them and delete their animation from the same “Motion” panel.
- Removing transitions doesn’t delete your slide content. It only removes the effect between slides.
- Keep your presentation simple, clean, and easy to follow.
❓FAQs – Removing Transitions in Google Slides
Q1. Can I remove transitions from just one slide?
Yes! Just select that slide, go to “Slide > Transition,” and set it to “None.”
Q2. Will this delete my text or pictures?
No, it only removes the transition effect—not your content.
Q3. What’s the difference between transitions and animations?
Transitions happen between slides. Animations happen to things on the slide (like text or images).
Q4. Can I remove all transitions at once?
Yes. After setting one slide’s transition to “None,” click “Apply to all slides.”
Q5. Will this work on mobile?
No, the Google Slides mobile app has limited features. Use a laptop or desktop for best results.
Want to keep your slides clean and focused? Try removing transitions. It only takes a minute, but it can make a big difference.