| Quick Steps to Make a Google Slides View Only ✅ Open your Google Slides presentation ✅ Click the Share button (top-right corner) ✅ Under “General access,” choose “Anyone with the link” ✅ Change permission from Editor to Viewer ✅ Click Copy Link, then Done Now your slide is view-only for everyone with the link! |
Introduction
Google Slides is a great tool for creating and sharing presentations. But sometimes, you don’t want others to change your work. You just want them to look at your slides — not edit or delete anything. That’s when the “view only” setting comes in handy. Making a Google Slide view only is the best way to keep your file safe while still letting people access it.
Let’s go through the easy steps to do that. You don’t need to be a tech expert — anyone can do this.
🔍 What Does “View Only” Mean in Google Slides?
When you make a Google Slide “view only,” it means:
- Others can see your slides
- But they cannot edit, move, or delete anything
- They also can’t add comments or make changes
This is perfect when you want to share your work but keep full control over it.
📘 Step-by-Step: How to Make Google Slides View Only
🔹 1. Open Your Google Slides File
Go to Google Slides and open the presentation you want to share.
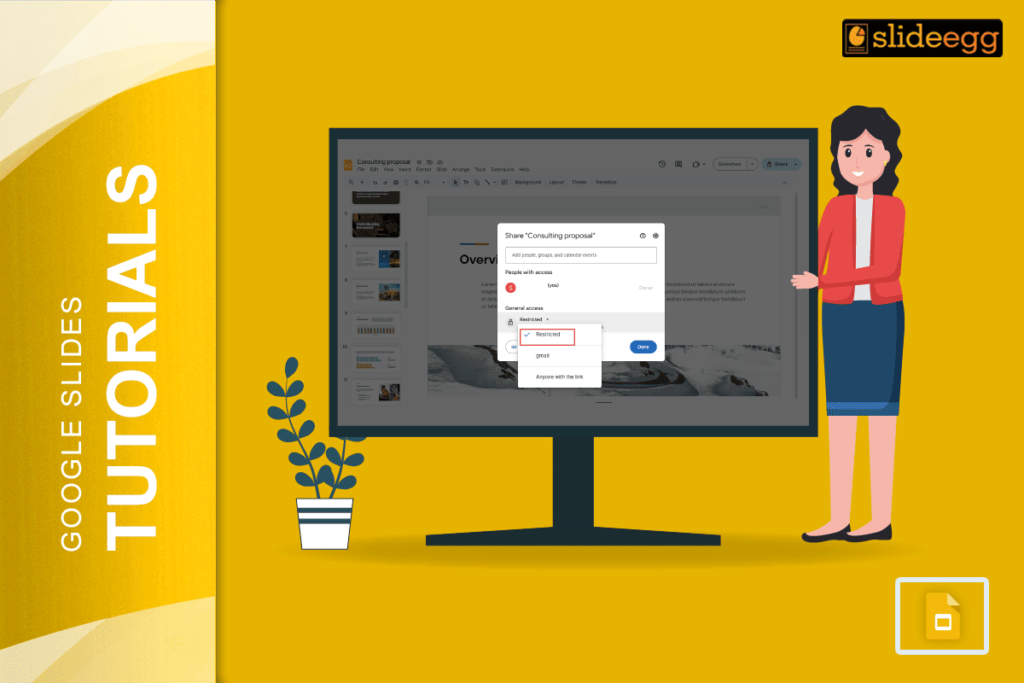
🔹 2. Click the “Share” Button
- Look at the top-right corner of your screen.
- You’ll see a “Share” button — click it.
- A pop-up will appear with the sharing settings.
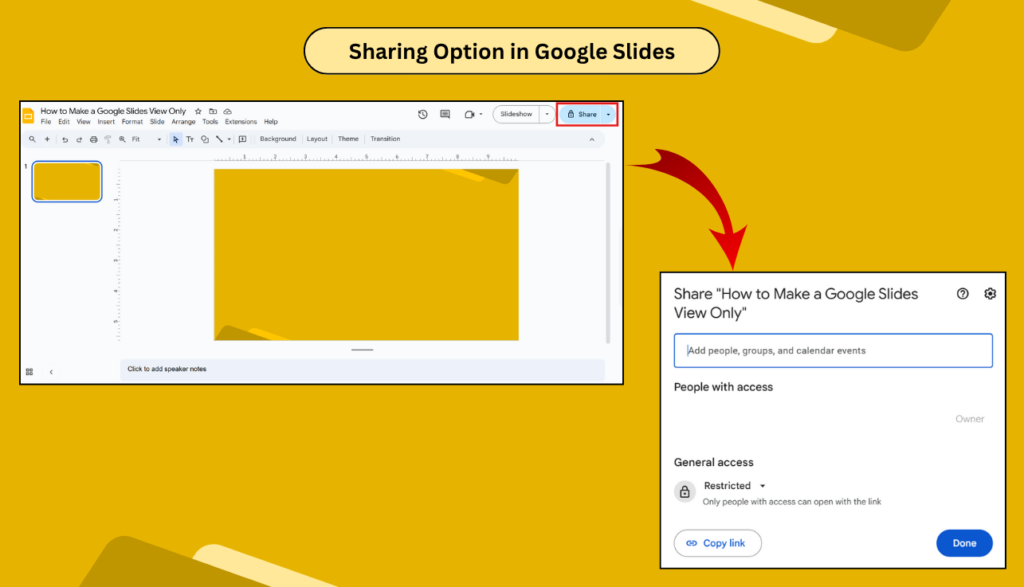
🔹 3. Set “General Access”
In the pop-up, look for a section called “General access.”
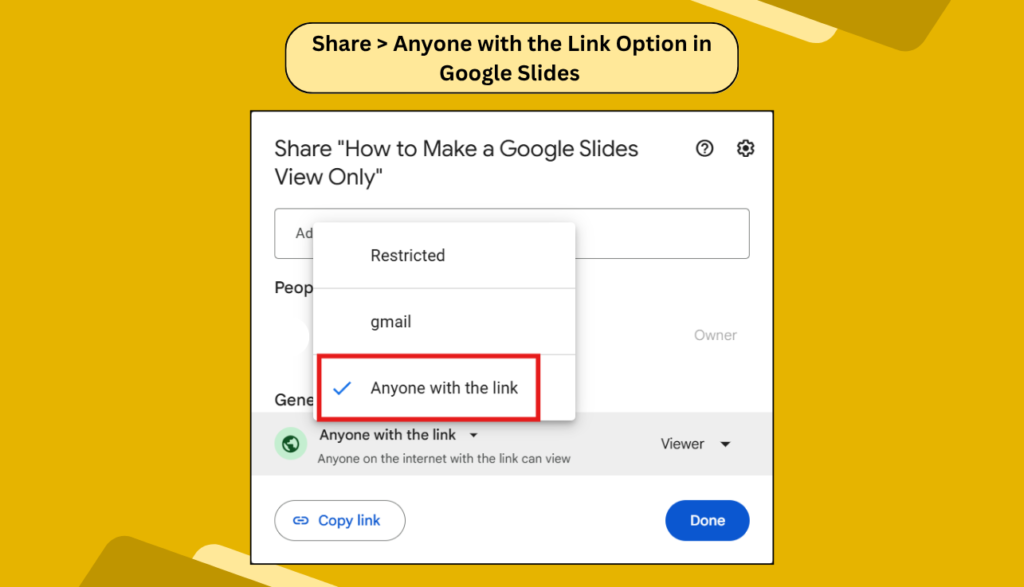
Click the dropdown that might say:
- Restricted
- Gmail
- Anyone with the link
If it’s on Restricted, click it and choose “Anyone with the link” so anyone with your shared link can open the slide.
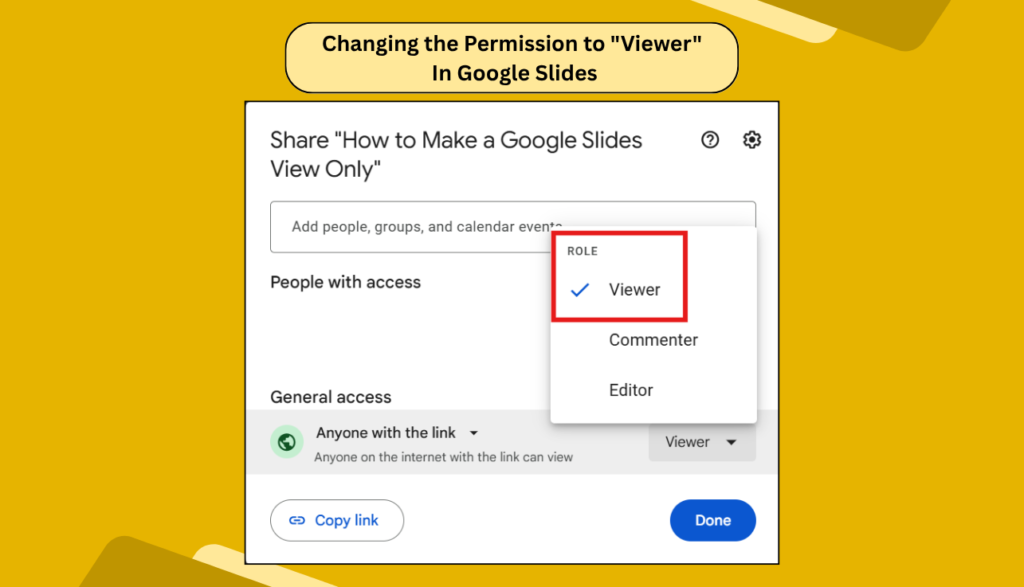
🔹 4. Change the Permission to “Viewer”
Next to the link setting, there’s a dropdown that may say:
- Editor
- Commenter
- Viewer
Click on that and select Viewer.
This will stop people from editing the slides.
🔹 5. Copy and Share the Link
Click the “Copy link” button. Then click “Done.”
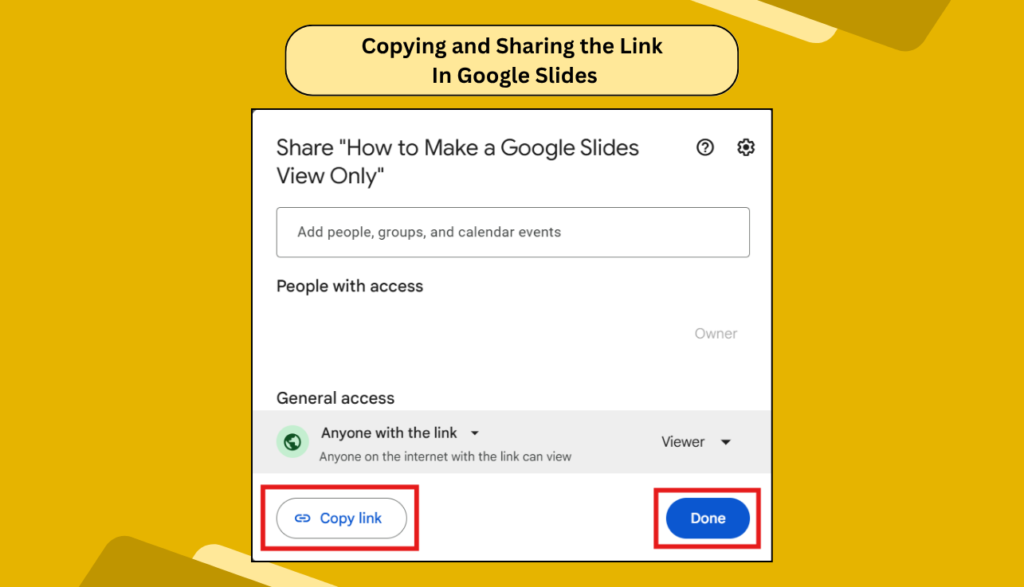
Now you can share the link anywhere — email, WhatsApp, website — and anyone who opens it will only be able to view the slide, not edit it.
📝 When Should You Use “View Only” in Google Slides?
Here are a few smart situations:
- You’re sharing a finished project with your teacher or boss
- You’re giving a public link for students or clients
- You want to show slides during a meeting, not let others change them
- You’re uploading slides to a website or social media
This feature is great when you want to protect your content.
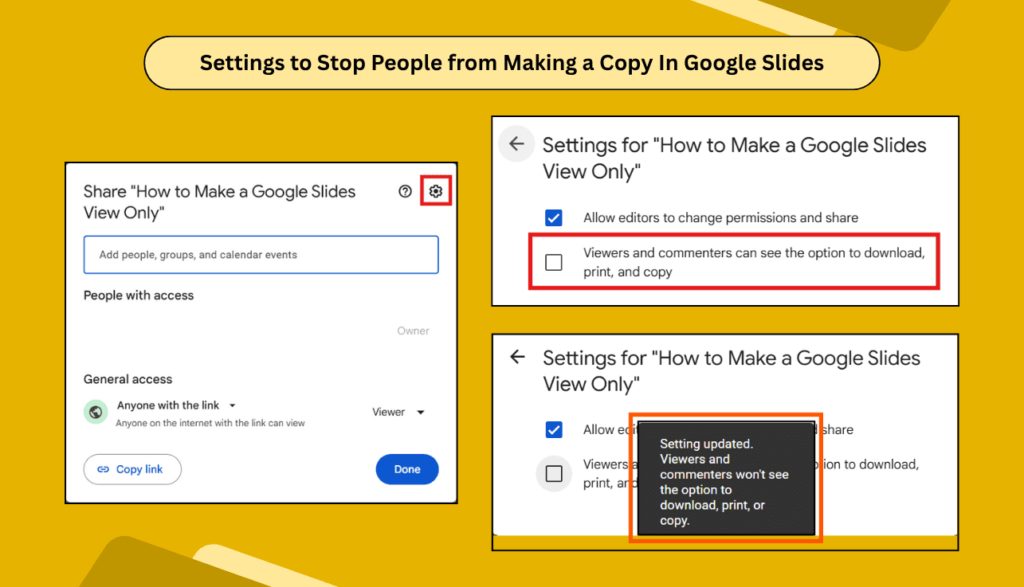
🔐 Extra Tip: How to Stop People from Making a Copy
Even when a file is view-only, people can sometimes make a copy or download it. If you want to stop that too:
- Click Share > Settings icon (⚙️)
- Uncheck the box that says “Viewers and commenters can see the option to download, print, and copy”
- Click Done
Now, your content is safer and harder to copy.
✨ Benefits of Making Slides View Only
- Protects your original work
- Prevents accidental edits
- Keeps formatting and content intact
- Gives you full control
- Great for classroom, business, or public sharing
It’s the perfect balance between sharing and staying in control.
❓ FAQs: Google Slides View Only
Q1: Can people still comment on a view-only slide?
No. View-only means no edits and no comments.
Q2: Can I stop someone from copying my slides?
Yes. In the share settings, uncheck the download/copy box under the gear icon.
Q3: Can I change back to editing later?
Absolutely. Just go back to the Share settings and change “Viewer” to “Editor.”
Q4: Will people need a Google account to view?
Not if you choose “Anyone with the link.” That lets anyone open it — no sign-in needed.
Q5: What if I only want one person to view it?
Set the access to “Restricted,” add their email, and give them Viewer permission.
Final Thoughts
Making a Google Slides view only is a simple but powerful way to share your work without the risk of others changing it. This feature keeps your presentations safe and polished while still making them easy to access.
It only takes a few clicks — and it’s worth it.
If you often share your work online, saving your slides as view-only can save you from edits, confusion, and lost content.