Introduction
Google Slides offers a fantastic way to create engaging and dynamic presentations. But what if you want to take your slides beyond static visuals? Imagine transforming a simple image into an interactive element that, with a single click, takes your audience to a relevant website, another slide within your presentation, or even a specific document. This isn’t just a fantasy – it’s incredibly easy to achieve by making images clickable!
In this comprehensive guide, we’ll walk you through the simple steps to create clickable images in Google Slides, empowering you to build more engaging and informative presentations that capture attention and drive action.
Why Make Images Clickable in Your Google Slides?
Before we dive into the “how,” let’s quickly explore the “why.” Adding clickable images can significantly enhance your presentations by:
- Boosting Interactivity: Transform passive viewing into active engagement.
- Providing Additional Information: Link to external resources like websites, articles, or videos for deeper dives.
- Improving Navigation: Create custom navigation buttons or a clickable table of contents using images.
- Saving Space: Instead of cluttering a slide with text links, embed them cleanly within an image.
- Enhancing Visual Appeal: Use visually appealing images as call-to-action elements.
- Creating Engaging Quizzes or Games: Design interactive elements for educational or team-building purposes.
Step-by-Step: Making an Image Clickable in Google Slides
This process is simple and can be applied to any image you’ve inserted into your Google Slides presentation.
Step 1: Open Your Google Slides Presentation
First, open the Google Slides presentation where you want to add a clickable image. Make sure you’re logged into your Google account.
Step 2: Insert or Select Your Image
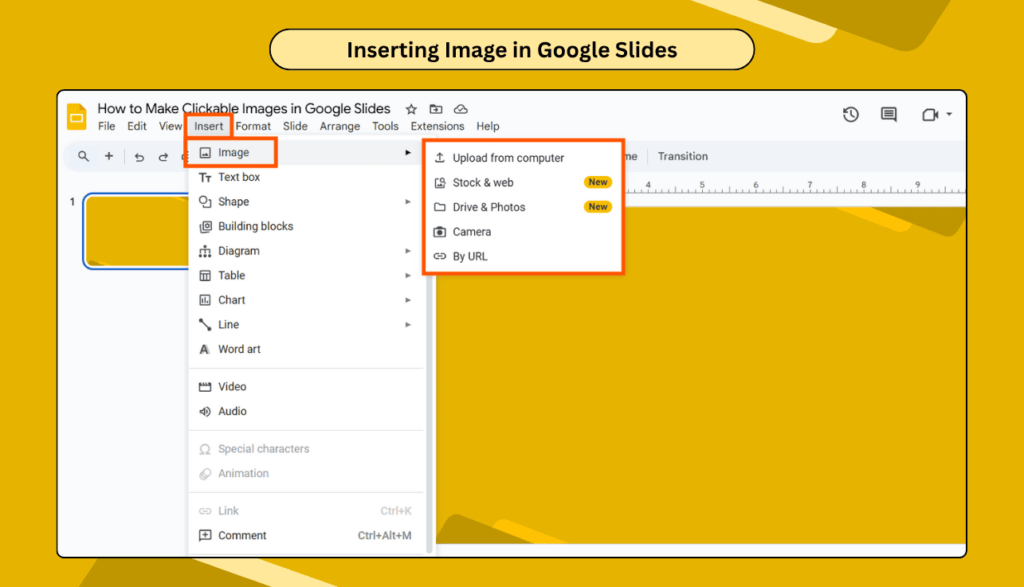
If you haven’t already, insert the image you wish to make clickable onto your slide. You can do this by going to Insert > Image and choosing your desired source (Upload from computer, Search the web, Drive, Photos, By URL, or Camera).
Once the image is on your slide, click on it once to select it. You’ll see a blue border appear around the image, indicating it’s selected.
Step 3: Access the “Insert Link” Option
There are a few convenient ways to bring up the “Insert link” dialogue box:
- Method A: Using the Toolbar Icon (Recommended for Clarity) Look for the chain-link icon (🔗) in the toolbar at the top of your Google Slides interface. This is typically found near the formatting options. Click on it.
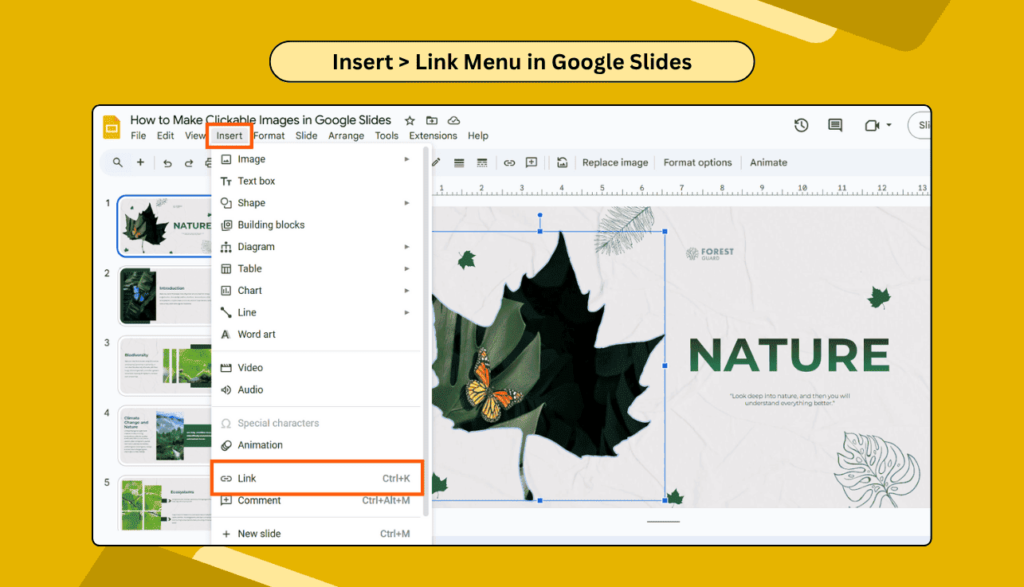
- Method B: From the Menu. Click “Insert” > “Link” Menu to get the linking option.
- Method C: Using Keyboard Shortcut. For a quicker approach, with the image selected, press Ctrl + K (on Windows) or Cmd + K (on Mac).
Step 4: Enter Your Link Destination
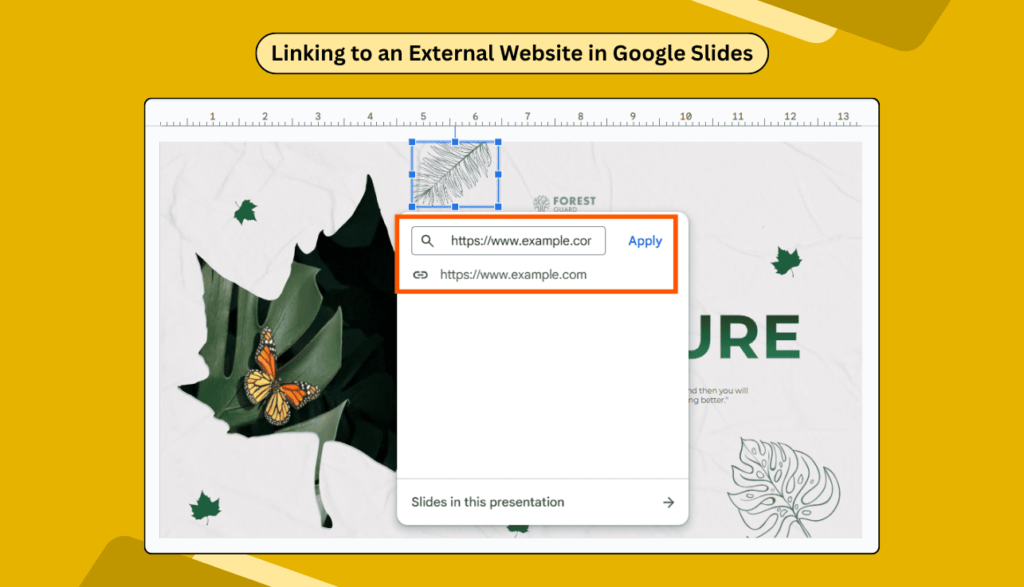
Now, the “Insert link” dialogue box will appear. Here, you have several options for where your clickable image will lead:
- Link to an External Website: In the text field provided, type or paste the full URL of the website you want to link to (e.g., https://www.example.com).
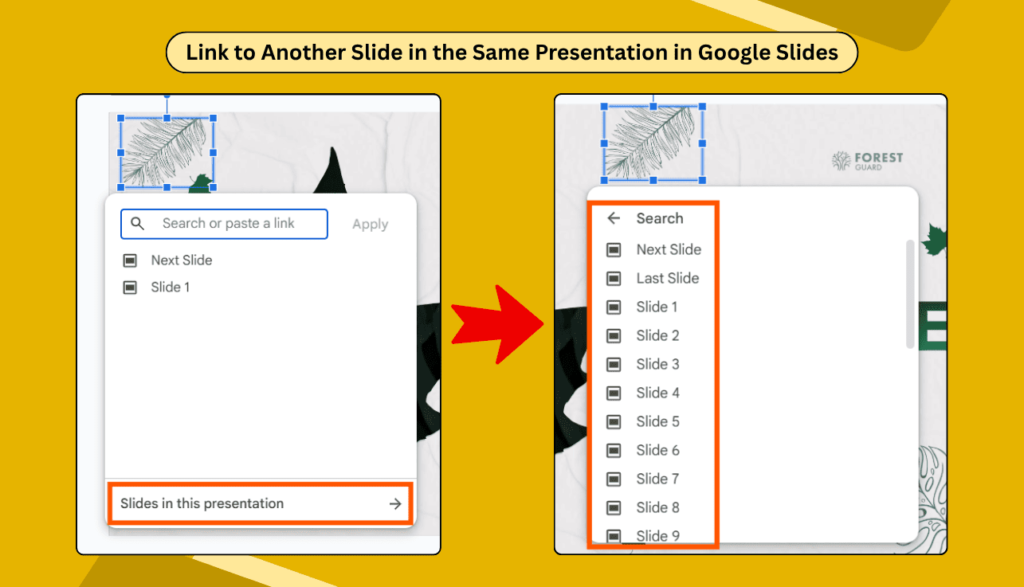
- Link to Another Slide in the Same Presentation: If you want the image to navigate to a different slide within your current presentation, click on “Slides in this presentation.” A dropdown menu will appear, allowing you to choose a specific slide by its number or title (e.g., “Next slide,” “Previous slide,” “Slide 3: Our Products”). This is excellent for creating interactive menus or “jump to” sections.
- Link to a Document in Google Drive: You can also link to a Google Doc, Sheet, PDF, or any other file stored in your Google Drive. First, ensure the file’s sharing settings allow public access or access to “anyone with the link.” Then, copy the shareable link from Google Drive and paste it into the URL field in Google Slides.
Step 5: Click “Apply.”
Once you’ve entered your desired link, click the blue “Apply” button. Your image is now clickable!
How to Test Your Clickable Image
It’s crucial to test your links to ensure they work correctly.
- Hover over the image: In edit mode, if you hover your mouse cursor over the image, a small box will appear showing the linked URL. You can click on this box to test the link directly.
- Enter “Present” mode: For the best test, switch to “Present” mode (click the “Present” button in the top right corner). Then, click on your image. It should take you to the linked destination.
How to Edit or Remove a Clickable Image Link
Mistakes happen, or plans change! Here’s how to modify or delete a link from an image:
- Select the linked image.
- Click the chain-link icon (🔗) in the toolbar again. Alternatively, right-click the image and select “Link.”
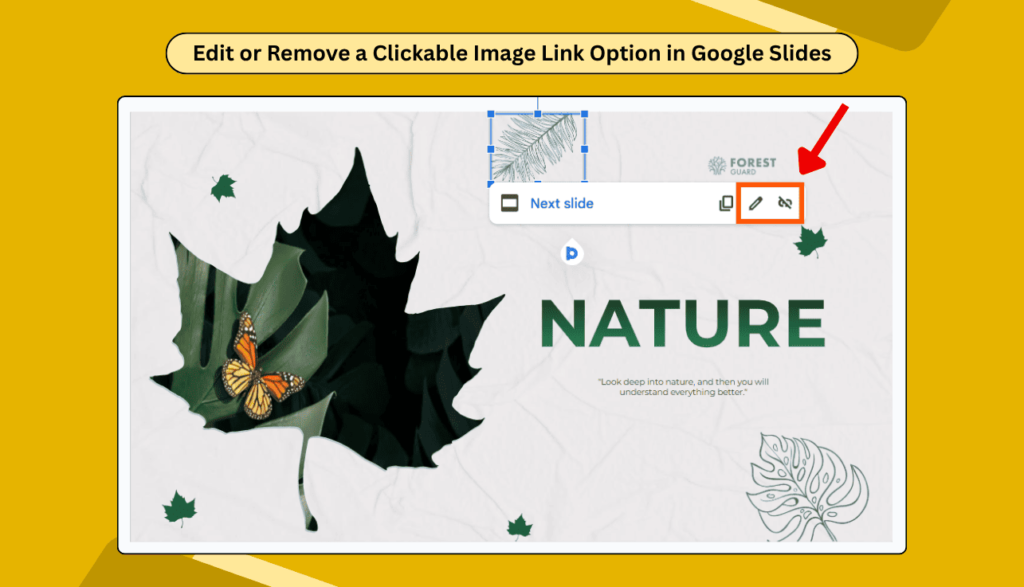
- In the dialogue box that appears, you’ll see options to:
- “Edit link” (pencil icon): Click this to change the destination URL or slide.
- “Remove link” (broken chain-link icon): Click this to completely remove the hyperlink from the image.
Pro Tips for Optimal Clickable Images
- Clear Call to Action: While the image is clickable, consider adding a subtle text overlay or a small icon (like a “click here” arrow) to guide your audience. This helps with accessibility and user experience.
- Relevant Imagery: Use images that are contextually relevant to the link’s destination. Don’t link a picture of a cat to a sales page for industrial machinery!
- Test All Links: Before your final presentation, rigorously test every single clickable image to avoid embarrassing broken links.
- Consider Accessibility: For users who may not see or click images, ensure critical information linked via images is also available through alternative text or other means.
- Don’t Overdo It: Too many clickable images on one slide can be overwhelming. Use them strategically to enhance, not distract.
Conclusion
Making images clickable in Google Slides is a powerful yet simple feature that can significantly elevate your presentations. By following these easy steps, you can create dynamic, interactive, and engaging slides that truly captivate your audience and effectively convey your message. Start transforming your static images into interactive gateways today!
Frequently Asked Questions (FAQs)
Q1: Can I link an image to a specific part of a Google Doc or Sheet, like a bookmark?
A1: Google Slides primarily links to the entire document or a specific slide. To link to a specific section within a Google Doc, you would need to create a bookmark within that Google Doc and then use the bookmark’s direct shareable URL as your link.
Q2: Will a clickable image work when I download the Google Slides presentation as a PDF or PowerPoint?
A2: Yes, typically, hyperlinks on images (and text) in Google Slides will be preserved when you download the presentation as a PDF. When downloaded as a PowerPoint (.pptx), the links usually convert and remain functional, but it’s always best to test them in the new format.
Q3: Can I add multiple links to different parts of a single image?
A3: Google Slides does not natively support “image maps” (where different regions of one image are linked to different destinations). However, a workaround is to place transparent shapes over different areas of your image and then hyperlink those shapes individually. Make the shape’s fill and border transparent for a seamless effect.
Q4: Why is my clickable image not working in Google Slides?
A4: Here are some common reasons:
- You might not have clicked “Apply” after entering the link.
- The URL you entered might be incorrect or broken. Double-check for typos (e.g., http:// vs https://).
- The linked Google Drive document might not have the correct sharing permissions.
- You might be in edit mode; links only become fully active in “Present” mode.
Q5: Can I change the color or appearance of the image when it’s linked?
A5: Google Slides doesn’t automatically change the image’s appearance (like adding an underline or color highlight) when it’s linked, unlike text. The visual cue is usually the mouse cursor changing to a hand icon when hovered over the clickable area. If you want a visual indicator, consider adding a small icon or text box next to or on top of the image.