Icons are tiny visual powerhouses that can add clarity, personality, and professionalism to your Google Slides templates. But how do you get them in there and make them look just right? Fear not, fellow presenter! This guide will walk you through the simple process of adding and editing icons in Google Slides.
Method 1: Using the Insert Icons Add-on
Install the Add-on:
- Go to your Google Slides presentation.
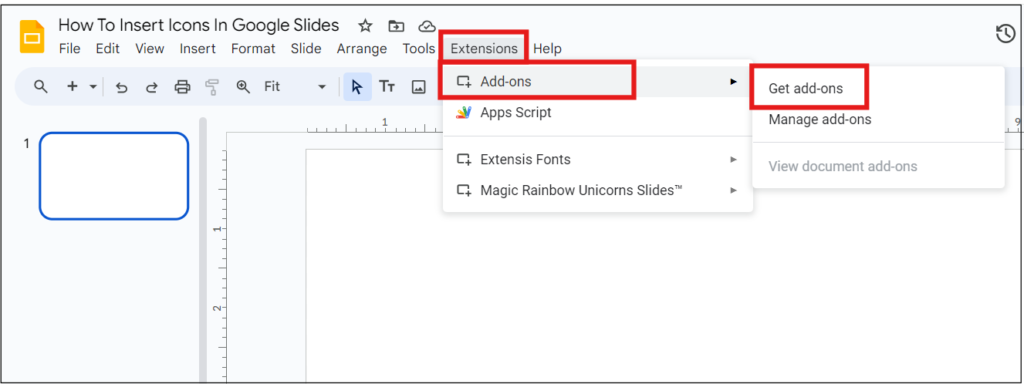
- Click on Extensions > Add-ons > Get add-ons.
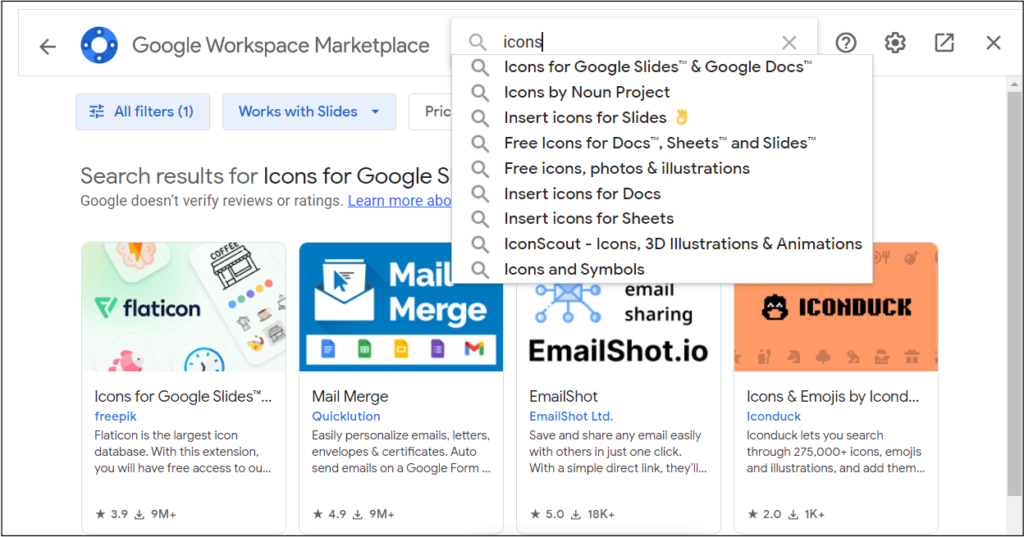
- In the Add-ons window, type “Icons for Slides & Docs” in the search field.
- When you find it in the results, click Install and follow the instructions to authorize the necessary permissions.
Start the Add-on:
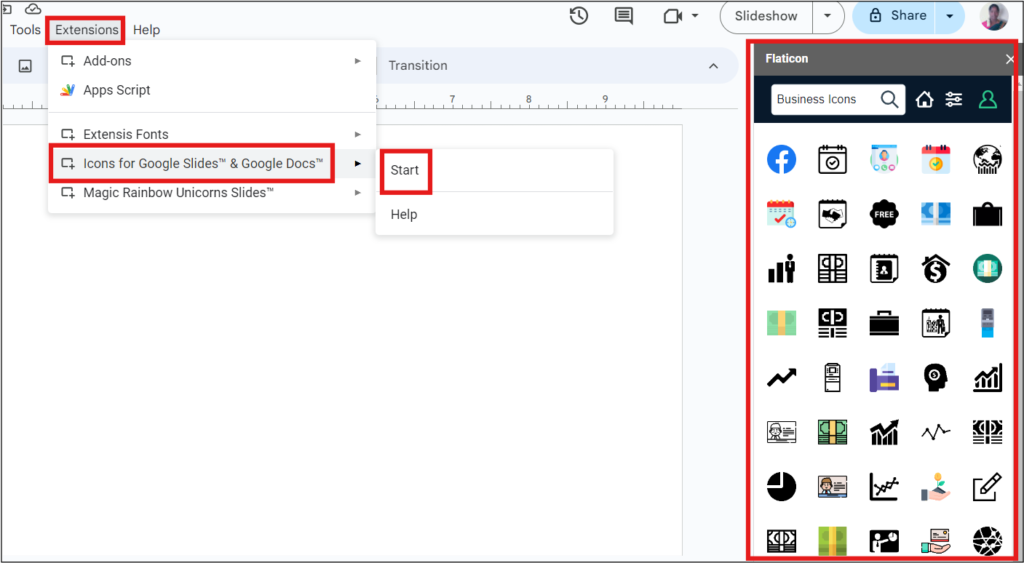
- Click on Extensions > Icons for Slides & Docs > Start.
Search for Icons:
- Use the search bar to find the icons you need.
Insert the Icon:
- Click on the icon you want to add to your slide.
Method 2: Using Google Images
Go to Insert:
- In your slide, go to the Insert tab in the menu.
- Choose Image > Search the web.
Search for Icons:
- Type in the type of icon you need, such as “business icon”, “e-mail icon”, etc.
- Select the icon and click Insert.
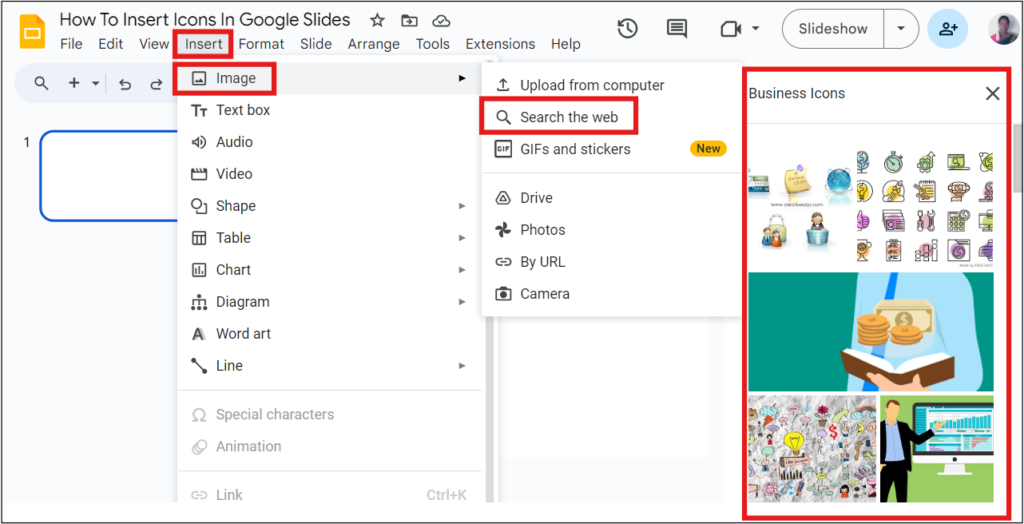
Now you can easily add icons to enhance your presentations!
After that, you can customize the icon to match your presentation’s look and feel using Google Slides’ customization options.
Customize Your Icon
Now that your icon is on the slide, let’s make it shine! To edit the icon, simply click on it. You’ll see small blue handles appear around it, letting you know it’s ready for your customization touch.
Resize: Want to make your icon bigger or smaller? Click and drag any of the blue handles to resize it to your liking.
Feeling playful? Click and drag the green rotation handle at the top to rotate your icon and add a touch of dynamism. Align the icon perfectly for your specific needs.
Enhance Your Icon: Don’t like the default color? No problem! Click on the Fill color icon (it looks like a paint bucket) in the toolbar at the top. Choose a new color from the palette or enter a specific color code for ultimate personalization.
Format Frenzy (Optional): Feeling fancy? The Format options panel appears on the right side of the screen when your icon is selected. Here you can add effects, borders, and more to make your icon truly stand out.
Icon Replacement (Optional): Change your mind about the icon. No worries! Select the existing icon and press the “Delete” key on your keyboard. Then, follow steps 2-4 to insert a new icon of your choice.
Slide Harmony: Move your icon around the slide by clicking and dragging it to the desired position. Use the alignment tools in the toolbar at the top to make your icon perfectly aligned with other elements on the slide.
Save Your Work: Once you’re happy with your icons and their placement, don’t forget to save your presentation. Click on the File menu and select Save or Save as.
With these easy steps, you’re now a Google Slides icon pro! No more boring presentations filled with walls of text. Lend your slides some personality and watch your audience perk up and take notice. Who knows, you might even get some compliments on your newfound design skills.


