| Quick Tips: How to Change Margins in Google Slides (In Short) ✅ Google Slides doesn’t have a built-in margin setting like Word. ✅ You can adjust margins manually using text boxes and rulers. ✅ Turn on rulers: Click View > Show ruler. ✅ Use guides or rulers to drag and set your own margins. ✅ Add a text box and move it inside your custom margins. ✅ That’s it! You’ve created your own margins. |
Google Slides doesn’t have an official “margin” setting. But, you can still control margins on your slides. It’s just a little DIY. Think of it like setting up your own space on the slide. And of course, it’s easier than you think.
Let’s break it down in a way that’s so simple. It works great if you’re prepping for a class or meeting, or just making things look neat!
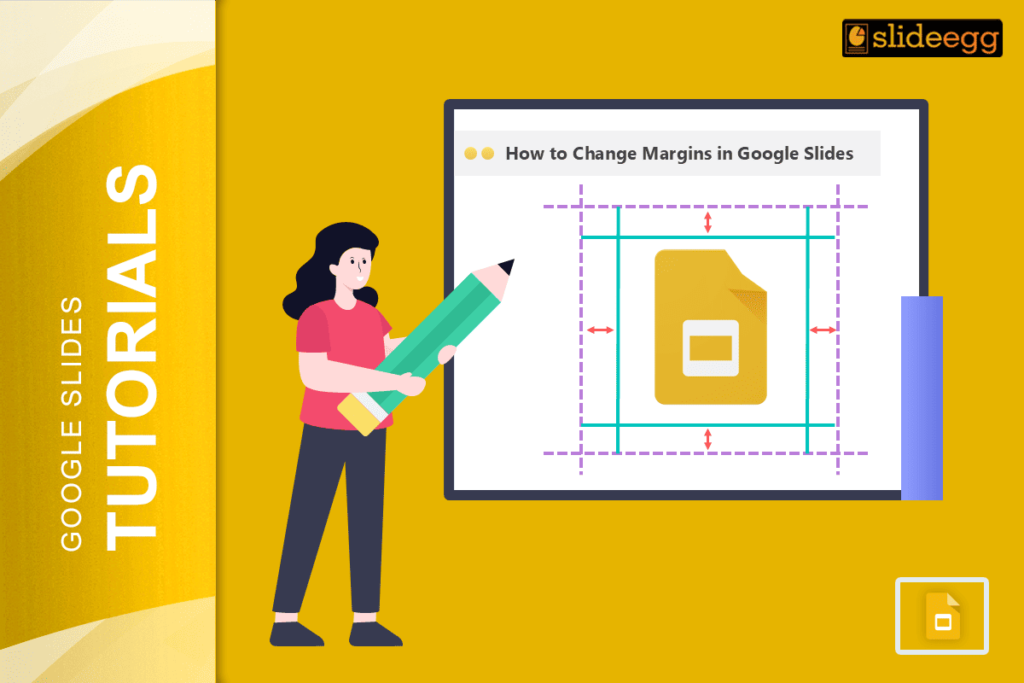
📌 What Are Margins in Google Slides?
Margins are just the blank space around your text or images. They help make everything look clean and not too crowded.
In Google Docs, margins are easy to set. In Slides, we do it manually. But the result? Still great.
🛠️ How to Change Margins in Google Slides – Step-by-Step
✅ Step 1: Open Your Google Slides File
Head over to Google Slides, and open the slide you want to edit.
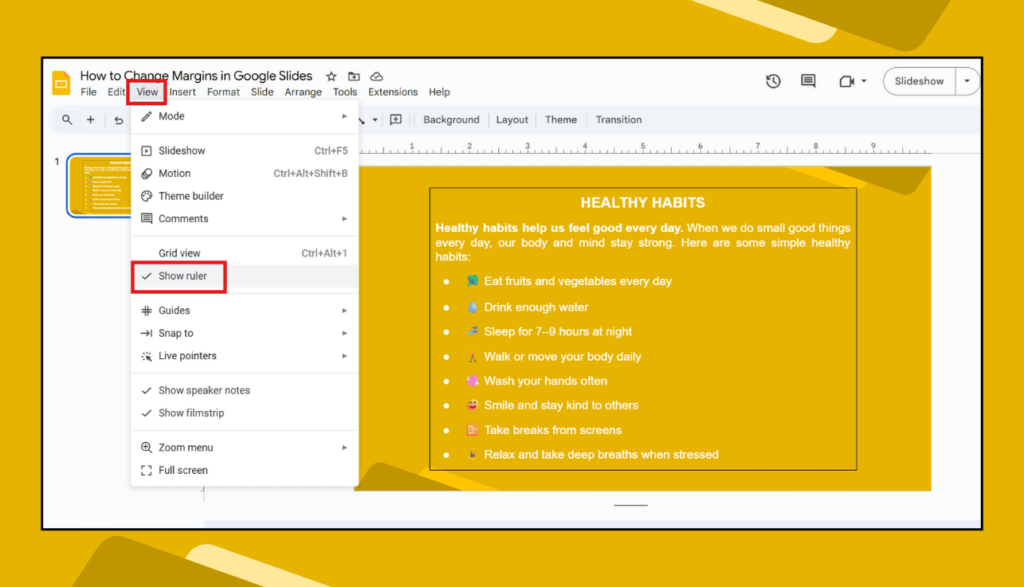
✅ Step 2: Turn on the Ruler
- Click “View” at the top menu.
- Then click “Show ruler”.
- Now, you’ll see a ruler at the top and left side of your slide.
✅ Step 3: Use Guides (Optional but Super Useful)
- Click View > Guides > Show guides.
- These help you line things up neatly, like invisible borders.

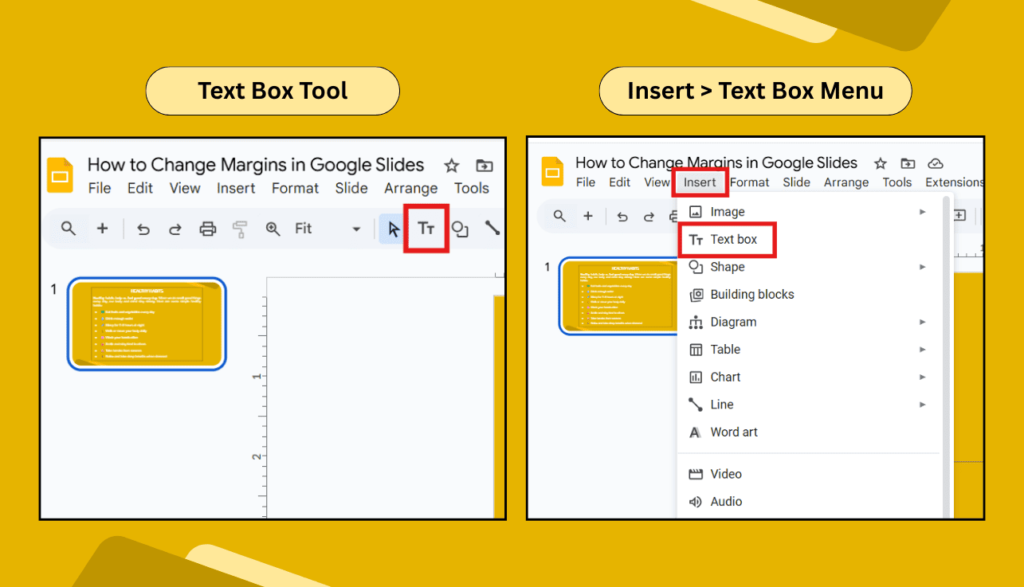
✅ Step 4: Add a Text Box
- Click on the Text Box icon (it looks like a “T” in a box)
- Or click on Insert > Text box.
- Draw the box inside your slide. Don’t go all the way to the edge.
✅ Step 5: Adjust Text Box to Create Margins
- Drag the edges of the text box inward.
- Use the ruler as your guide – for example, leave 1 inch on each side.
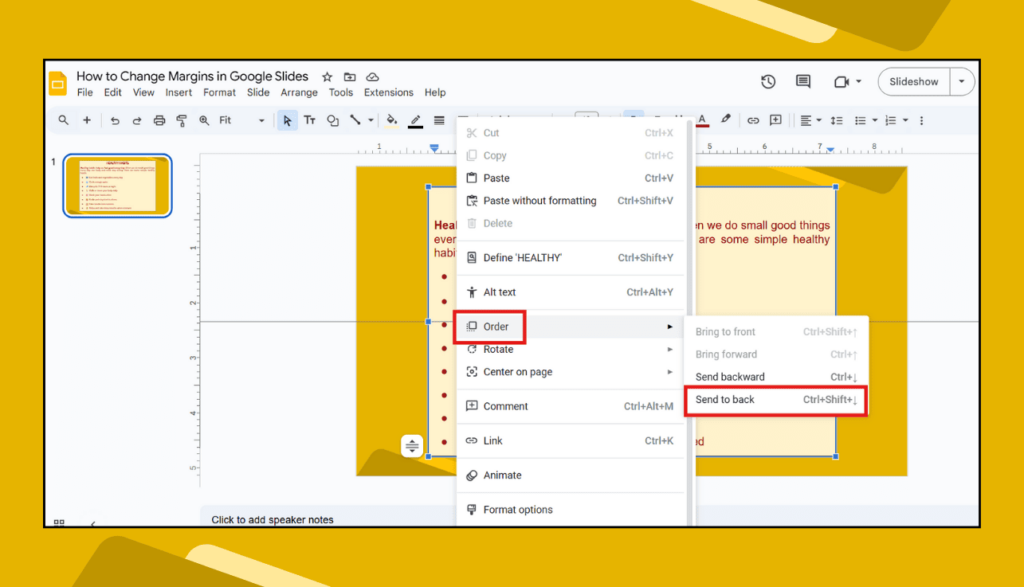
✅ Step 6: Lock It In (Optional)
Want to make sure no one messes it up?
- Right-click on the text box > Order > Send to back, or just duplicate the layout.
🧠 Pro Tip: Use Master Slide for Consistent Margins
If you want the same margins on every slide:
- Go to Slide > Edit theme, and add your margin box there.
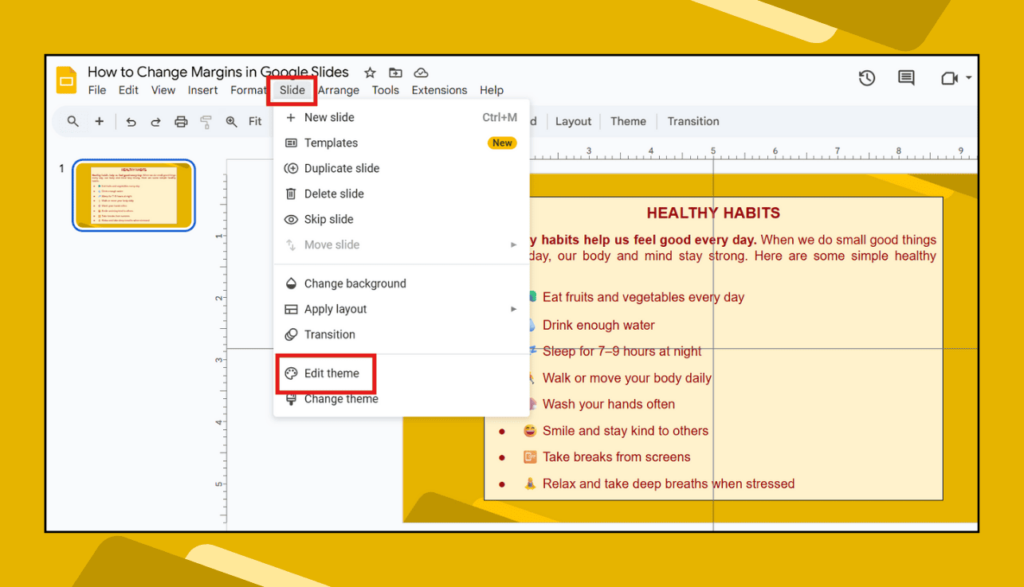
Now every new slide will follow the same layout. Clean and simple!
🤓 Why Margins Matter in Google Slides
- They make your content easier to read.
- They help your slides look more professional.
- They avoid text getting cut off when presenting or printing.
- They give your work a clean, polished look.
❓ FAQs About Changing Margins in Google Slides
Q1: Can I set default margins in Google Slides?
Nope. Google Slides doesn’t have default margin settings like Google Docs. But you can use guides or edit the master slide to copy the setup.
Q2: Why don’t my margins stay in place?
If you add new text boxes or change the layout, things can shift. Stick to using the same layout or master slide to keep things tidy.
Q3: Can I print slides with margins?
Yes! When you adjust the text boxes properly, your printed slides will reflect the space you’ve set up. Just preview before printing.
Q4: Is there an add-on or extension to fix margins?
Not really for margins. But layout or template tools can help make margin-like designs easier.
Q5: How do I make sure my text doesn’t touch the edges?
Simple – just drag your text box inward a little and check the rulers. Give at least 1 inch from each side for safe spacing.
If you’re someone who likes things neat and tidy (and who doesn’t?), setting up your own margins in Google Slides is totally worth the two extra minutes.