| Quick Steps to Bring an Image to the Front in Google Slides Short on time? Here’s a quick guide: 1️⃣ Click on the image you want to move. 2️⃣ Right-click and select “Order” from the menu. 3️⃣ Choose “Bring to Front” to place it above everything else. 4️⃣ Select “Bring Forward” to move it up just one layer. Done! Your image is now on top. Want more details? Keep reading! |
Introduction: Why Image Positioning Matters
Ever added an image to Google Slides, only to find it stuck behind text or another picture? Frustrating, right? Google Slides doesn’t have fancy design tools like Photoshop, but you can still layer images and text like a pro with a few simple tricks!
Understanding how to bring an image to the front in Google Slides can help you create clean, professional, and visually appealing slides. Whether you’re designing a school project, a business presentation, or a creative infographic, knowing how to adjust image layering is a game-changer.
Let’s dive into the simple steps to move images forward or backward in Google Slides.
1. How to Bring an Image to the Front in Google Slides
Bringing an image to the front is super easy. Here’s how:
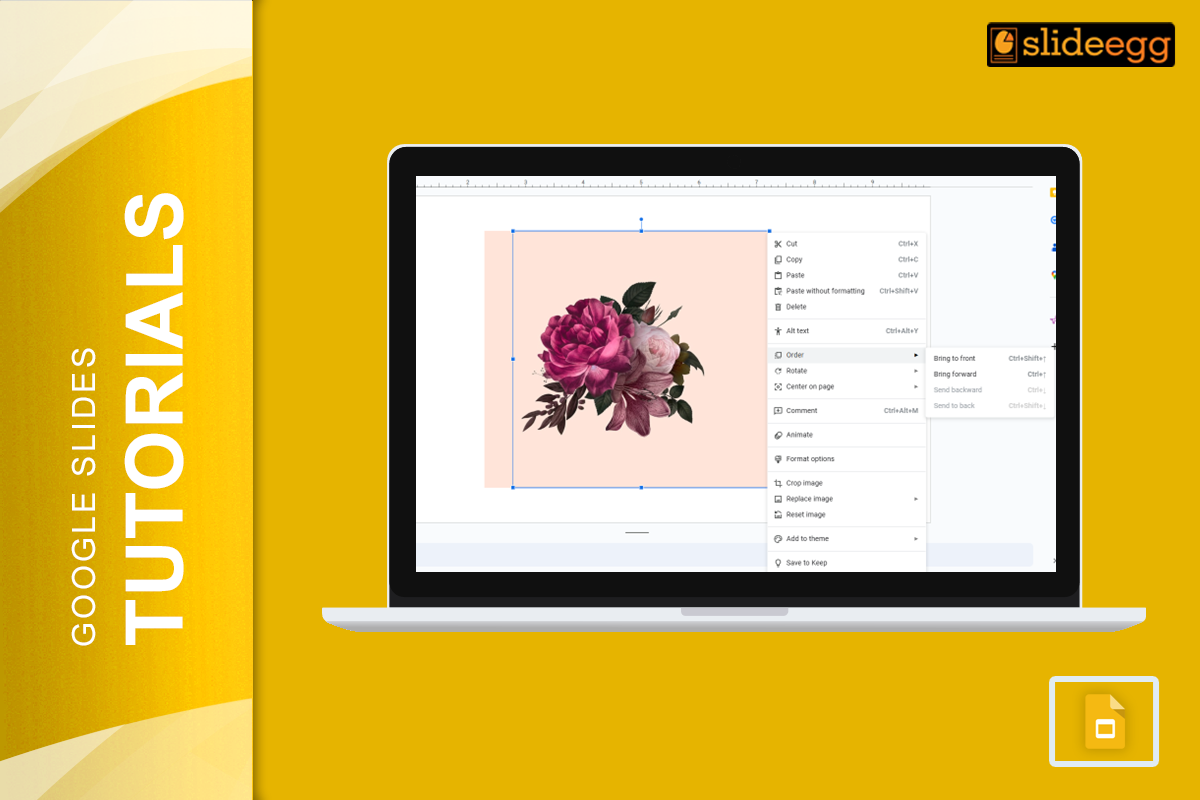
Method 1: Using Right-Click (Fastest Way)
- Click on the image you want to move.
- Right-click on it.
- Hover over “Order” in the menu.
- Click “Bring to Front” to place it above all other objects.
🔹 Want to move it up just one layer instead of all the way to the top? Choose “Bring Forward” instead.

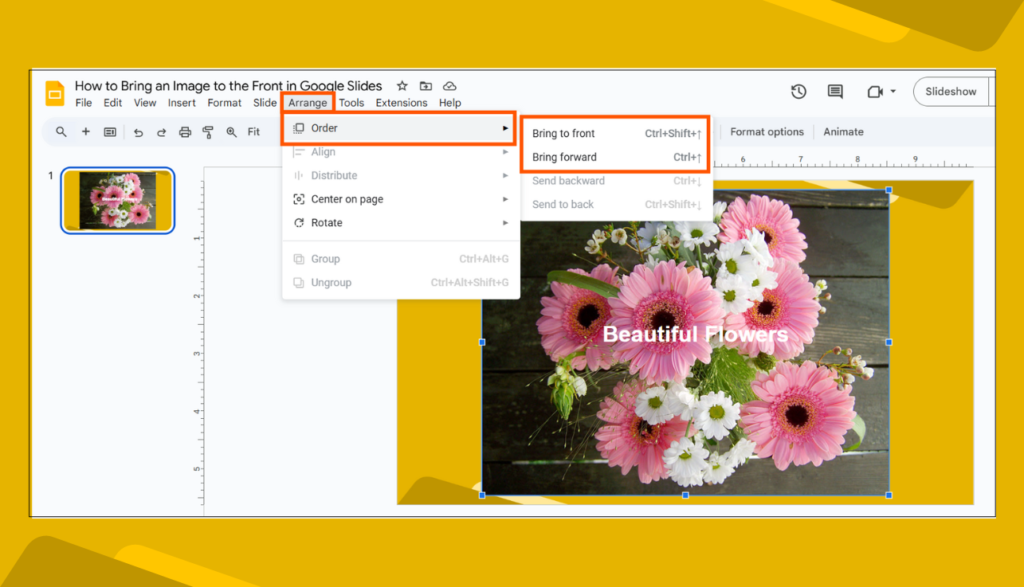
Method 2: Using the Toolbar
- Select the image on your slide.
- Click “Arrange” in the top menu.
- Hover over “Order” and select “Bring to Front”.
This method works the same way but is useful if you prefer using the toolbar instead of right-clicking.
2. How to Send an Image Backward in Google Slides
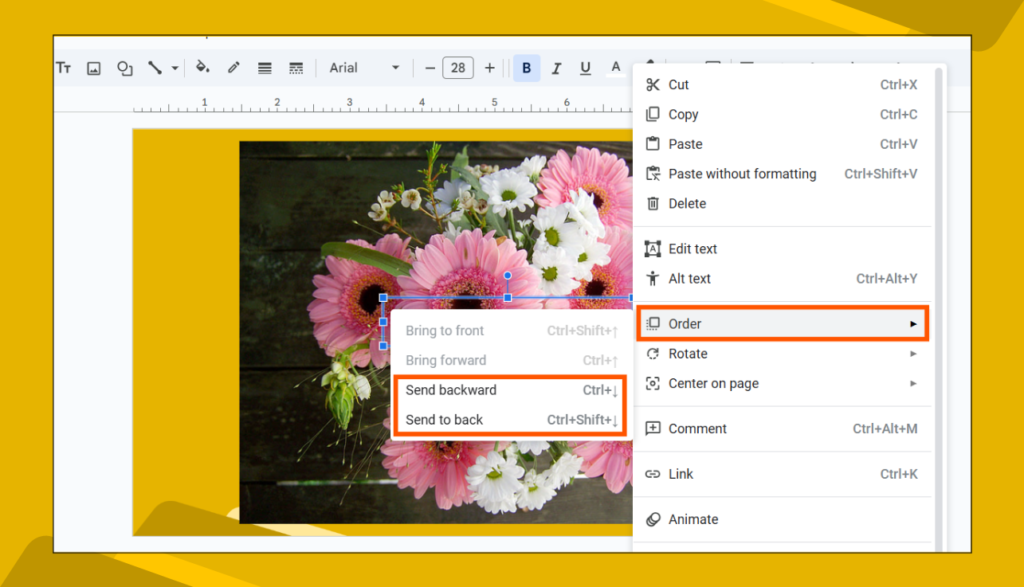
Sometimes, you need to do the opposite—move an image behind text or other objects. Here’s how:
- Select the image you want to move.
- Right-click and go to “Order”.
- Click “Send to Back” to push it behind everything.
- Click “Send Backward” to move it down one layer at a time.
This is perfect when you’re layering multiple images, text boxes, or shapes!
3. Pro Tips for Arranging Images in Google Slides
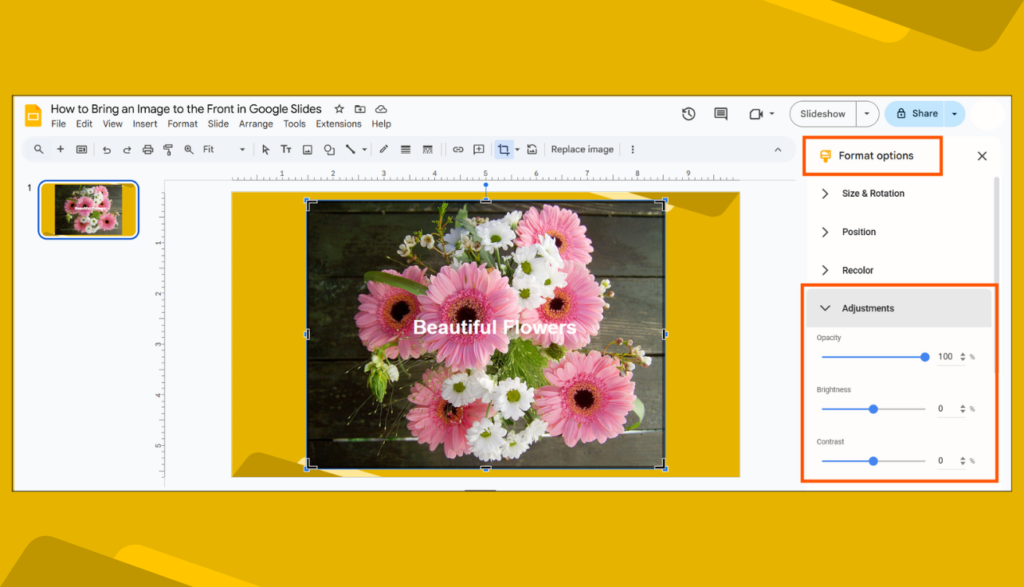
💡 Use Transparency for Better Layering
- Click the image, then go to “Format Options” > “Adjustments” to change transparency.
- Great for creating watermarks or background images.
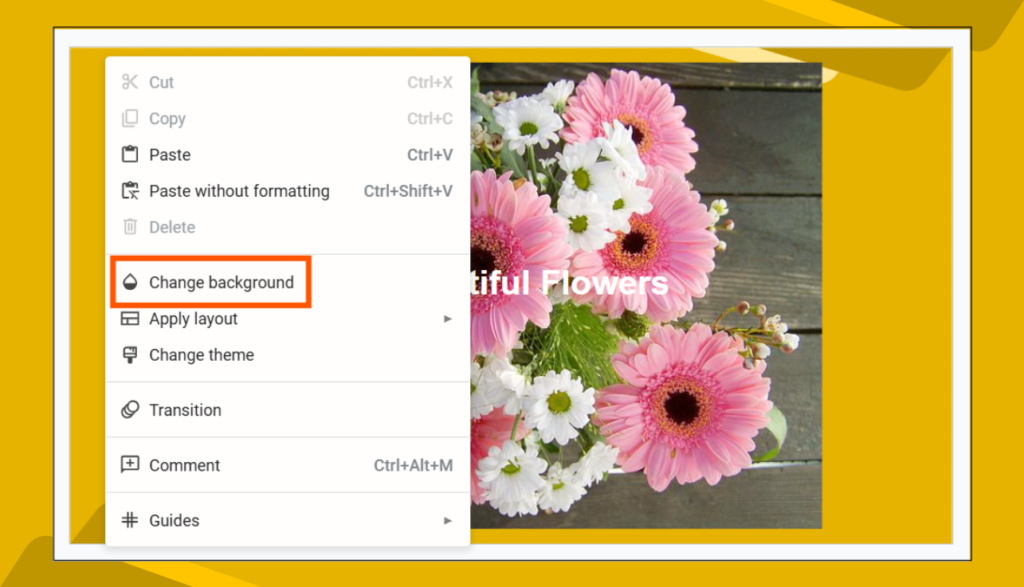
💡 Lock Background Images
- Insert an image as a background (Right-click > “Change Background”).
- Prevents it from accidentally moving while editing.
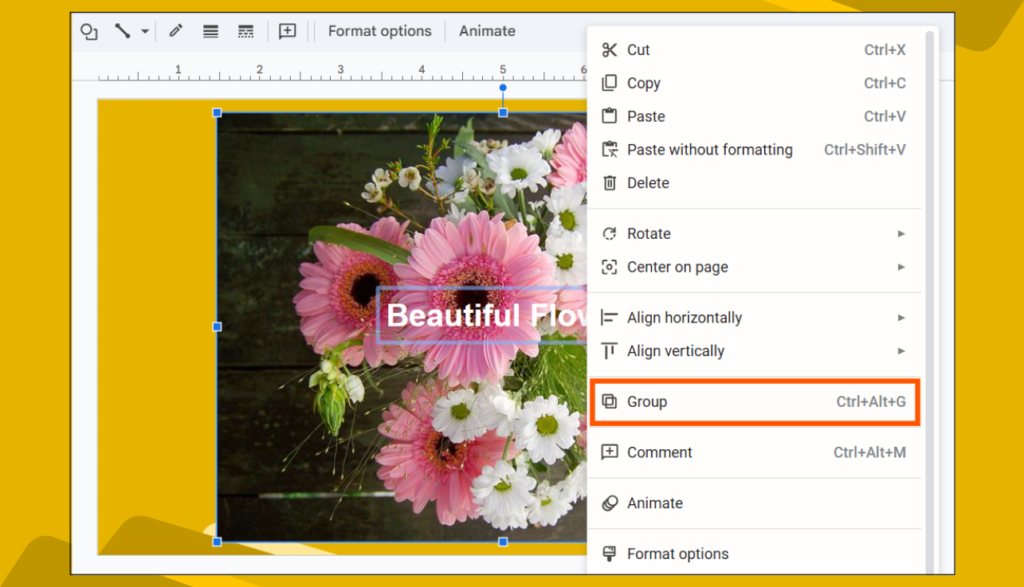
💡 Group Objects for Easy Movement
- Select multiple images or text boxes, then press Ctrl + Alt + G (Cmd + Option + G on Mac). Or right-click and select the “Group” option from the context menu.
- This lets you move everything together as one object!
4. FAQs About Image Positioning in Google Slides
Q1: Why is my “Bring to Front” option grayed out?
👉 This usually happens if the image is already at the top layer. Try moving other objects backward instead.
Q2: Can I layer images over videos in Google Slides?
👉 No, videos will always stay on top of images. However, you can add text or shapes over a video.
Q3: How do I send multiple images forward at once?
👉 Hold Shift, select multiple images, then follow the Bring to Front steps.
Q4: How do I reset an image’s position?
👉 Just cut (Ctrl + X) and paste (Ctrl + V). This places it on top automatically.
Final Thoughts
Knowing how to bring an image to the front in Google Slides makes your presentations look more polished and professional. Whether you’re creating business reports, school projects, or digital posters, layering images the right way can make a huge difference.
Now that you’ve mastered image ordering in Google Slides, go ahead and create slides that look amazing and stand out!