| Adding Google Slides to Google Classroom – Simple Steps at a Glance: 📌 Open your Google Slide – Go to Google Drive and open the file you want to share. 📌 Go to Google Classroom – Visit classroom.google.com and open your class. 📌 Create a new assignment – Click on Classwork > Create > Assignment. 📌 Attach your Slide – Click the paperclip icon or “Add” > “Google Drive” > choose your slide. 📌 Choose how students interact – Select View only, Edit, or Make a copy for each student. 📌 Click Assign – That’s it! Students will now see the slide in their classroom. |
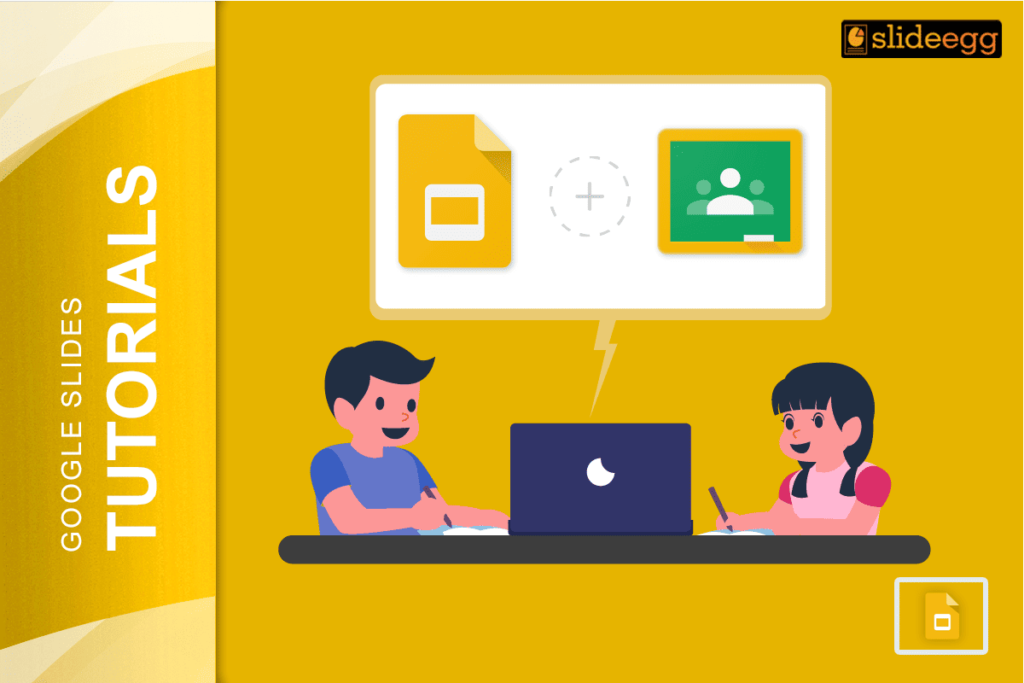
How to Add a Google Slides to Google Classroom
Teachers today use Google tools more than ever. If you’re wondering how to add a Google Slides to Google Classroom in the easiest way possible, you’re in the right place.
You don’t need to be a tech expert to do this. Whether you’re creating lessons, assignments, or fun quizzes, Google Slides and Google Classroom work beautifully together. And you can do this in just a few clicks!
Let’s walk through this in a very simple way.
Why Use Google Slides in Google Classroom?
Google Slides helps make your lessons visual, interactive, and fun. And when it’s shared through Google Classroom, everything becomes organized and easy for students to access. No need to send emails or print worksheets.
Here are some reasons why this is super helpful:
- You can share your lesson plan in seconds.
- Students can view or work directly on the slide.
- It keeps your class paper-free and tidy.
- You can track who viewed or turned in work.
Step-by-Step: Add a Google Slides to Google Classroom
🔹 Step 1: Open Your Google Slide
Start by going to Google Slides. Pick the file you want to share. You can use it as a lesson, quiz, poster, or anything you’ve created for your students.
If you haven’t made one yet, check out this helpful guide on how to make a good Google Slides presentation.
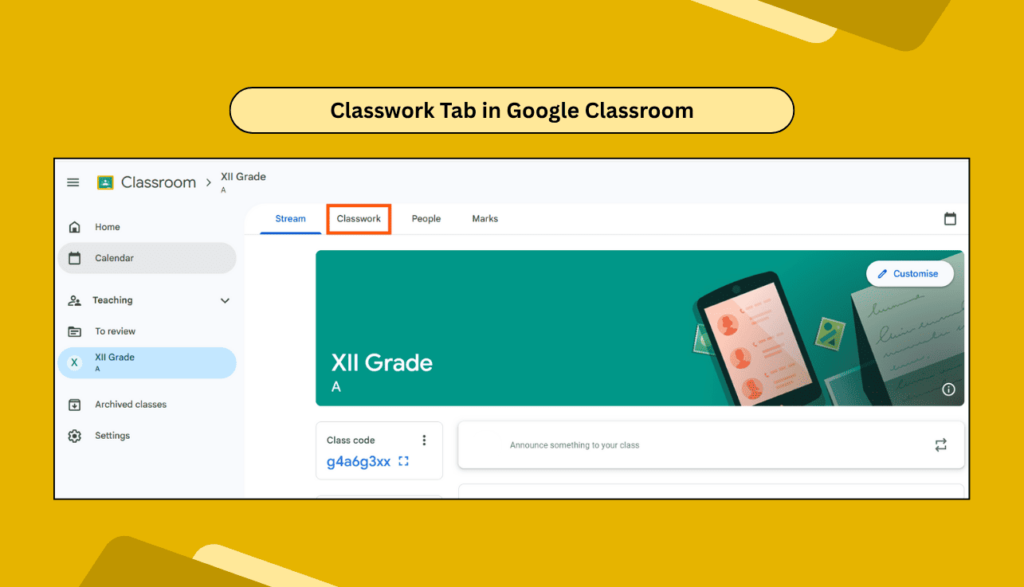
🔹 Step 2: Go to Google Classroom
Now, open Google Classroom. Choose the class where you want to post the slide. Click on the Classwork tab at the top.
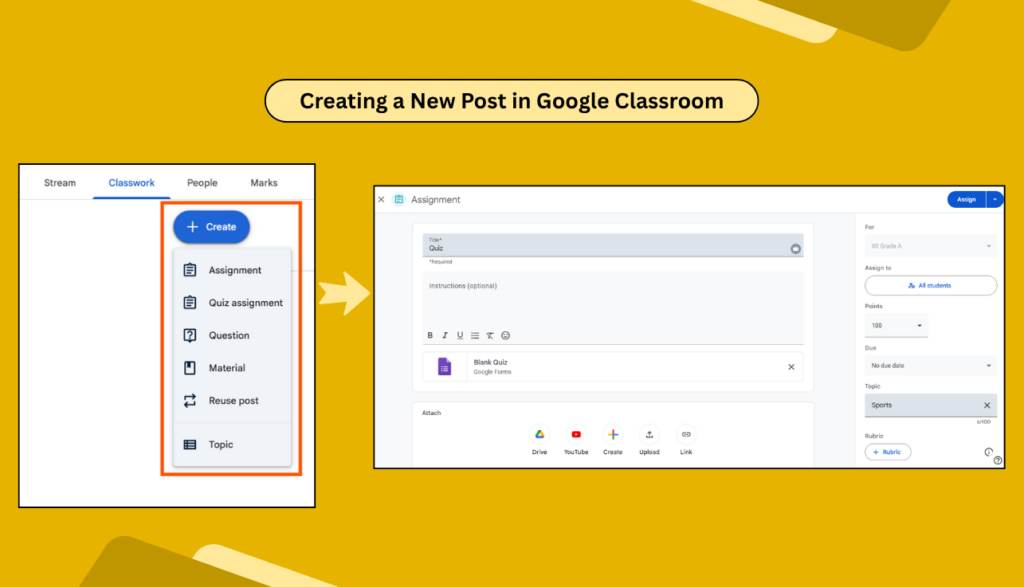
🔹 Step 3: Create a New Post
Click the “+ Create” button and choose what type of post you want. For example:
- Assignment (if you want students to do something with it)
- Material (if it’s just for reading or viewing)
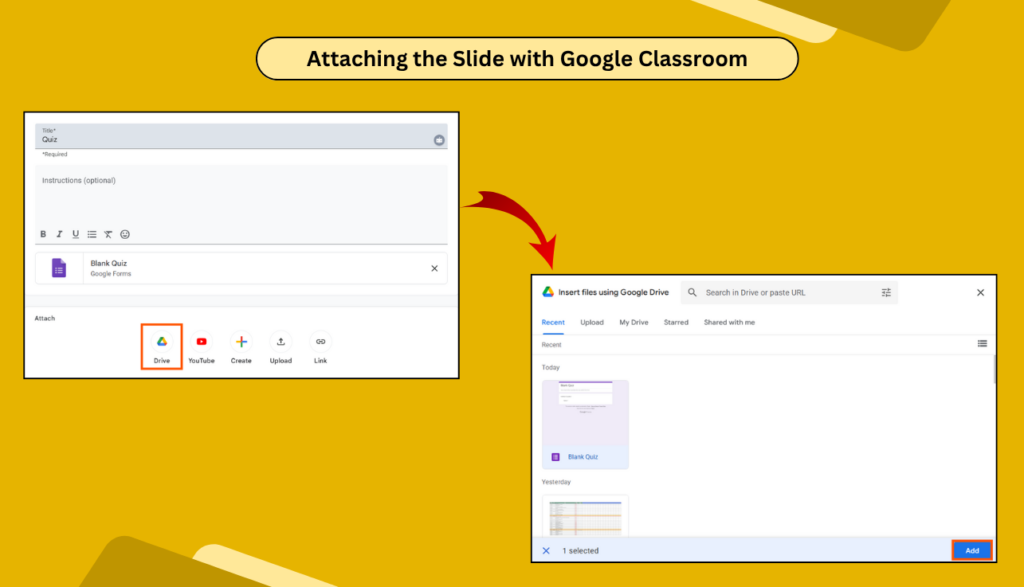
🔹 Step 4: Attach the Slide
Click “Add” > “Google Drive” and find your Google Slides from your Drive folder. Click “Add”.
You’ll now see it attached to your post.
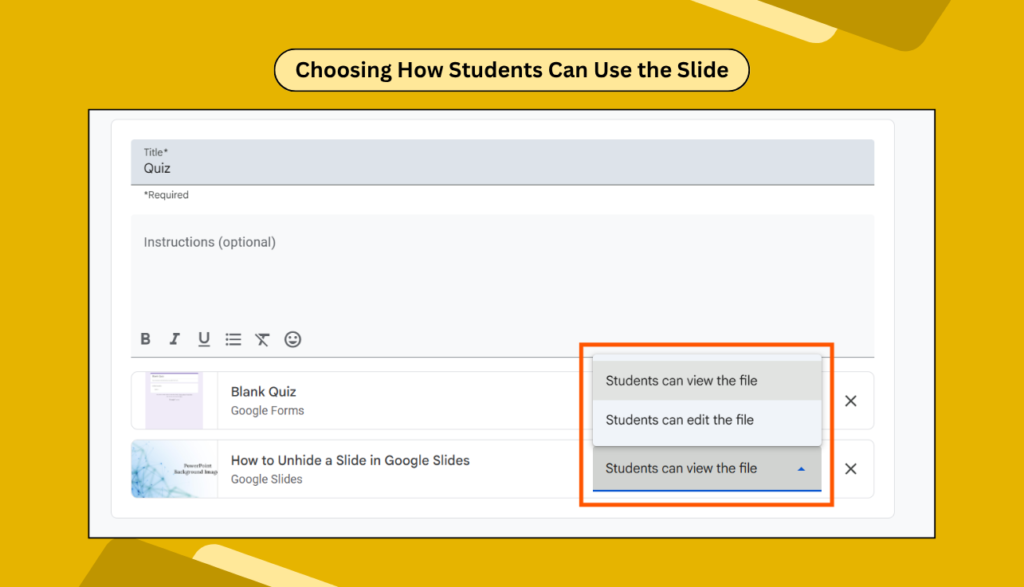
🔹 Step 5: Choose How Students Can Use It
This part is important!
You’ll see a drop-down next to your file name:
- View Only – Students can read but can’t change anything.
- Edit File – All students work on the same file (great for group projects).
- Make a copy for each student – Each student gets their own copy to work on.
Pick the one that fits your goal.
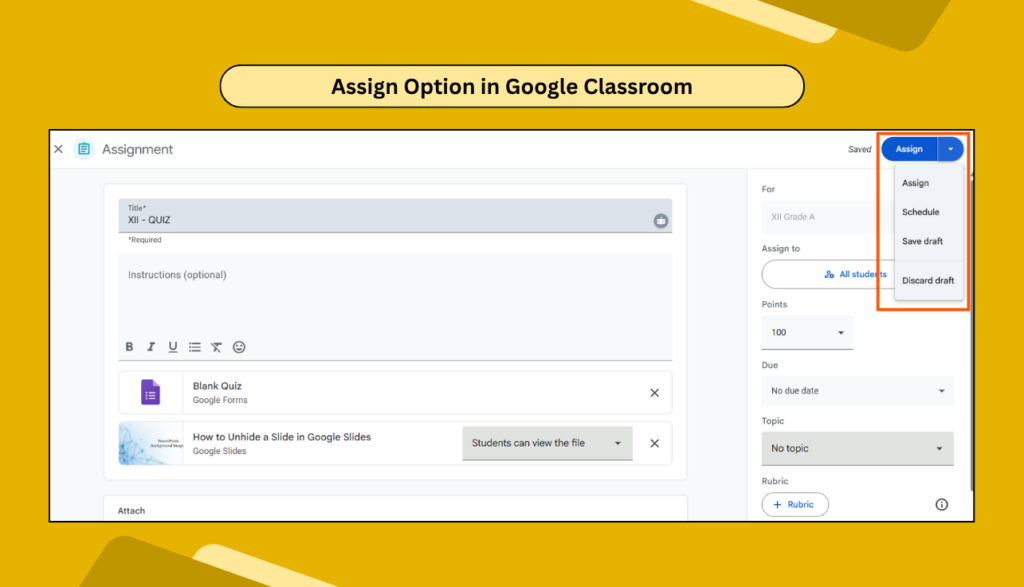
🔹 Step 6: Post It
Click Assign or Post, and your slide is now in the classroom! Easy, right?
Pro Tips You’ll Love
- If you want students to collaborate, choose the Edit option.
- Want them to work alone? Select Make a copy for each student.
- You can reuse slides for different classes or change the access anytime.
Common Use Cases for Teachers
- Daily lessons with colorful slides.
- Student projects with editable templates.
- Worksheets or activity pages as digital copies.
- Posters and announcements on class updates.
This method works well for all grade levels – from young learners to high schoolers.
FAQs – You Might Be Wondering
1. Can I share multiple slides at once?
Yes! Just make sure all your slides are in one file. Attach that single file, and students can view the whole deck.
2. What if I want to update the slide later?
If you choose View or Edit mode, any changes you make will show up for students right away.
3. Can I remove the slide later?
Yes, you can go back and delete or unassign the post from your Classroom.
4. Do students need Google accounts?
Yes, they need a Google account to access Classroom and view or edit the slides.
5. Can I see who opened or worked on the slide?
Absolutely. When using Assignments, Google Classroom shows which students turned in their work.
Adding Google Slides to Google Classroom is super simple once you try it. It saves time, makes lessons better, and helps keep everything in one place. Happy teaching, and enjoy using Slides the smart way!