Text boxes are a versatile tool that can be used to add text, images, and other content to your Google Slides presentations. They can be used to create callouts, add extra information, or even create entire presentations.
Whether you’re a student creating a presentation for class, a business professional giving a presentation to clients, or a teacher creating a presentation for your students, text boxes can be a valuable tool for making your presentations more informative and engaging.
In this blog post, I will show you how to add, copy, and delete text boxes in Google Slides. I will also provide some tips for using text boxes effectively.
Why Text Boxes Matter
Text boxes are essential components of a well-structured presentation. They allow you to insert text wherever you need it, ensuring that your content is organized, legible, and visually appealing. Whether you’re presenting a business proposal, an educational lecture, or a creative project, text boxes help you convey your message effectively.
Adding Text Boxes in Google Slides
Adding a text box to your Google Slides presentation is a straightforward process:
- Open Your Presentation: Log in to your Google account, open Google Drive, and access the presentation in which you want to add a text box.
Navigate to the Slide: Choose the slide where you want to insert the text box and click on it to open it.
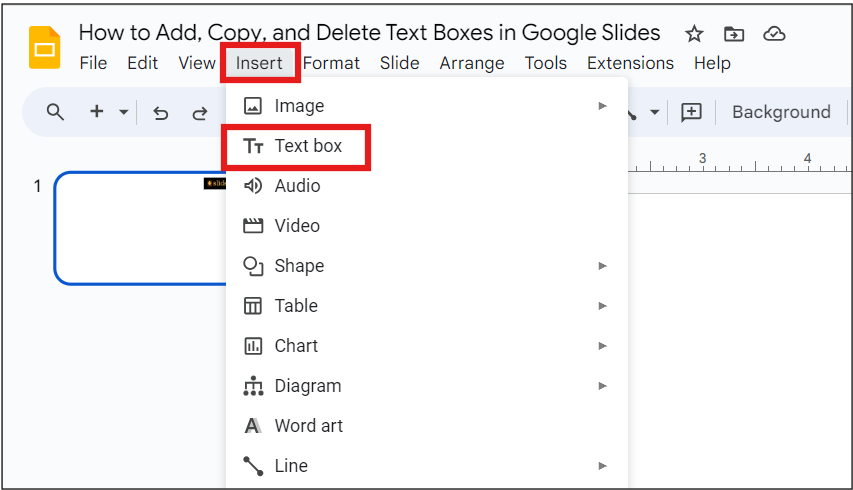
Insert a Text Box: In the menu at the top, click on “Insert” and then select “Text box.” A text box will appear on your slide, ready for you to add your content.
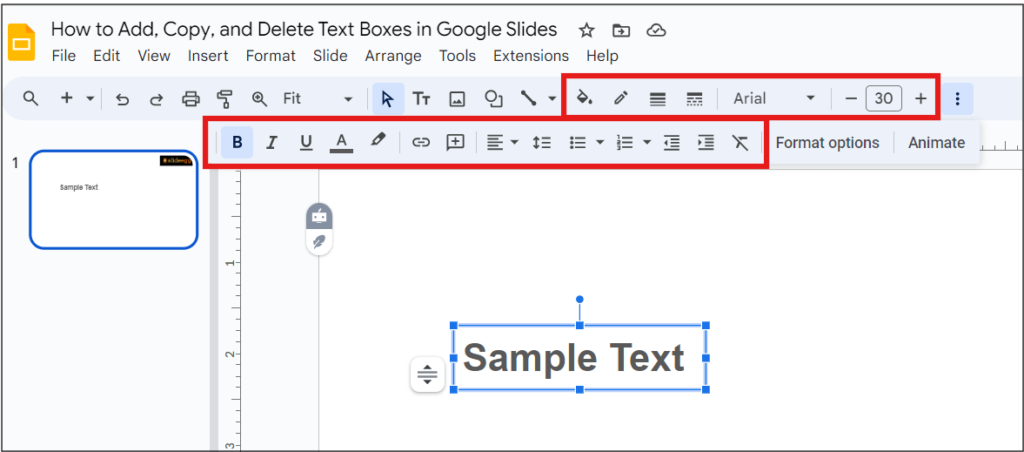
Type Your Text: Click inside the text box and start typing your content. You can adjust the font, size, color, and alignment using the formatting options in the toolbar.
Resize and Reposition: To resize the text box, click and drag its corners. To reposition it, click and drag from its border. This customization ensures your text box fits perfectly on the slide.
Copying Text Boxes
Copying text boxes allows you to maintain consistency and save time when creating similar slides:
Select the Text Box: Click on the text box you want to copy to select it.
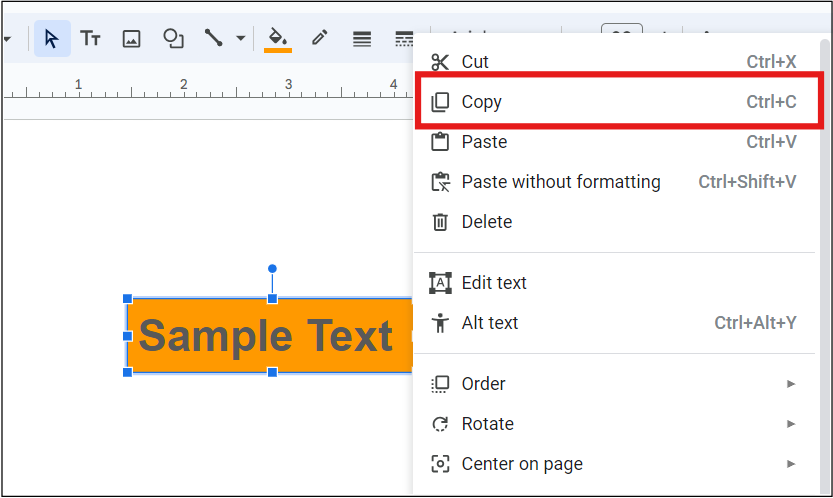
Copy the Text Box: Right-click on the selected text box and choose “Copy” from the context menu, or use the keyboard shortcut “Ctrl + C” (Windows) or “Command + C” (Mac).
Paste the Text Box: Right-click on the slide where you want to paste the copied text box and choose “Paste” from the context menu, or use the keyboard shortcut “Ctrl + V” (Windows) or “Command + V” (Mac).
Adjust as Needed: After pasting the text box, you can resize, reposition, and edit its content as required.
Deleting Text Boxes
When a text box is no longer needed, removing it from your presentation is simple:
Select the Text Box: Click on the text box you want to delete to select it.
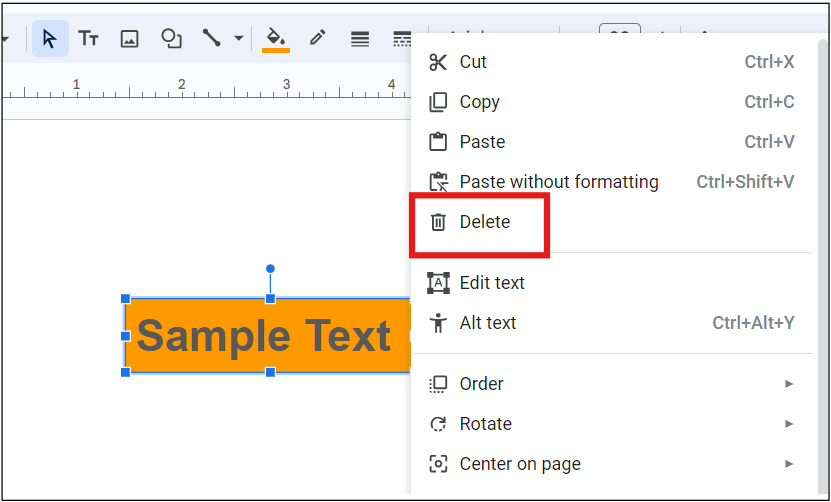
Delete the Text Box: Press the “Delete” or “Backspace” key on your keyboard, or right-click on the selected text box and choose “Delete” from the context menu.
Watch This Video For Easy Learning:
Enhancing Your Presentations
Mastering the art of adding, copying, and deleting text boxes in Google Slides enhances your presentation creation process. Here are a few additional tips to ensure your text boxes contribute to an engaging and professional presentation:
Consistency: Use consistent fonts and colors across your text boxes to maintain a cohesive look throughout your slides.
Whitespace: Leave enough whitespace around your text boxes to improve readability and overall aesthetics.
Alignment: Ensure your text boxes are aligned properly with other elements on the slide for a polished appearance.
Bullet Points and Lists: Utilize bullet points or numbered lists within text boxes to present information in a clear and organized manner.
Conclusion
Text boxes are your allies in creating visually appealing and organized presentations in Google Slides. By adding, copying, and deleting them with confidence, you’ll be well-equipped to convey your message effectively to your audience. To learn more about how to use Google Slides, please visit our website. Thank you for reading!
